Graphics Programs Reference
In-Depth Information
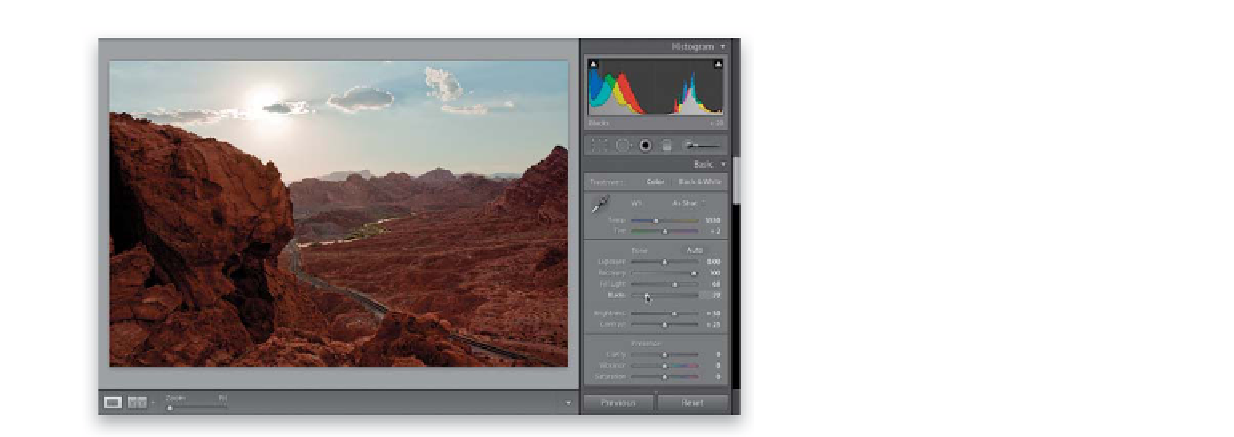
Step Three:
The way to get rid of that washed-out
look is simply to push a little bit of deep
shadows into the image by clicking-and-
dragging the Blacks slider to the right just
a little bit. In most cases, you'll be able to
move it just one or two ticks (so, you'll
generally move it from its RAW image
default setting of 5 to around 6 or 7), but
in this case, with such a broad move of
the Fill Light slider, I had to drag it all the
way to 20 to bring back the saturation and
keep the photo from looking washed out.
Go ahead and increase the Clarity amount
while you're here. Since this is a landscape
photo with lots of well-defined edges, you
can crank it up a little higher than usual
(I went to 75).
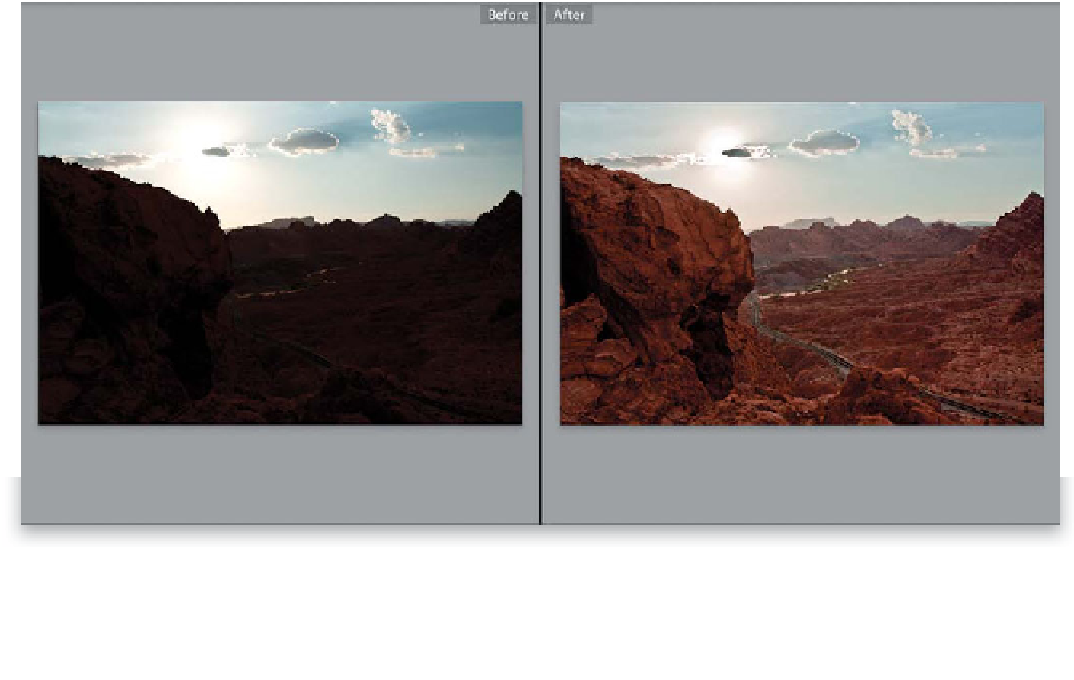
Step Four:
Here, I used Lightroom's Before/After view (press
Y
) to show what a big difference this technique (using
Fill Light, then bringing back the deep shadows by increasing the Blacks slider) can do for our backlit photos.