Graphics Programs Reference
In-Depth Information
One of the most common digital photography problems is photos where the
subject is backlit, so it appears almost as a black silhouette. I think the reason it's so
common is because the human eye adjusts for backlit situations so well, that to
our naked eye, everything looks great, but the camera exposes much differently and
that shot that looked very balanced when you took it, really looks like what you see
below. The Fill Light slider, found in the Basic panel, does the best job of fixing this
problem of anything I've ever seen, but there is one little thing you need to add.
(Using Fill Light)
Step One:
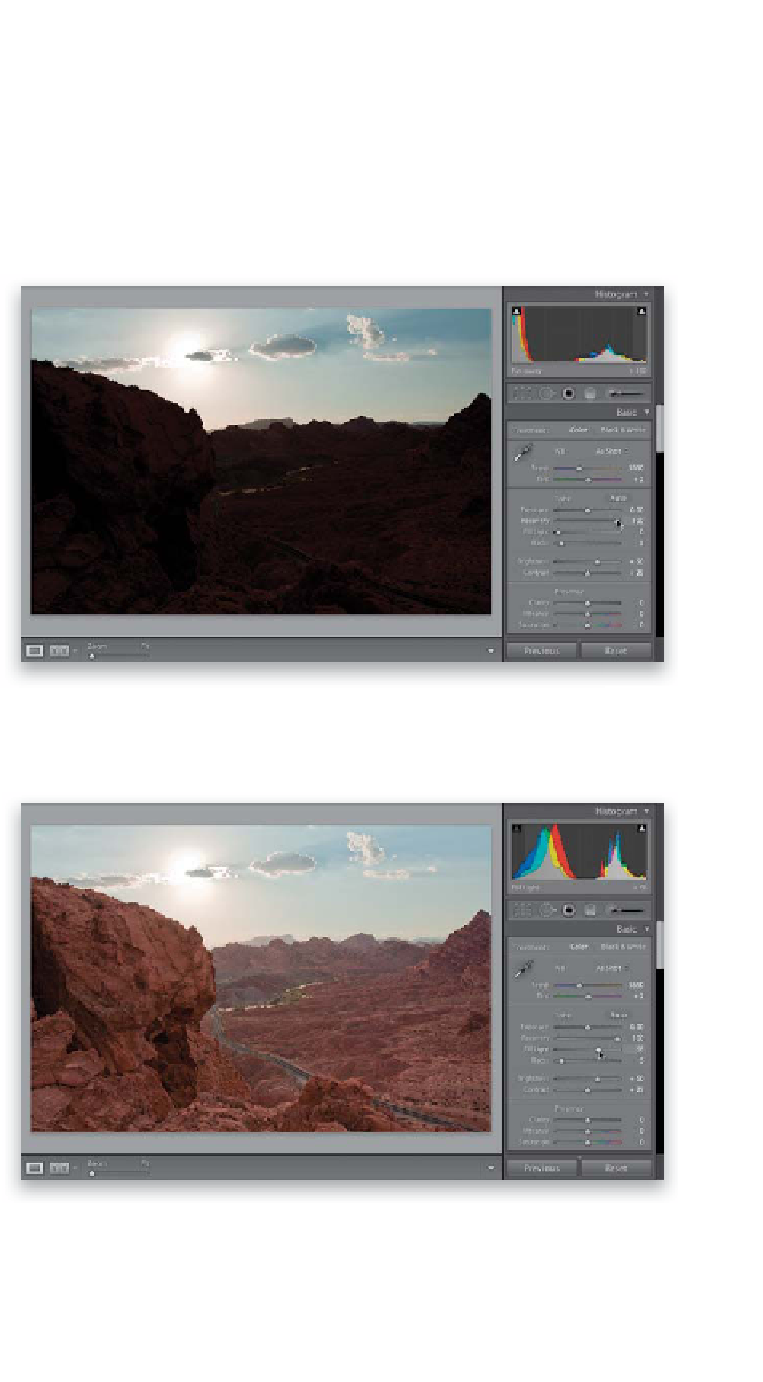
Here's an image, taken out in Nevada's
Valley of Fire, and while the rocks in the
foreground looked pretty well exposed
while I was standing there looking at the
scene, of course, the camera didn't
agree—it exposed for just the sky, leav-
ing the rocks and the road below in
shadows. Before we fix the backlit problem,
increase the Recovery amount to 100% to
tame some of the overly bright sky.
Step Two:
To open up the foreground area, just
click-and-drag the Fill Light slider to
the right. Unfortunately, in most cases
you just can't crank it up to 100,
because not only would the photo
not looked balanced, but any noise
in the image (which is usually the most
prevalent in the shadow areas) will get
amplified big time, and any noise that
was hiding out in the dark shadows
won't be hiding anymore. So, just keep
an eye out for noise as you drag. If you
do wind up adjusting the Fill Light slider
to something as high as around 65 (like
I did here), then the photo will probably
look kind of washed out (as seen here),
but in the next step, we'll fix that with
just one simple move.