Graphics Programs Reference
In-Depth Information
An edge vignette effect (where you darken all the edges around your image
to focus the attention on the center of the photo) is one of those effects
you either love or that drives you crazy (I, for one, love 'em). Here we're
going to look at how to apply a simple vignette; one where you crop the
photo and the vignette still appears (called a “post-crop” vignette), and
how to use the new options just introduced in Lightroom 3.
Step One:
To add an edge vignette ef fect, go to the
right side Panels area and scroll down to
the Lens Corrections panel (the reason it's
in the Lens Corrections panel is this: some
particular lenses darken the corners of your
photo, even when you don't want them to.
In that case, it's a problem, and you'd go
to the Lens Corrections panel to fix a lens
problem, right? There you would brighten
the corners using the controls in this panel.
So, basically, a little edge darkening is bad,
but if you add a lot intentionally, then it's
cool. Hey, I don't make the rules—I just
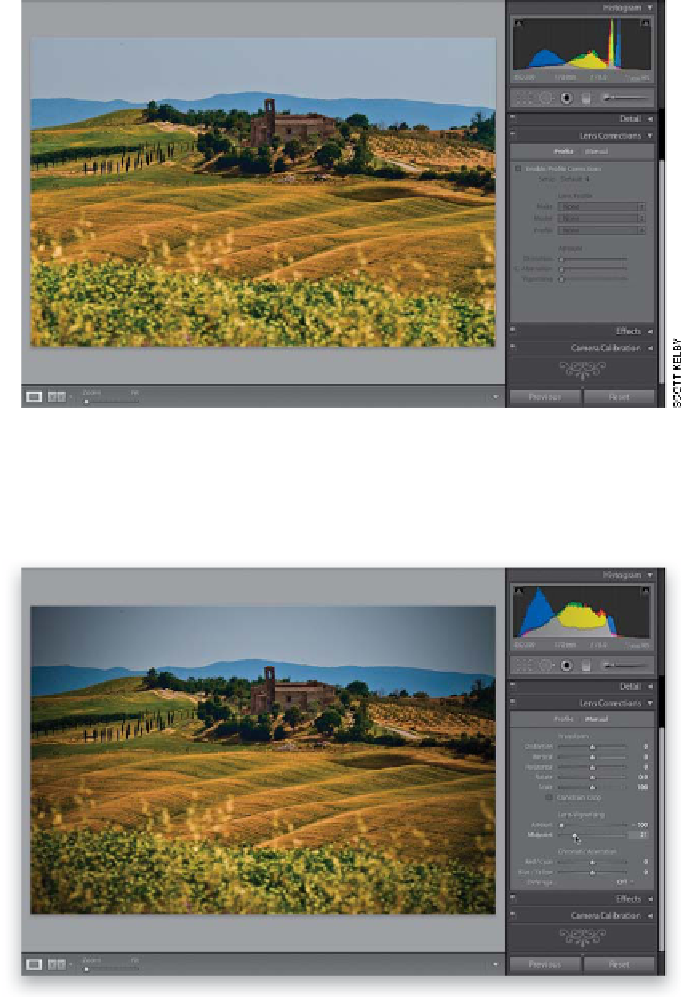
pass them on). Here's the original image
without any vignetting (by the way,
we'll talk about how to get rid of “bad
vignetting” in Chapter 6—the chapter
on how to fix problems).
Step Two:
We'll start with regular full-image vignett-
ing, so click on Manual at the top of the
panel, then drag the Lens Vignetting
Amount slider all the way to the left. This
slider controls how dark the edges of your
photo are going to get (the further to the
left you drag, the darker they get). The
Midpoint slider controls how far in the
dark edges get to the center of your photo.
So, try dragging it over quite a bit too (as
I have here), and it kind of creates a nice,
soft spotlight effect, where the edges are
dark, your subject looks nicely lit, and your
eye is drawn right where you want to look.
Continued