Civil Engineering Reference
In-Depth Information
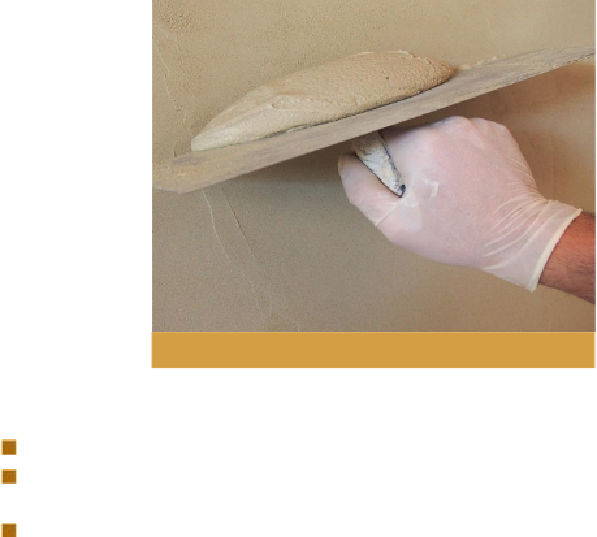
Using a laying-on trowel to apply the plaster.
For applying the basecoat:
Load your hawk with a comfortable amount of plaster, and knock this into a consistent
lump of plaster using your laying-on trowel.
Transfer the amount you need on to your trowel, and apply the plaster to the wall with
an upward motion. The trowel should be held at about a 45-degree angle to the wall at
the start of the stroke; as the stroke continues, turn the trowel in towards the wall (with
the blade closer to vertical) to dispense the plaster.
Every so often, intersperse upward strokes with horizontal ones but without any plaster
on the trowel. This allows the stiff edge of your trowel to check for flatness in both
planes. Any lines or dips in the plaster become apparent after the horizontal stroke. You
may need to trowel out high points, or fill in dips, but don't play around with it too
much as you will make it worse. You are better off practising your laying-on technique
than playing around with plaster once it is on the wall.
To fill in a dip, take a small amount of plaster on the corner of your trowel and apply it
to the low area before smoothing it over with a trowel stroke.
The aim should be to achieve a generally flat surface. However, any small lines or
ridges in the plaster created by the edges of the trowel are irrelevant at this stage, as are
any minor dips and high points, as these will be taken out later with the float.
Once you have applied the plaster over the whole wall, leave it to firm up before com-
ing back to float the surface.


Search WWH ::

Custom Search