Graphics Programs Reference
In-Depth Information
8.
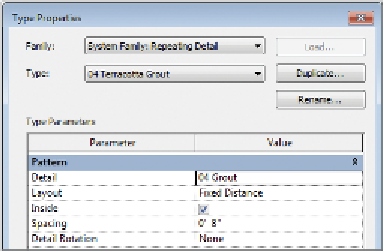
The Type Properties dialog box looks like Figure 11.17. Click OK when
you've finished.
Figure 11.17
The repeating detail's type
properties
9.
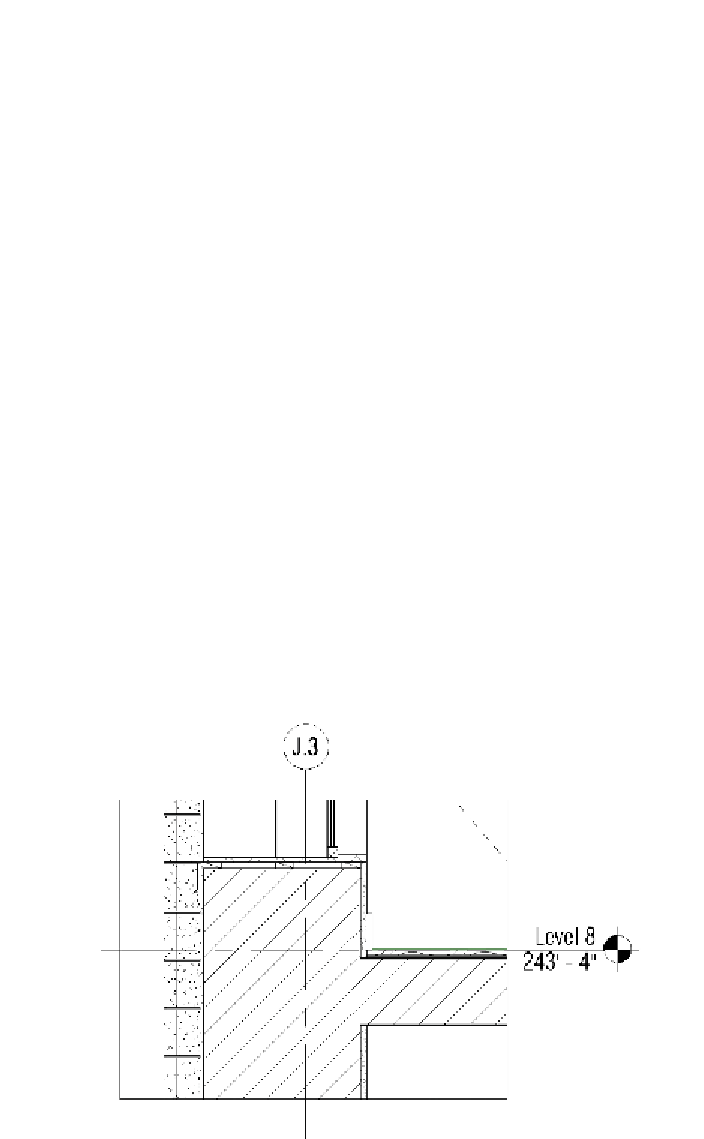
With the Repeating Detail command still active, draw a line all the
way up the left edge of the exterior wall, starting at the base of the
view, placing the new joint over the terracotta exterior.
10.
Place one of the joints directly below the window sill, by using the Nudge
tool to shift the detail into the right location. This appears on top of the
flashing you drew earlier, so you'll want to move the flashing to the front.
11.
Select the flashing detail line, and choose Bring To Front from the
Arrange panel. The completed detail looks like Figure 11.18.
Figure 11.18
The finished window sill detail


Search WWH ::

Custom Search