Graphics Programs Reference
In-Depth Information
3.
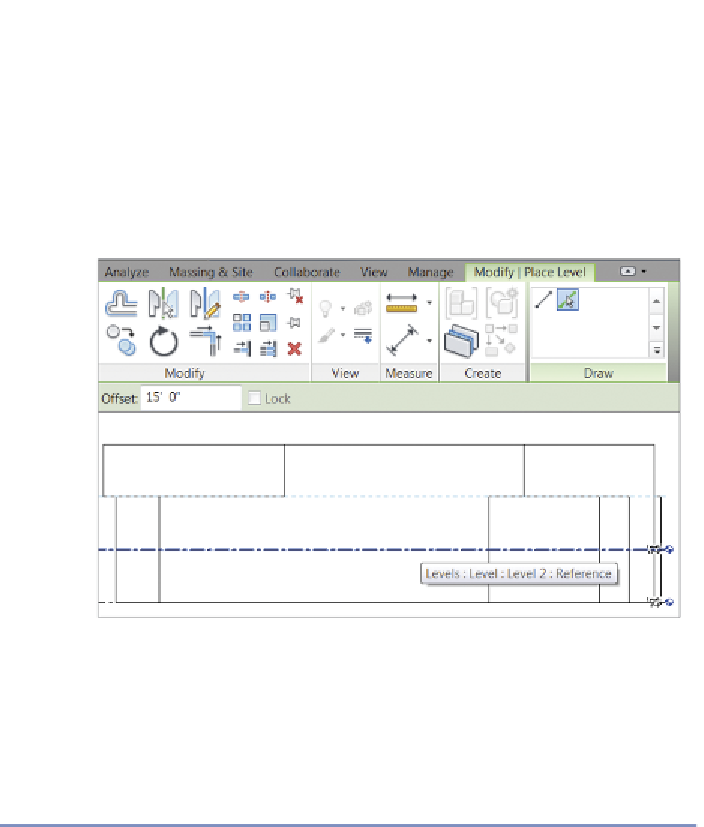
In the Draw panel, choose the green Pick Lines tool.
4.
On the Options Bar, set the offset value to
15
′
-
0
″
(
4.57
m).
5.
Hover your mouse over the Level 2 annotation element. Look for a
dashed blue line to appear
above
Level 2. This dashed line indicates
where the new level will be placed; see Figure 7.6.
FIgure 7.6
Use the Pick Lines tool to create a new level.
6.
Click to place the new level, called Level 3, at 30
′
-0
″
.
This concludes Exercise 7.3. You can compare your results with the sample
ile
c07-ex-07.3end.rvt
from the download for this chapter.
Levels vs. reference Levels
If you copy a level instead of create a new one, Revit creates a
reference level
.
Reference levels are useful for Top Of Parapet or Bottom Of Eave—architec-
tural references that don't need a floor plan. Reference levels show black level
symbols in elevation views instead of blue level symbols. The blue symbols are
hyperlinked to their corresponding floor plan. Try double-clicking the blue level
marker, and Revit will open the floor plan view.


Search WWH ::

Custom Search