Graphics Reference
In-Depth Information
3.
Because grouping can get complex, it is a good idea to name the groups as you create them. With all
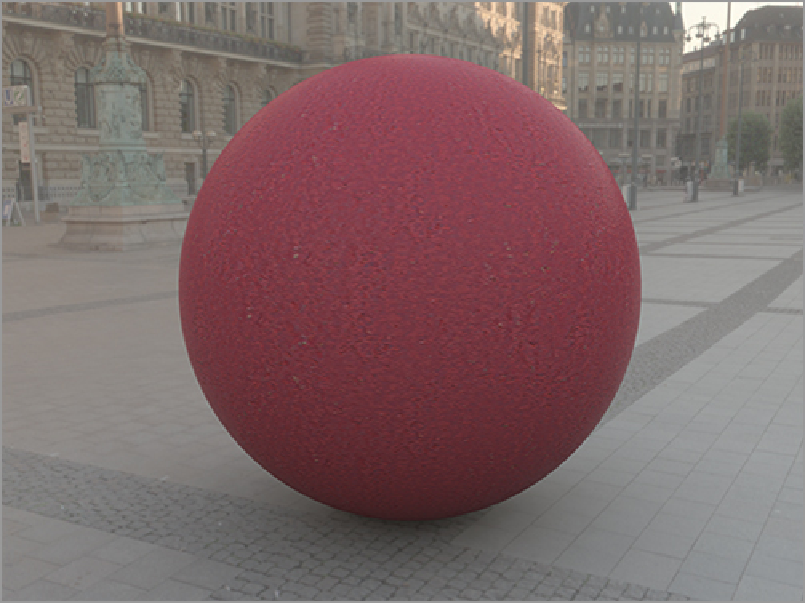
of your concrete layers grouped, create a new group for the red paint. With the group selected, double-
click the Red Curb material to populate the group with that material. At this point, you will have a red
concrete material, as shown in
Figure 12-5
.
Now that the layers are created, the next step is properly masking the paint layer so that it looks like it
is chipped. To do this, you will start with finding a procedural texture that has a proper look for the task.
The quickest way to do this is to add a material to the top of the material and leave it at its default (Diffuse
Color) setting. Follow these steps:
1.
Start with Crackle, which is found in the Organic section of the Enhance: modo Textures. The default
setting produces a large, broad texture that will not work well for chipping away the material. To fix
this, the texture needs to be scaled down.
2.
To scale down the texture, go to the Texture Locator tab and set the Size X, Y, and Z to 100 mm. The
material is getting close, but what you are looking for is an alpha channel, so more contrast is needed.
Adjusting the Bias and Gain will solve this problem.
Figure 12-5:
The Red Curb material layered on top of the concrete
3.
Set the Gain to 99%. The contrast will be adequate.
4.
Adjusting the Bias will fine-tune the amount of white and black in the texture. Set Bias to 95%, and
your material should look something like
Figure 12-6
.
This could be the basis for a decent material mask, but it is a bit too geometric in nature.
Figure 12-6:
The Crackle texture added to the sphere, properly scaled and with Bias and Gain edited