Graphics Programs Reference
In-Depth Information
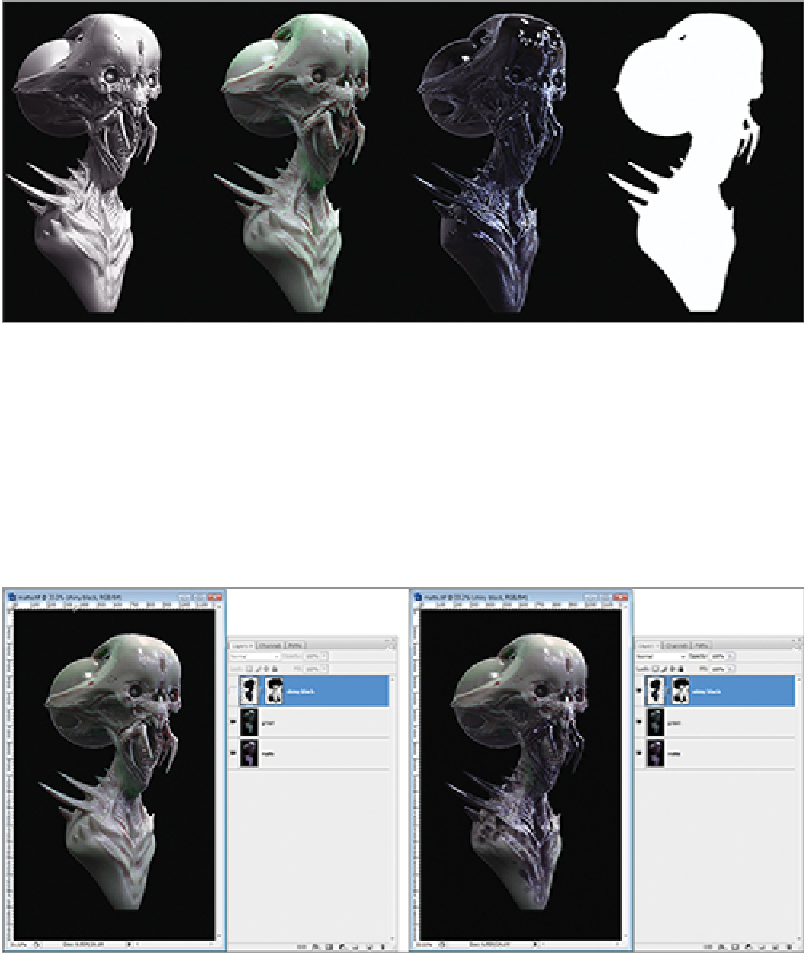
Finishing in Photoshop
I bring the material renders into Photoshop and stack them one on top of the other in the same document,
making sure that they are all lined up. I then experiment and see how the materials work with each other. I
turned the translucent skin pass into a Soft Light layer and put that on top of the matte material layer. This
became my base for the painting. Then I placed my shiny black material on the top layer and used a mask to
paint the patterns on the chest, mandibles, and spikes (
Figure 9-114
)
.
Figure 9-114:
Using the shiny black material
In Photoshop, I can continue to design. If I want to significantly alter the model, I can liquefy it or I can
paint directly over the image. I do tend to paint over my 3-D renders quite a bit, using a soft brush to main-
tain the illusion and consistency of the image. You'll notice that I didn't take the time to sculpt the creature's
eyelids in the model. When I brought the renders into Photoshop, I decided to paint them in, giving the
creature a slight sympathetic quality (
Figure 9-115
).
To break up the color of the face, I lightly painted some pinks around the eyes, nose, and mouth on a soft
light layer (
Figure 9-116
). I wanted the creature to be really fleshy and translucent, so I spent time panting in
veins. To accomplish the effect in the forehead, I used a photograph of a human brain on another Soft Light
Search WWH ::

Custom Search