Hardware Reference
In-Depth Information
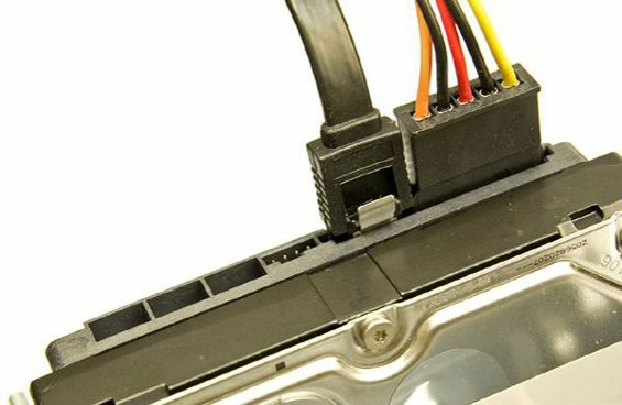
Figure 19.31. SATA data and power cables connected to a hard disk.
4.
Attach a power connector to the drive (refer to
Figure 19.31
)
. Some SATA drives have both
conventional 4-pin peripheral power connectors as well as SATA 15-pin power connectors, in
which case you can use one or the other, but not both simultaneously. If your drive has only a
SATA power connector and your power supply doesn't have SATA power connectors
available, you might need to purchase a peripheral-to-SATA power cable adapter if one was
not provided with your drive. This type of adapter changes a standard 4-pin peripheral power
connector into a 15-pin SATA power connector. If necessary, you can also use a Y-splitter
cable to create two power connectors from one. (Some computers have fewer power
connectors than drive bays.)
Caution
If a drive has both conventional (also called
peripheral
or
legacy
) and SATA-type power
connectors, you must not plug in both power connectors at the same time, or the drive may be
damaged!
System Configuration (Drive Detection)
Older systems often required that drives be manually identified and configured in the BIOS Setup.
The BIOS in modern PCs incorporates automatic drive parameter detection (autodetect). The BIOS
sends a special Identify Drive command to all the devices connected during the system startup
sequence, and the drives are intelligent enough to respond with the correct parameters. The BIOS then
automatically enters the parameter information returned by the drive. This procedure eliminates
errors or confusion in parameter selection:
1.
Start the computer and press the appropriate key to access the BIOS Setup screens to configure
the drive. If your BIOS has an autodetect or auto-type setting, I recommend you use it because it
will configure the parameters automatically using optimal settings. With SATA drives, you may
also have options to configure Advanced Host Controller Interface (AHCI) support or set