Now that you understand the two methods of painting texture in ZBrush, let’s explore color theory. This section focuses on painting a creature skin from scratch, but there is often more to painting than just laying down colors in a random pattern hoping for a good result. By understanding some basic color theory, you can make educated decisions on what color to select and where to place it on your character, and you can begin painting extremely realistic skin textures quickly. For this paint scheme, we’ll use a limited palette. Table 5.4 shows the colors that we’ll use to paint this particular skin tone.
Table 5.4: Hues used in the paint job
|
Color |
Name |
R |
G |
B |
 |
Red |
255 |
2 |
2 |
 |
Yellow |
255 |
255 |
128 |
 |
Blue |
0 |
128 |
255 |
 |
Warm brown |
64 |
0 |
0 |
 |
Cool brown |
72 |
63 |
53 |
 |
Gray |
100 |
123 |
122 |
 |
Olive |
134 |
129 |
89 |
Figure 5.12 The color wheel
Color Theory
Color theory constitutes a topic unto itself, but some of the most important things to note are in this section.
The color we see can be organized into a color wheel (Figure 5.12), which consists of the primary, secondary, and tertiary colors. Primary colors consist of red, yellow and blue. These colors cannot be created by mixing any other colors. The secondary colors are created by mixing two primary colors: red and blue make purple, yellow and blue make green. Tertiary colors are created by mixing a primary and secondary color like blue-green or yellow orange. By understanding a few color concepts, you can make educated decisions about what colors to put down on a character when painting a skin.
Temperature
Temperature refers to the relative warmness or coolness of a color. Red is “warm” compared to blue. A color can be warm or cool depending on what is mixed with it; red, for instance, becomes warm when mixed with yellow, or becomes cool when mixed with blue.
Hues that move toward the red area of the color wheel are said to be “warmer” than those toward the blue, or “cool,” side. By placing two colors near each other with different temperatures, you create what is known as temperature contrast.
In practical terms, try painting a cool color into recessed areas and a warm color on raised areas. This contrast helps to emphasize the form as well as create visual interest.
Saturation
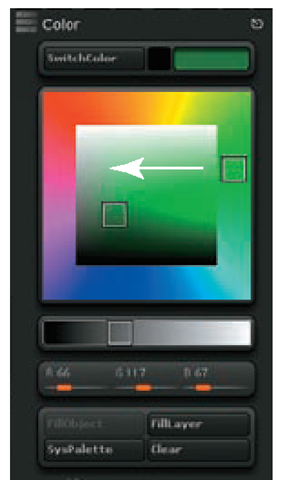
Saturation is the relative intensity of a color. You can reduce a color’s saturation by moving the color picker toward gray. This is called neutralizing the color and helps create a muted color (Figure 5.13).
Optical Mixing
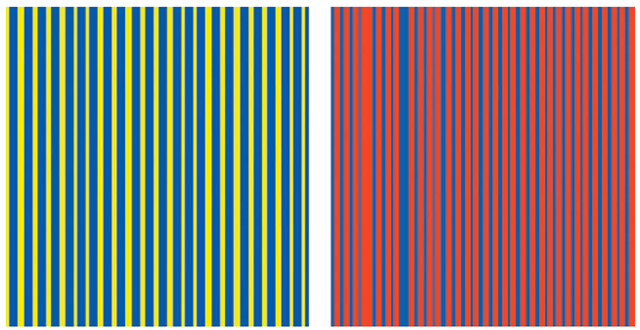
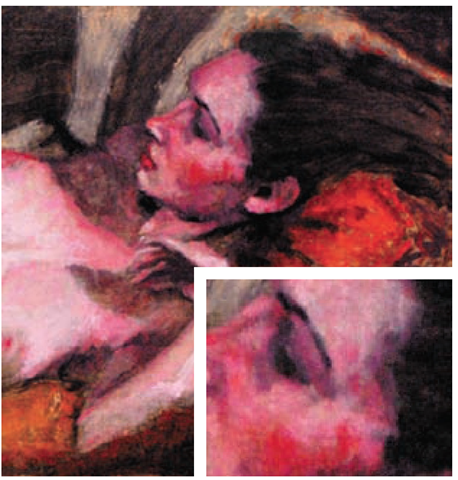
You can see that the color selections in Table 5.3 are a limited palette, especially when compared to the look of the final painted skin. The power of these few color choices comes from the phenomenon of optical mixing. Optical mixing refers to a method of creating a secondary color by placing its two primary components close together. This can be seen in the Pointillist paintings, where tiny dots of color are used to create the entire painting. For example, with stripes of yellow and blue placed close together, the hues combine in the eye to cause the viewer to see green (Figure 5.14). To see this at work in a more practical setting, see Figure 5.15. The same approach can be seen in painting where a stroke of one color is dragged across another color. The two colors seen in such a way give the impression of a third color.
Figure 5.13 Neutralizing a color
Figure 5.14 Optical mixing
Figure 5.15 Optical mixing seen in a painting by Ryan Kingslien
Temperature Zones of the Face
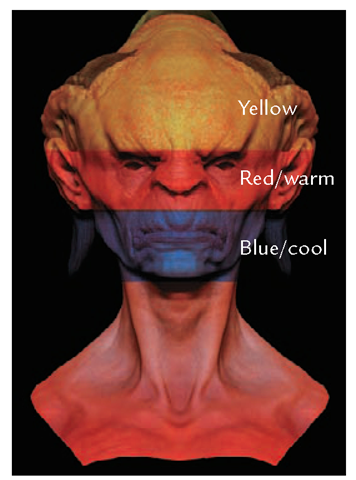
Portrait painters have known for centuries that the face can be broken into temperature regions—areas that have a defined relative warmth or coolness. This is due to the translu-cency of the skin and the quality of the tissues, as well as the relative closeness of muscle and bone to the surface. In Figure 5.16, I have broken down the relative temperature relationships between the regions of the face of the character we’ll paint later in this topic. In general, on a light-skinned individual the brow takes on a yellow or golden cast, while the cheeks, nose, and ears are warm, red hues. The mouth and jawline are cooler blues. In men, this is even more pronounced than in women because of the beard line and the presence of hair in the follicles under the skin.
Figure 5.16 Zone theory
Airbrush Techniques
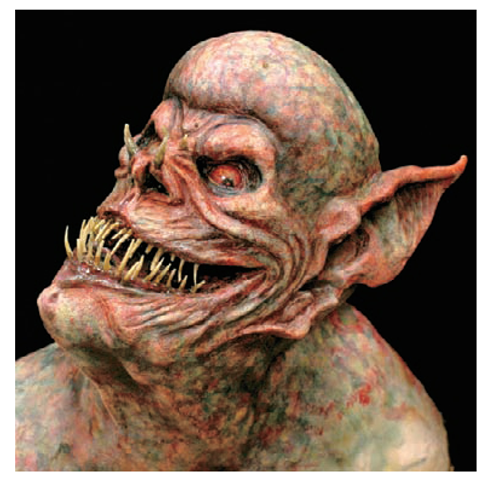
The technique we’ll use to paint this creature skin is based on airbrush paint techniques from the practical makeup effects world. An airbrush sprays paint on a surface in an adjustable fine mist. Changes to the brush can cause paint to be applied in broken-up, spotty patterns. This kind of paint application is ideal for optical mixing and for giving the skin a realistic look. Look at a close-up photograph of a face and notice how it contains many colors and temperature variations. It is not a single flat hue.
Figure 5.17 and Figure 5.18 illustrate this technique applied to practical creature effects. Just as ZBrush allows you to sculpt with real-world style tools and techniques, it also allows you to paint this way as well. Using an airbrush tool in ZBrush helps you apply some of the same techniques and approaches used to paint prosthetics and animatronic creature skins.
Figure 5.17 This creature mask was painted with several broken-up colors and squiggly lines called mottling.

