A good thing about wireless networks is that you don’t have those pesky W " Ethernet cables to tie you up in knots. I can still remember back in the old days when I’d have those drab, gray cables running from room to room. I also remember constantly tripping over said cables; fortunately, those days are gone! That doesn’t mean that wireless networks are always easy to set up and use. Hopefully, you’ve made it past the rough spots and are ready to actually transfer data around your home.
Maybe your wireless network is ready to send data between your living room and second-floor bathroom. If so, make sure your PC can see the router and any other access points. That’s where Windows Vista’s Connect to a network feature in the Network and Sharing Center, formerly known as Available Networks for Windows XP, enters the picture.
Discovering What’s Out There
Notice that the title doesn’t say who is out there.If you’re still interested in finding what’s out there, read on, because you’re in the right place.
The Connect to a network feature lets you see what networks are available — for dial-up, VPN, and wireless. Available means that they’re out there, probably close by. The list should include one or more of your own networks, if all goes well. If you don’t see your networks, be concerned.
If you sort the list to only display available wireless connections, the list is displayed by signal strength, which is indicated by a series of bars (much like the ones used by mobile phones to display signal strength).Your network(s) should be at the top of this list; if it’s not, it should be quite closer; otherwise, we should discuss where your wireless router is stored, not to mention where it is that you tend to do most of your work.
In some cases, you see neighbors’ wireless networks. That doesn’t mean that you can connect to those networks, though.
You likely won’t see wireless networks where the owners have intentionally made them invisible to public viewing. The geeks can still discover your network name, but it’s one tool in your security toolbox. After I tell you about monkey wrenches and screwdrivers (I’m trying to milk this toolbox metaphor).
1. Right-click the network icon in your Windows notification area.
A menu appears.
2. Select Connect to a network.
You see something like Figure 2-1. The dialog box lists Available Networks. In this case, Dog is the network and Livebox-bbcc is the neighbor (possibly the one with the barking dog and who insists on partying every weekend).
Figure 2-1:
The Connect To a Network dialog box displays all available wireless networks, or rather all those in range of your computer.
3. Click the name of the desired network and click Connect.
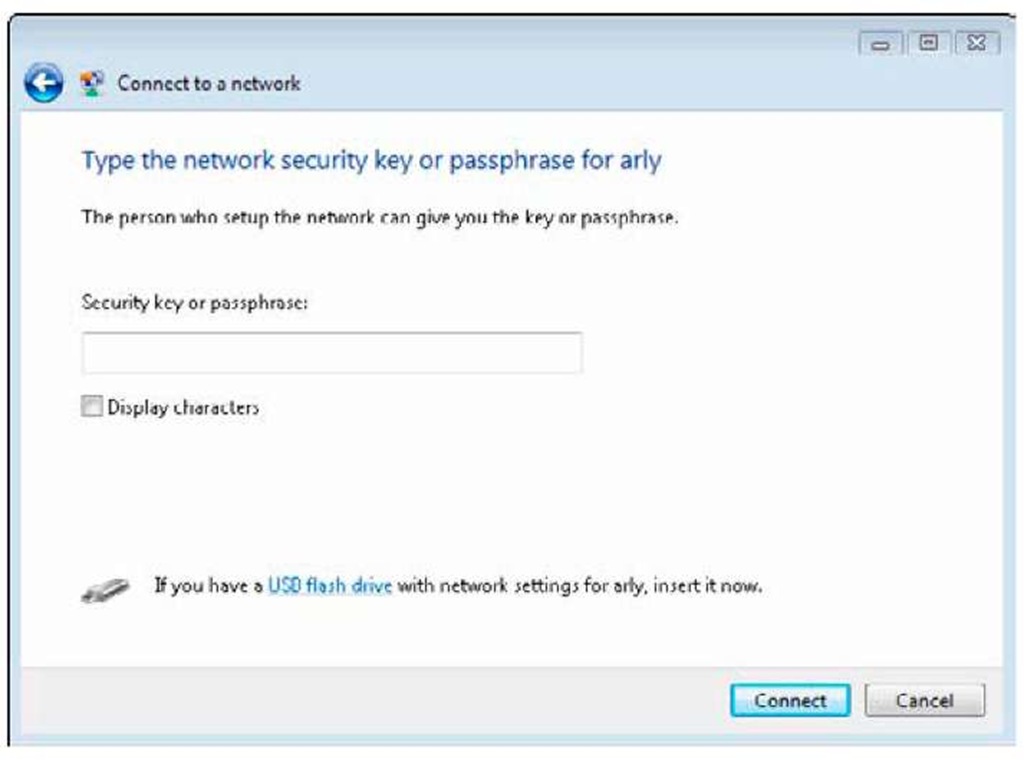
If the selected network requires a network key, now’s the time to type it in this screen of the dialog box, as shown in Figure 2-2.
Figure 2-2:
You need to know the security key for a secured network before you can use it.
Some networks require a network key, which is basically a password with so many unrelated letters and numbers that only a Jeopardy contestant can remember it. You can tell if the network requires a network key because it is labeled as a security-enabled network.
What if an available network requires a network key, but you don’t have one? If you’re sure it’s your network or one you’ve been invited to use, you should ask its administrator for The Magic Key. Unfortunately, "abracadabra" doesn’t work here.
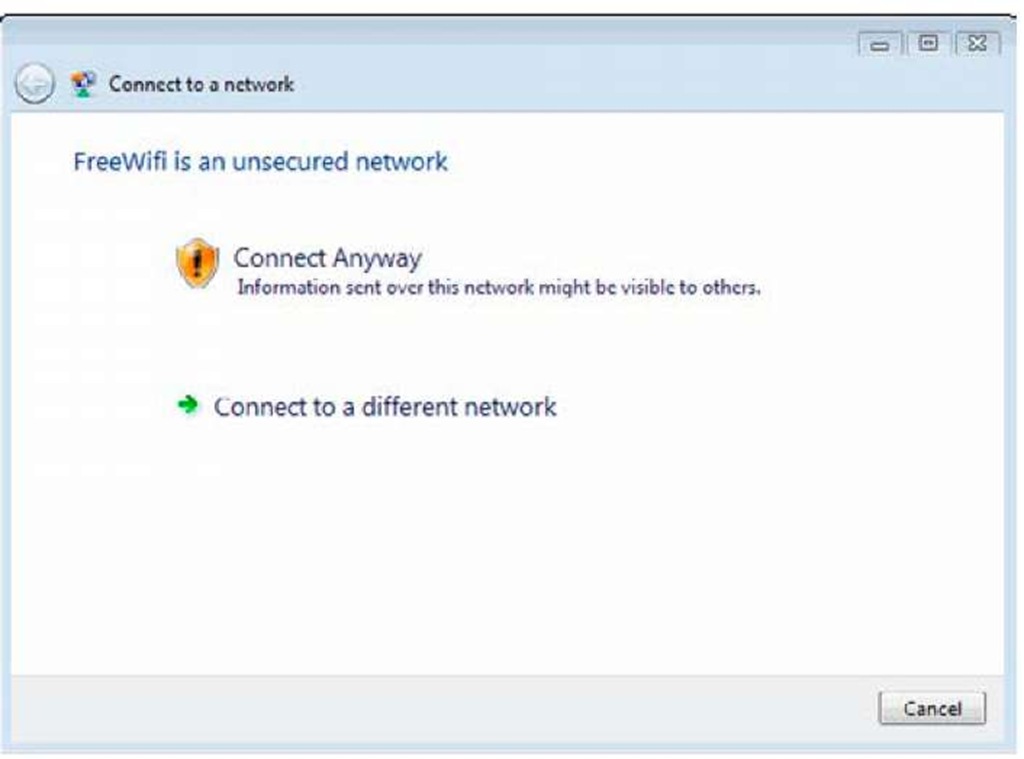
4. If a network doesn’t require a network key (labeled as an Unsecured network), click the Connect Anyway link as shown in Figure 2-3.
If you do use an unsecured network, be aware that your data may be visible to other parties. Though there is some security risk in using unsecured networks, you can take precautions (and others that Windows automatically takes for you in this case, which I will discuss later).
It’s a scary option, I know, but select it for now. I tackle security issues in another topic. That’s it! You’re done.
Figure 2-3:
If you are going to use an unsecured network as a wireless connection, Windows makes sure that you realize what you’re getting yourself into.
You can do something that ensures almost always having a working Internet connection. In one word, it’s called redundancy. Say a DSL line now comes into your house. Well, call up the cable company and order its cable modem service, too. Now use one connection for your wired network and the other connection for your wireless network. If one goes down, you can easily switch to the other Internet connection. Too bad you can’t do that with electrical service!
What the heck is a, b, g, n?
When you went to your local electronics store to buy a laptop, or a wireless router/card, you likely noticed that 802.11 (followed by a/b/g/n) appeared on the box. These are wireless protocols that are used to designate a set of standard for wireless communications. For example, if you are using 802.11a (which is very unlikely these days), you know that your wireless connection is operating on a certain frequency and has a set data transfer rate.
There are currently four protocols used for wireless communications. The oldest are "a" and "b" — which are also the least powerful.
I’d say that "g" is the most commonly used protocol, but it will quickly be replaced by the "n" protocol, which has only been available for a relatively short amount of time. When you buy a wireless router, you must make sure that your laptop computer or wireless card is compatible with the router. If you buy an 802.11n wireless router, but only have a "g" compatible card, you won’t be able to take advantage of the high performance of the "n" protocol.
To get a good idea of the difference between the various protocols, here are some facts and figures:
✓ (A) 802.11a Frequency 5 GHz
Typical Data Rate 23 Mbit/s Max Data rate 54 Mbit/s Range 115 feet
✓ (B) 802.11b Frequency 2.4 GHz Typical Data Rate 4.5 Mbit/s Max Data rate 11 Mbit/s Range 115 feet
✓ (G) 802.11g Frequency 2.4 GHz Typical Data Rate 19 Mbit/s Max Data rate 54 Mbit/s Range 125 feet
✓ (N) 802.11 n
Frequency 5 GHz and/or 2.4 GHz Typical Data Rate 74 Mbit/s Max Data rate 300 Mbit/s (2 streams) Range 230 feet
Viewing Available Networks
If you followed the previous set of instructions, you’ve made it past the initial gatekeeper. You can view all available networks now. After following the steps in the preceding section, you find yourself in the Wireless Properties dialog box.
As I mention earlier, you may see your neighbors’ wireless networks on the list. Ignore them, as it’s the right thing to do. Hopefully, they’ll do the same for you. Besides, you were wise enough to enable security on your wireless network, so there’s no chance of them getting on, right?
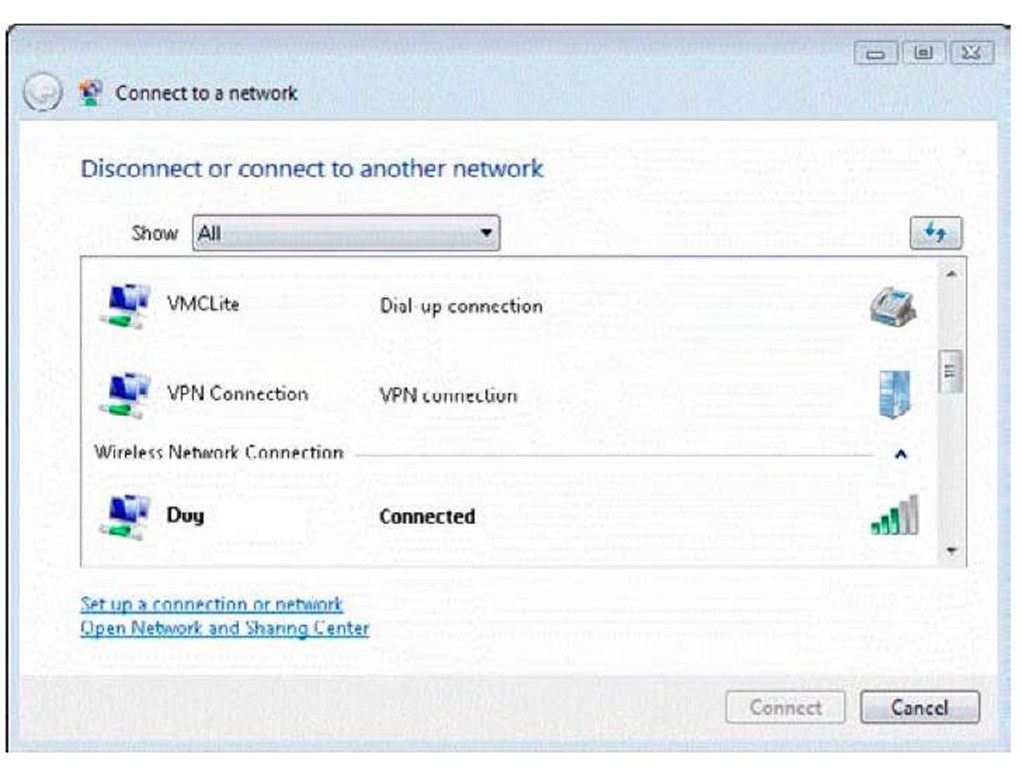
If the stars are aligned, you see your wireless network along with other kinds of networks on the list, as shown in Figure 2-4. Again, in the example the network is dubbed Dog, which does not reflect on myself, my cat, or my network hardware.
You can refresh the list of available networks by clicking the — yes! — Refresh button, which is above the list of networks, to the right (across from the Show scroll-down list). If you’re in a neighborhood with lots of wireless networks, you’ll probably see this list constantly change as some networks go live and others shut down.
Figure 2-4:
Besides your wireless networks, you might also find dial-up and VPN connections.
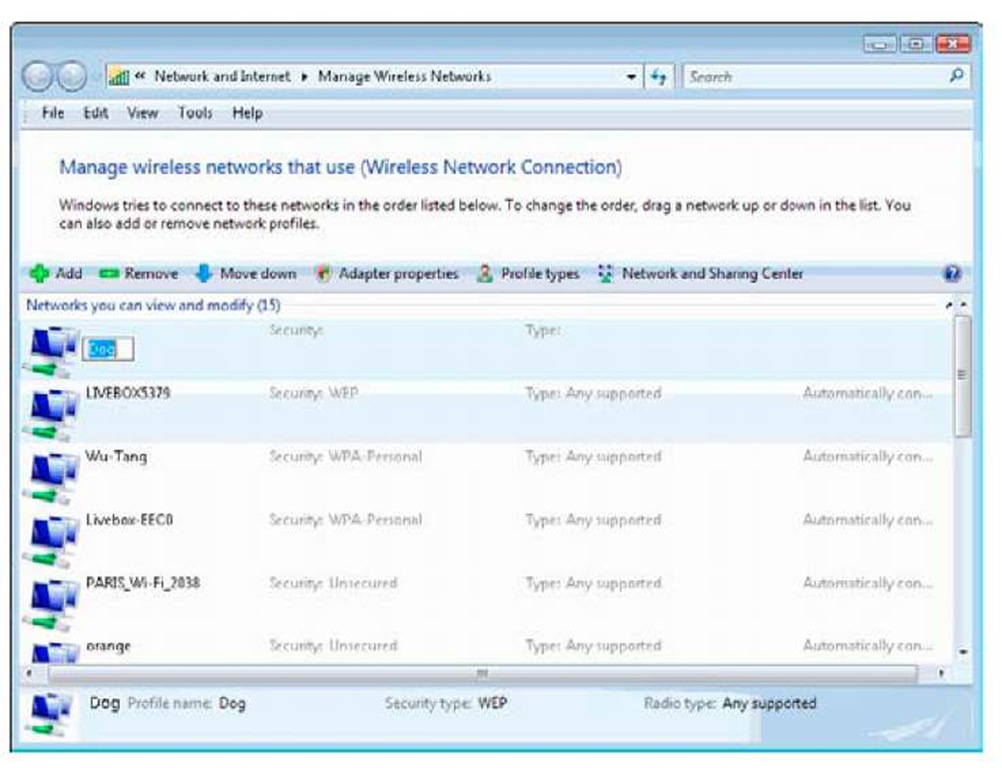
You can configure an available network from the Manage Wireless Networks page, which is available from the Tasks list in the Network and Sharing Center. Configuration options include changing the network name (which is also called the SSID) and the wireless network key. Here’s how you configure an available network:
1. In the Network and Sharing Center, click Manage wireless networks under the Tasks list.
2. Click the name of the network you wish to configure.
3. Right-click and select Rename. (The network name becomes an enter-able text box, as shown in Figure 2-5.) Rename the network and click outside the box.
A dialog box appears warning you of the consequences of such actions. Validate this dialog box. The network appears in the Manage Wireless Networks page with its new name.
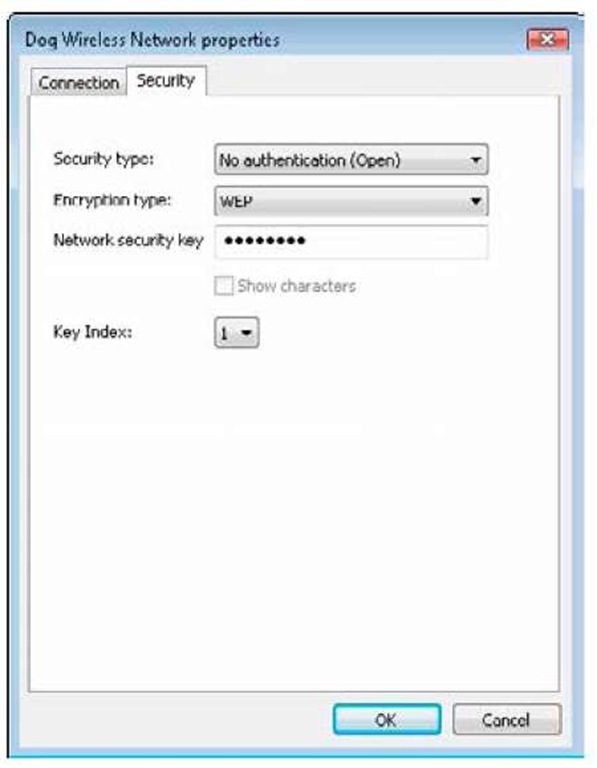
4. Right-click the name of the network and click Properties; click the Security tab.
The following dialog box appears, as shown in Figure 2-6.
5. You can make one or more changes to Association settings:
• Toggle Network Authentication between Open and Shared.
• Change the Data Encryption setting to Disabled or WEP. If you select WEP, you can enter a network key and make other related changes.
6. Click OK.
Whew! That’s it for configuring available networks. Now, onward to preferred networks.
Figure 2-5:
You can rename your SSID, or wireless network, to make it more recognizable.
Figure 2-6:
The Properties dialog box lets you make some pretty important security decisions.

