People Can’t Memorize Computer Industry Acronyms
Laptop users have another option called PCMCIA cards, PC Cards, or ExpressCards. PCMCIA stands for the Personal Computer Memory Card International Association, though I always remember it as "People can’t memorize computer industry acronyms."
ExpressCards are the newer standard, and replace PC Cards. Depending on how old your computer is, you may have one of each or only ExpressCard slots. Either way, these cards slide inside the base of your laptop, leaving only an antenna sticking out.
PC Cards might also be a good choice for older laptops with the slower USB 1.1 ports, which run a lot slower than the PC Card interface.
The D-Link DWL-G630 card I’m using here follows a similar setup process to the other hardware we’ve looked at.
1. Make sure your PC Card isn’t plugged in. Just like the USB installation procedure, you install the drivers before the card.
2. Start the installation program by inserting the CD that came with the card into your CD drive.
3. Click Next.
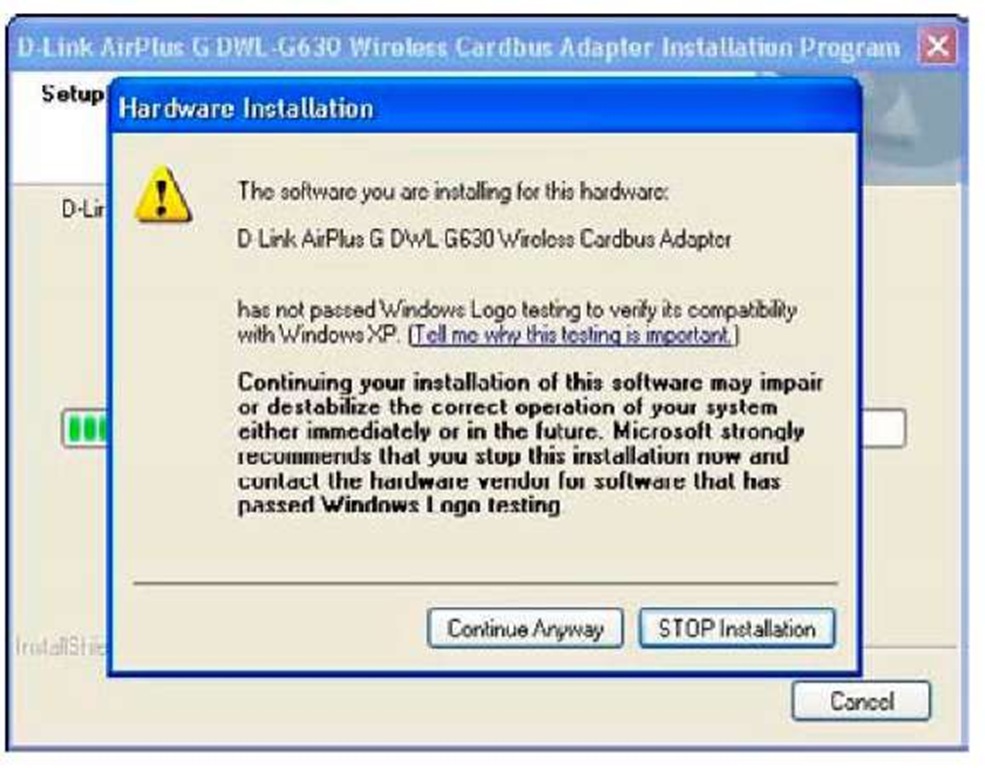
A dialog box appears, as shown in Figure 5-7.
Figure 5-7:
The D-Link installation starts with a warning.
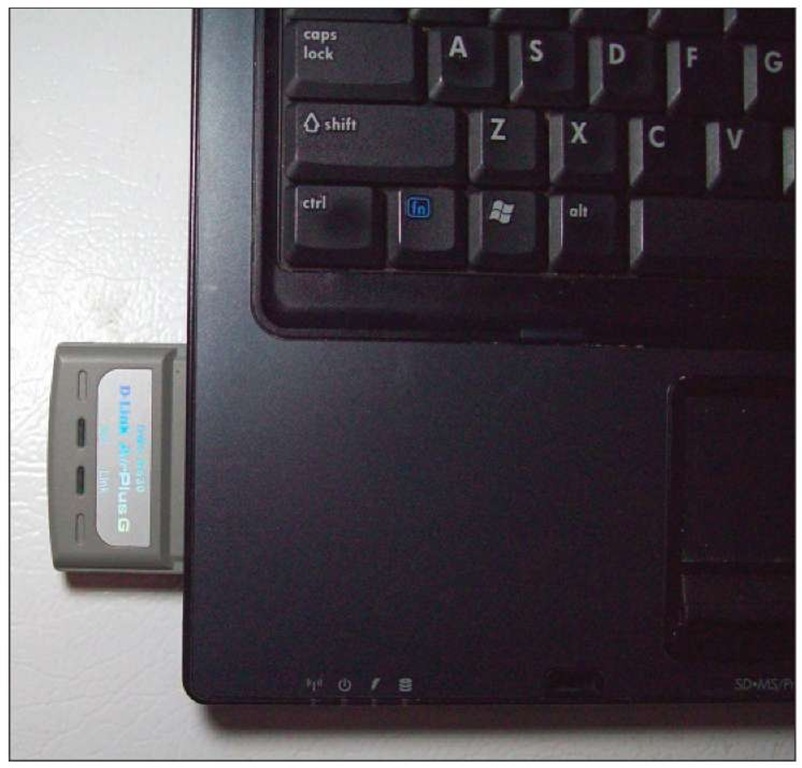
4. Insert the PC Card into one of the slots in the side of your computer, like in Figure 5-8.
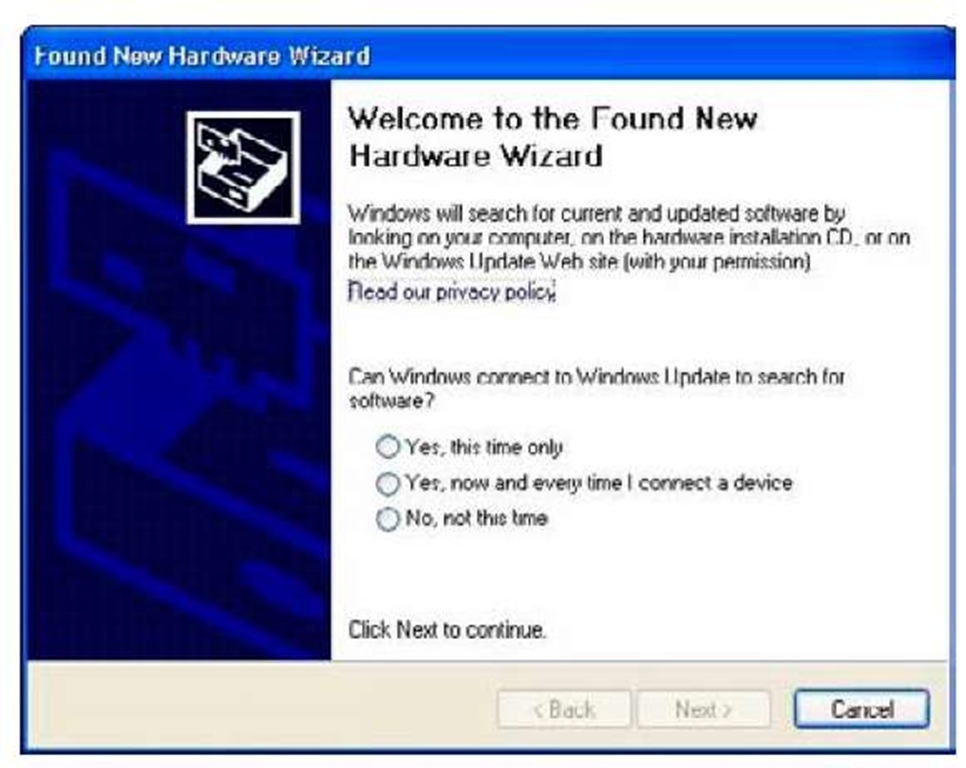
Do this gently because you don’t want to bend any pins inside your computer. If the card doesn’t fit, check to see if you are trying to plug an older PCMCIA card into an ExpressCard slot (you will see a small piece of plastic inside the slot which is designed to prevent you from plugging the wrong type of card). A hardware detection dialog box opens, as shown in Figure 5-9.
5. Select Cancel to return back to the manufacturer’s installation process.
You may see a screen like the one shown in Figure 5-10 that indicates that the driver hasn’t passed logo testing.
6. You are using the manufacturer’s driver, so you can safely select Continue Anyway.
7. Wait while your computer installs the software.
8. After the installation quits, click the Exit button to exit the process.
9. Reboot your computer with the wireless card still inside.
Figure 5-8:
A PC Card that’s been inserted into a laptop.
Figure 5-9:
The Windows hardware detection dialog box.
Figure 5-10: Ignore the warning about unverified software.
Cracking Open That Case!
PCI Cards are a reliable way of getting a desktop onto the wireless network. To add a new card to your machine’s motherboard, you must open up your PC. After everything’s closed up, the network card becomes a permanent part of your computer. The PCI Card has no risk of getting unhooked accidentally, lost, or having coffee spilled on it. Well, maybe you’re not safe from the coffee, but I think you get my drift.
Going over some ground rules
You’re going to be opening up your computer and working inside it. I’d suggest it’s turned off while you do that. No, actually, I insist that your computer is turned off while you work inside it. Humans and electricity don’t mix well.
Like a fuzzy cat, you’re a natural collector of electric charge in the form of electrons. Collect enough electrons by shuffling your feet on carpet, rubbing a sweater against other items, or just picking a bad day to work, and you can turn those excess electrons into lightning bolts known as static electric shocks.
Those lightning bolts find their way to ground through the most efficient path possible, and all those electronics in your case provide such a path. The problem is that your computer is made to run on 12 volts, and those shocks that you’re throwing around like Zeus run in the tens of thousands. Shock the wrong part and you’ll be an unhappy computer owner.
Fortunately, protecting yourself while working inside your computer is quite easy. Follow these suggestions:
♦ Don’t wear a heavy sweater, sweat pants, or dangly jewelry.
♦ Keep all parts in their protective bags until you need them.
♦ Keep a hand on the computer case at all times to ground yourself.
♦ Get your tools ready in advance so that you’re not building up charge as you run around the house.
♦ Hold on to cards by the edges and don’t touch the contacts or components.
Also, keep a small dish handy to hold any screws you might have to remove. That’s got nothing to do with static electricity — those screws are small!
Installing the drivers
Just like the other devices we installed, you want to install the CD that came with the card before actually installing the card. It’s remarkably similar to the USB and PC Card procedure; in fact, it’s so similar that I’m just going to point you back to Step 2 in the previous section instead of reproducing it here.
Opening the case
Unplug everything from your computer’s case and put it on your desk. The goal here is to separate the lid from the rest of the computer so that you can access the components inside.
Every computer is different, though. Rest the computer on its feet and have the buttons facing you. Look on the sides of the computer for buttons that you can push in to release the top. Push these in while rotating the lid upward, and it should open like a clam.
Failing that, look at the back of your computer for screws that hold the lid to the rest of the chassis. Some computers require that you turn a thumbscrew to release the lid, which slides back to reveal the parts inside.
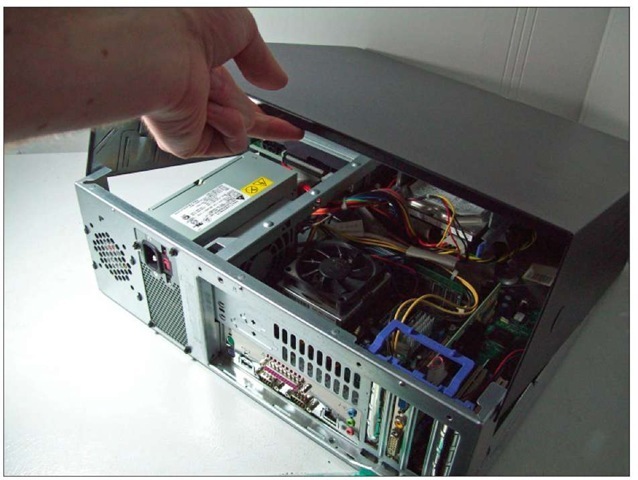
Figure 5-11 is what my computer looks like. The button visible on the side releases the back of the cover, which swings upward to reveal the inside.
Accessing the PCI slots
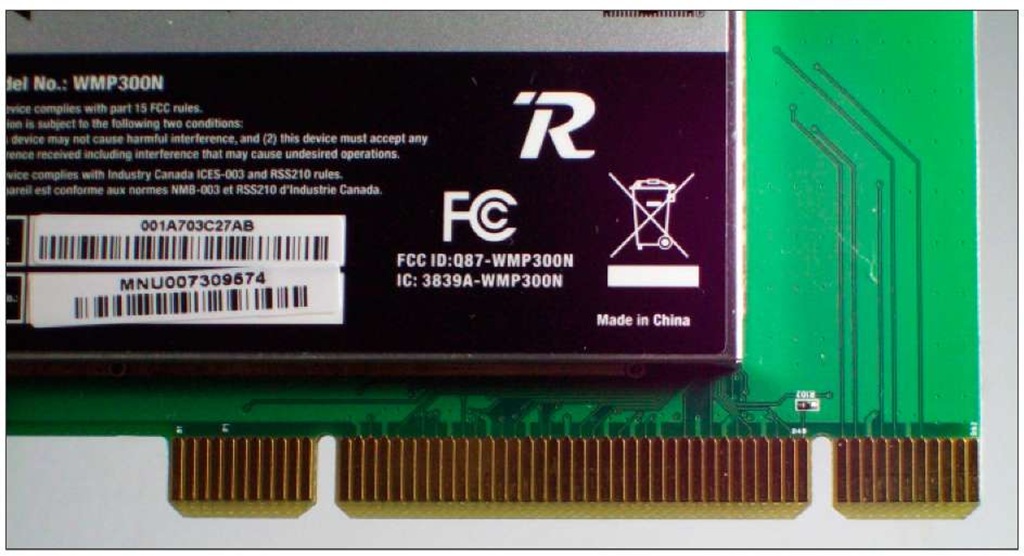
Figure 5-12 shows the edge of the wireless card. This is a standard PCI card (Peripheral Component Interconnect) that you can use to expand your computer.
1. Peer into you open computer case and look for some slots that would fit this card.
You should see between two and five in parallel against the back edge of your computer. Some computer designs have a riser board that comes out of the computer’s motherboard at a 90 degree angle.
Figure 5-11: Open the case.
Figure 5-12:
The edge connectors on a wireless card.
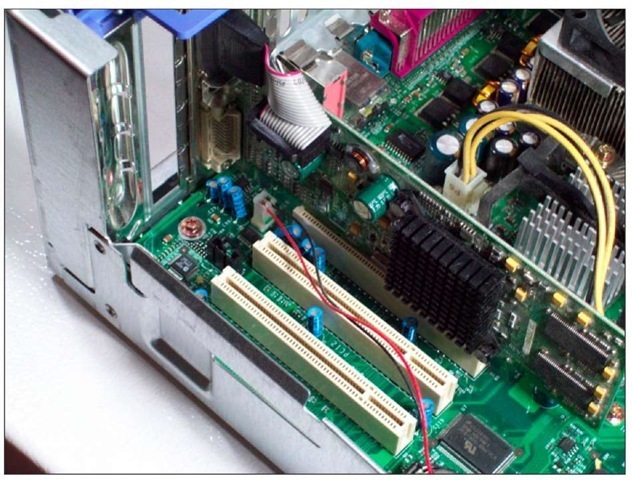
Figure 5-13 shows the PCI slots in my desktop. You may see slots that look similar but are offset somewhat. These are generally not PCI, and you want to avoid them.
Figure 5-13:
PCI slots in a standard desktop.
2. Notice that the case of the computer has openings to the outside but are probably covered up at this point (you can see such an opening back in Figure 5-13).
When properly plugged in, one edge of the PCI card shows to the outside of the computer through one of these openings. Take a moment to figure out which PCI slot you’re going to use and which opening on the case corresponds to that slot. The two don’t line up perfectly, though, so you can use your card as a guide to figure out which port is to be used.
3. Depending on your computer, you might have to undo a screw on the case to allow the card to go in. You replace the screw later to hold the card down. You may also have to punch out part of the case to make room for the card — be careful! Other computers might use a clamp mechanism to hold down all the PCI cards at once.
4. Gently line up the PCI card with the slot, and then make sure it’s straight against the case so that the connectors on the card show through the outside.
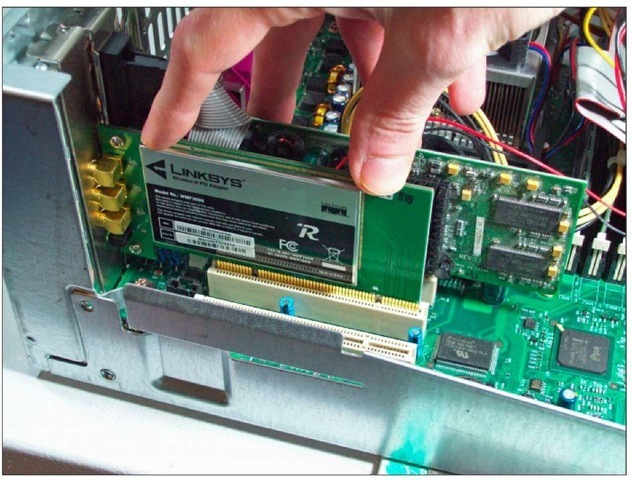
Figure 5-14 shows the card all ready to go.
Figure 5-14:
A PCI network adapter ready to be seated.
5. Push down with your fingers on the edge of the card until the card is properly seated.
The card should be level in the case, that is, both sides of the connectors should be in the slots to the same depth. The edge of the card that shows outside the computer should also be seated snugly against the case, with the notched edge flush with the case and ready to be fastened.
6. Screw the card down to the case or replace the clamp as appropriate.
Take a last look for forgotten tools and replace the top of the case.
Attaching the antenna
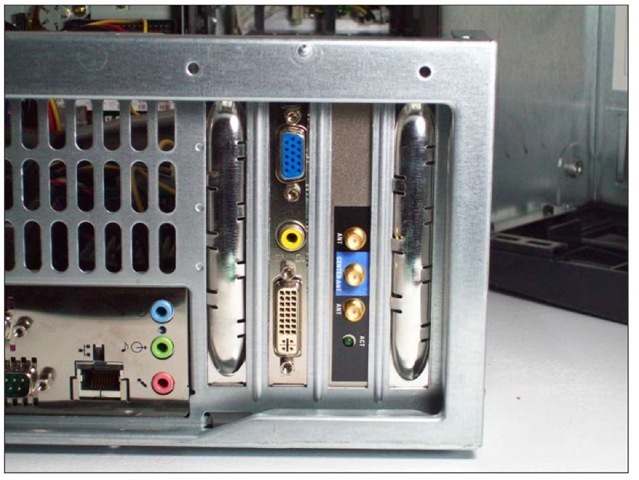
You will see some connectors protruding from your wireless card when looking at the back of your computer, as in Figure 5-15. Screw the connectors from the antenna onto those connectors. Make sure they fit snuggly, but hand-tighten only, please. Your card might indicate which cables go to which ports, so follow those directions. In the Linksys PCI card I’m using, the middle port is marked in blue, but it corresponds to a blue tag on the antenna cable. The other two ports can go in any order.
Figure 5-15:
Antenna connectors on the wireless card.
Finally, put your computer back in its spot and hook up all the cables. Make sure the antenna cord is free of the other cords, and put the antenna somewhere where it will be unobstructed. That’s it!
By now you’ve got your USB or PCMCIA network adapter plugged into your laptop and the drivers installed. If you’re a desktop person, then you’ve conquered your computer’s case and installed a PCI card, or you took the USB route.
Either way, you’ve got a functioning network card and a wireless network that’s just begging to be used. The next topic looks at getting your computer online.

