Managing your preferred networks
A computer can only be connected to one wireless network at a time. Sometimes, you run into a situation where your computer can see two networks that it knows how to log into, and the computer must decide which network to log into. You control this decision by ordering your preferred networks. Windows chooses the network that’s highest on the list.
If you ever connect to a default network like NETGEAR, D-link, or Linksys, make sure that you move it down to the bottom of your list of preferred networks. Your computer doesn’t know the difference between the network you connected to at the coffee shop and your neighbor’s insecure wireless network, because all it has to go on is the name. With the defaults at the bottom, you avoid the embarrassing situation where you connect to your neighbor’s network when you should be connecting to your own.
Go back to the Wireless Network Connection Properties dialog by right-clicking on the wireless adapter in the system tray, selecting View Available Wireless Networks, and then Change Advanced Settings. Figure 6-6 shows this dialog. Look at the Preferred Networks section. You can select any network and move it up or down using the appropriate buttons on the right. If you want to view the connection’s settings, highlight the name of the network and click on the Properties button.
You may adjust the priority of any network you have used, no matter if you configured it manually or let Windows set it up for you.
Using Wireless Utilities
The Windows Zero Configuration method isn’t too difficult, but you need to do a lot of clicking to find what you want. Wireless support in Windows XP was almost an afterthought, so it’s no surprise that there are some annoyances.
Modern network adapters come with a utility for managing the network connections which takes over from Windows Zero Configuration. You must choose to use one or the other — both cannot be active at once. The wireless utility from the manufacturer has its own configuration database, meaning that if you switch back to WZC at some point, you lose all your settings.
Still, I prefer to use the manufacturer’s utility because it usually has a nicer interface and often provides more troubleshooting tools than does Windows.
If you are running an earlier version of Windows, such as Windows 2000 or Windows95, then you’re pretty much stuck with using the manufacturer’s utility.
Finding a network
Just like the WZC procedure, you connect to a network by picking it from the list of available networks.
I’m using a NETGEAR USB adapter and the associated utility called the NETGEAR Smart Wizard. If you’re using a different adapter, your screens are going to be different. Most of the utilities are similar, so just click around until you find what I’m talking about.
To find a network, follow these steps:
1. Open the utility by finding it from your Start menu, or by double-clicking the icon in the system tray.
I’m not talking about the Windows network adapter icon, but the new icon that was created when the software was installed.
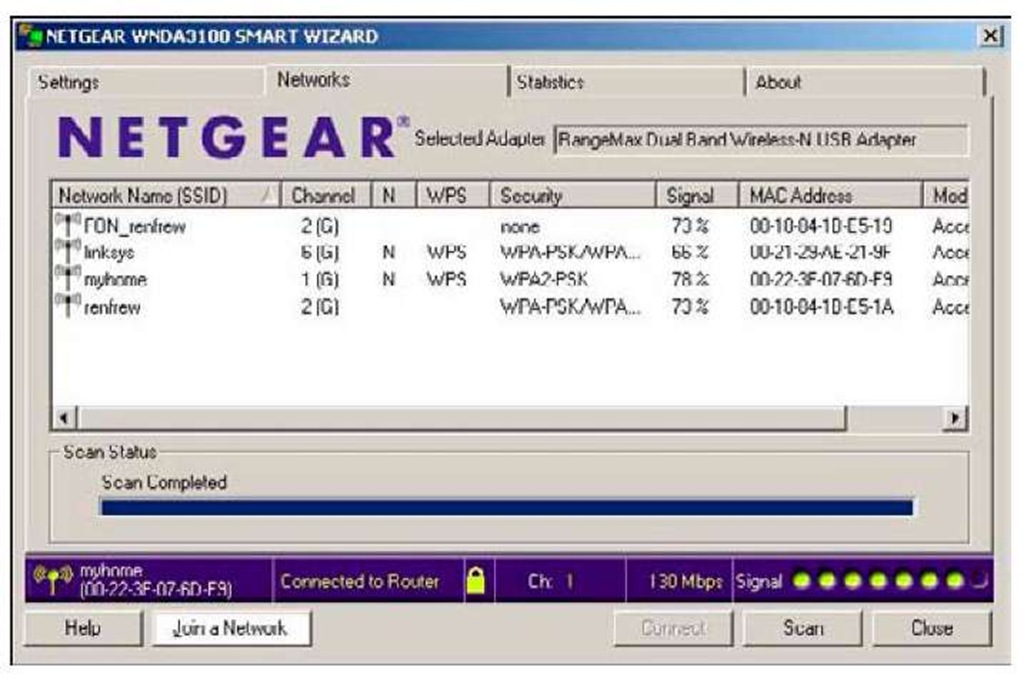
2. Select the Networks tab to see the list of available networks.
The NETGEAR utility is the only one I’ve used in which I had to click on a tab to get to the list of networks; all the other ones started off at that screen. The screen is shown in Figure 6-9.
You get a list of all the available networks, along with an indication of what wireless standard is used, the security mode, and the strength as measured by a percentage. The column marked N indicates 802.11n capable networks.
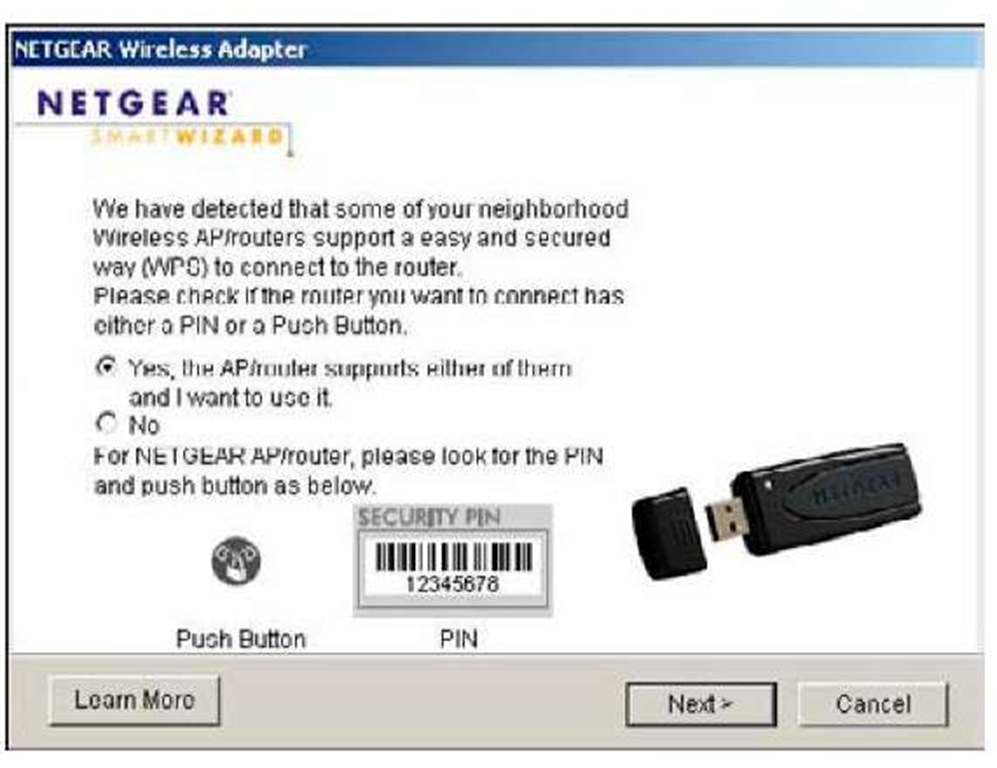
3. Double-click on your SSID (linksys in this case), which brings up the dialog box you see in Figure 6-10.
Wi-Fi Protected Set up (WPS) is a simplified method of connecting to wireless networks. Rather than typing in passwords and any other security settings, a different approach is used. A WPS capable router has a PIN number printed on it, a WPS button, or both. If you supply the PIN during the connection, then your computer can negotiate the shared secret directly with the router. Alternatively, you can press the WPS button on the router, which puts it in a mode ready to pair up with your computer.
Figure 6-9:
The list of available networks as seen by the Smart Wizard.
Figure 6-10:
The Wi-Fi Protected Setup dialog box.
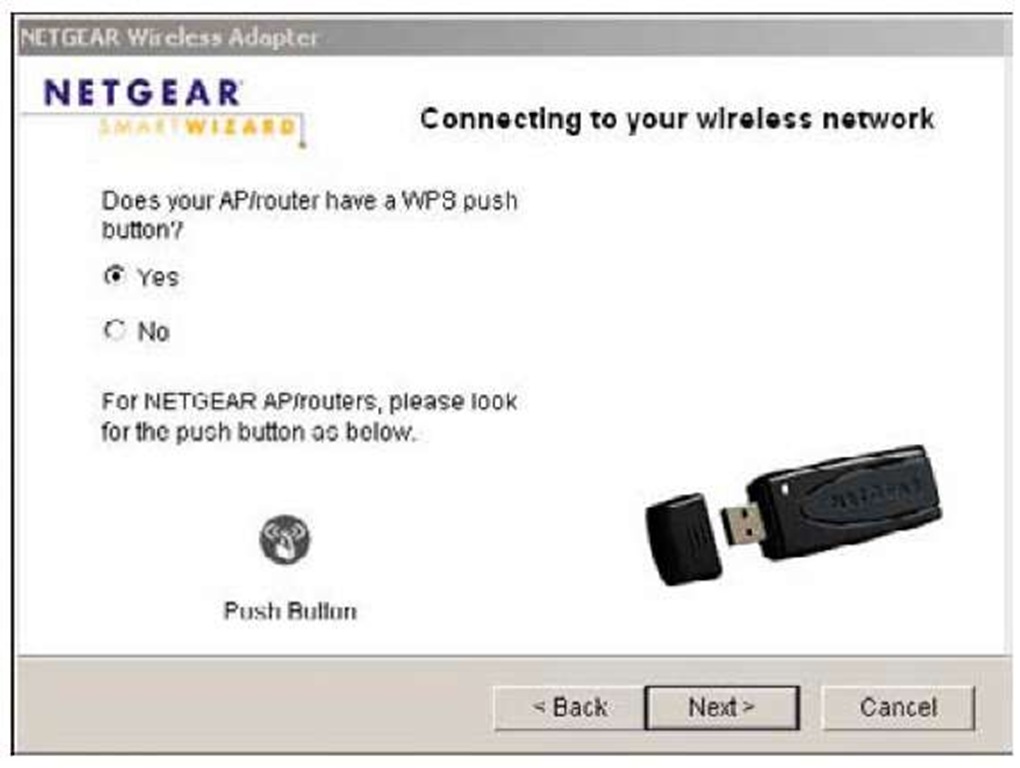
4. Select Yes in response to the dialog box shown in Figure 6-11, which then prompts again to see if the router has a push button.
5. The router does indeed have a push button, so click Yes.
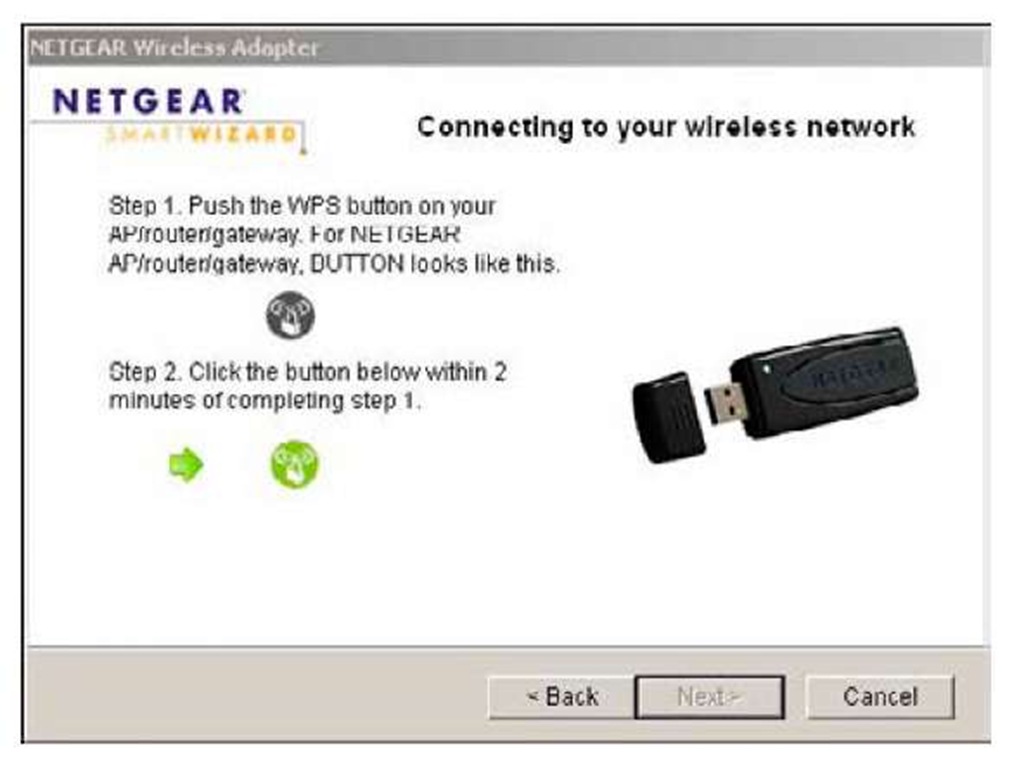
The next screen, shown in Figure 6-12, asks you to press that button.
Figure 6-11:
Do you have a WPS button?
Figure 6-12:
Press your WPS button!
6. Press the WPS button on the router and then come back to the dialog box and click on the icon where indicated.
Your computer thinks for a moment and then connects you to the wireless network.
The WPS method is very easy because you don’t have to remember any settings. All you need to do is press a button or read a PIN off a sticker.


