Configuring TCP/IP on a Mac OS X client
Follow these steps to set up and configure TCP/IP on your Mac OS X client:
1. Choose System Preferences from the Apple Menu at the upper-left of the screen.
2. Click the Network icon Location pop-up menu and choose Automatic.
3. Access the Configure pop-up menu and choose your connection media, such as Built-in Ethernet.
4. If the lock icon (bottom left) is locked, make sure that you click the icon and enter your password to unlock it.
This allows you to save the changes you make in the following steps.
5. Click the TCP/IP tab, and from the Configure pop-up menu, choose Manually or Using DHCP, depending on how you plan to get the IP address.
Figure 6-3 shows the configuration window.
6. If you’re adding the address manually, type the subnet mask (if your network uses one).
7. If you’re not using DHCP to get an address, type your IP address in the IP Address box.
8. Click the Apply Now button.
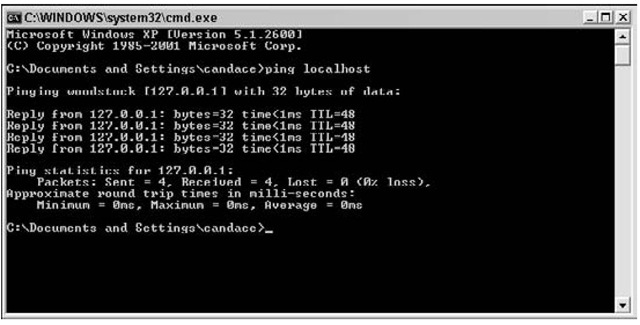
To test your configuration, try using a beloved command of network administrators: the ping command. Ping checks for a host’s availability on the network. To test your own connection, use the command
Figure 6-4 shows that localhost (Woodstock) is alive and well on the network. If the ping command doesn’t give you a reply, your network configuration has a problem.
Figure 6-3:
Set your IP address for Mac OS X.
Figure 6-4:
The ping command tests your network configuration.
The ping command is available on all the operating systems used in this topic. It runs from a terminal or command window.
Configuring TCP/IP on a Linux or Unix client
When you install Linux or Unix, the operating system installation procedure assumes that you’re also setting up networking — and asks you to provide the following information:
✓ The network interface that you want to use
✓ Whether you want a DHCP server to assign your IP address
✓ Your IP address and subnet mask (if you didn’t choose DHCP in the preceding step above)
✓ The host name
✓ Whether you want to use DNS to translate names into IP addresses: If you don’t choose DNS, you have to put entries in the hosts file.
The operating-system installation procedure also sets up networking files. If you choose not to set up networking during the installation procedure, you can use the upcoming steps to set up and configure TCP/IP at any time on your Linux client.
Don’t panic if your installation screens look different from ours. Our computer is running Ubuntu Linux software with the popular Gnome interface. Although every Linux vendor designs its screens differently, the steps to follow for setting up TCP/IP and your network are essentially the same.
Follow these steps to configure TCP/IP on a Linux or Unix client:
1. Log on with the root password and select System from the main menu.
2. Choosing Administration then Networking opens the Networking Settings Window.
3. Choose either Wireless or Wired Network Connection and select the Properties tab to see the settings for your Ethernet connection.
The NIC information shows the DHCP client.
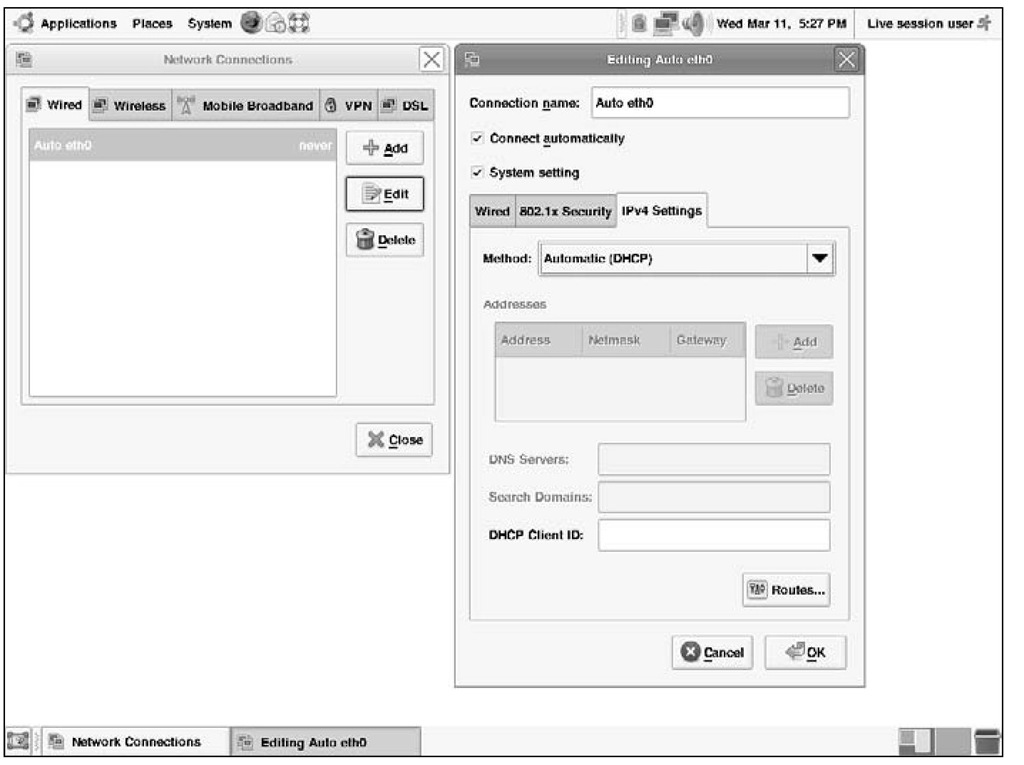
Figure 6-5 shows the automatic DHCP setting. If you want to set a static IP address, click on the drop-down Automatic Configuration box to input your IP address.
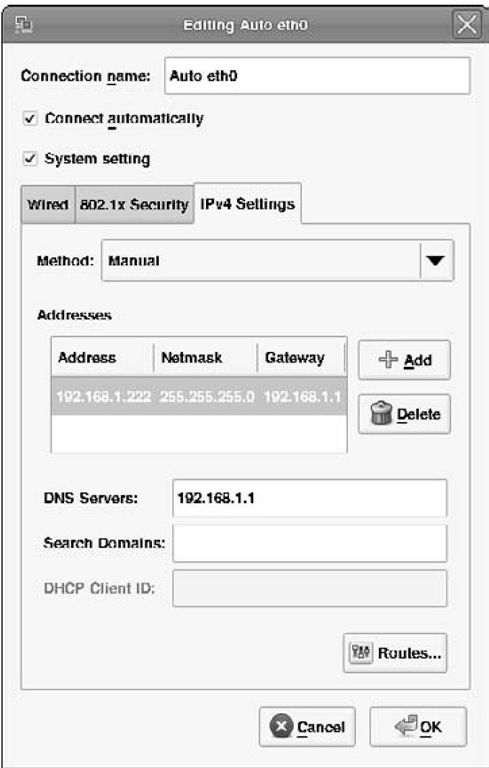
4. If you want to set a static IP address, fill in the IP address, subnet mask, and gateway address (if you have one) in the Settings for Interface window.
Figure 6-6 shows you how manual IP settings look.
Figure 6-5:
A TCP/IP client automatically receives an IP address from a DHCP server.
Figure 6-6:
If you want to assign a static IP address to your client, you have more work to do.
As you can see from the Mac example (from the previous section) and this Linux example, setting up a client is a simple procedure — even though the setup windows look different. Client setup works the same way in Microsoft Windows XP and Windows Vista, although getting to the actual setup window is different for each variation of Windows; see the next two sections for details.
Configuring a TCP/IP client on Windows Vista
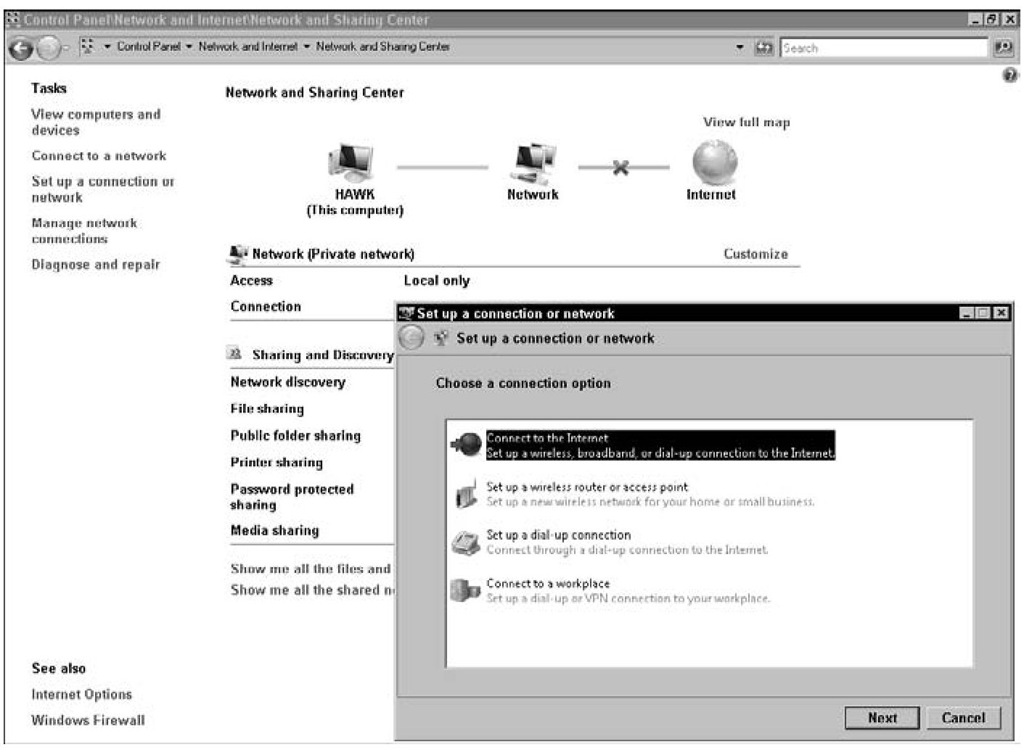
Follow these steps to get started setting up your network client on Microsoft Windows Vista (see Figure 6-7):
1. Click StartControl Panel.
2. Choose Network and InternetNetwork and Sharing Center.
3. Click Manage Network Connections.
4. You probably want to add a DHCP address, which is already there. If not, enter your IP address.
Figure 6-7:
Start configuring TCP/IP on Windows Vista.
Configuring a TCP/IP client on Windows XP
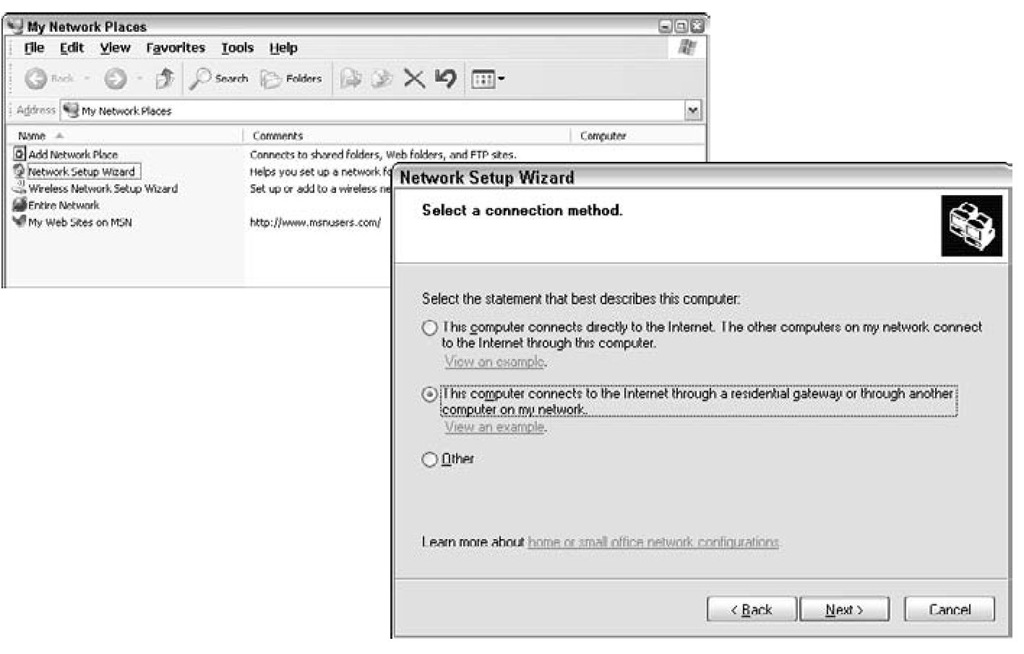
1. Click My Network Places from the Start Menu.
The My Network Places window opens, as shown at the top of Figure 6-8.
2. Click on the Network Setup Wizard.
The Wizard searches for network hardware, and then opens the dialog box shown at the bottom of Figure 6-8.
3. Choose the network connection you want to set up (or change).
4. Follow the Network Setup Wizard’s directions.
Fill in the computer’s name and description. The Network Setup Wizard continues to guide you through various screens until your network’s set up. Mostly you just have to click "Next" until you’re done with the Wizard.
It’s always a good idea to answer "Yes" to any query that asks whether you want to create a backup disc.
Figure 6-8:
Start configuring a home office TCP/ IP client on Microsoft Windows XP.
![tmp9-64_thumb[4] tmp9-64_thumb[4]](http://what-when-how.com/wp-content/uploads/2012/03/tmp964_thumb4_thumb.jpg)
