Consuming Web Service
To consume a web service, we will create a new page so that the MainPage.xaml will not be overcrowded.
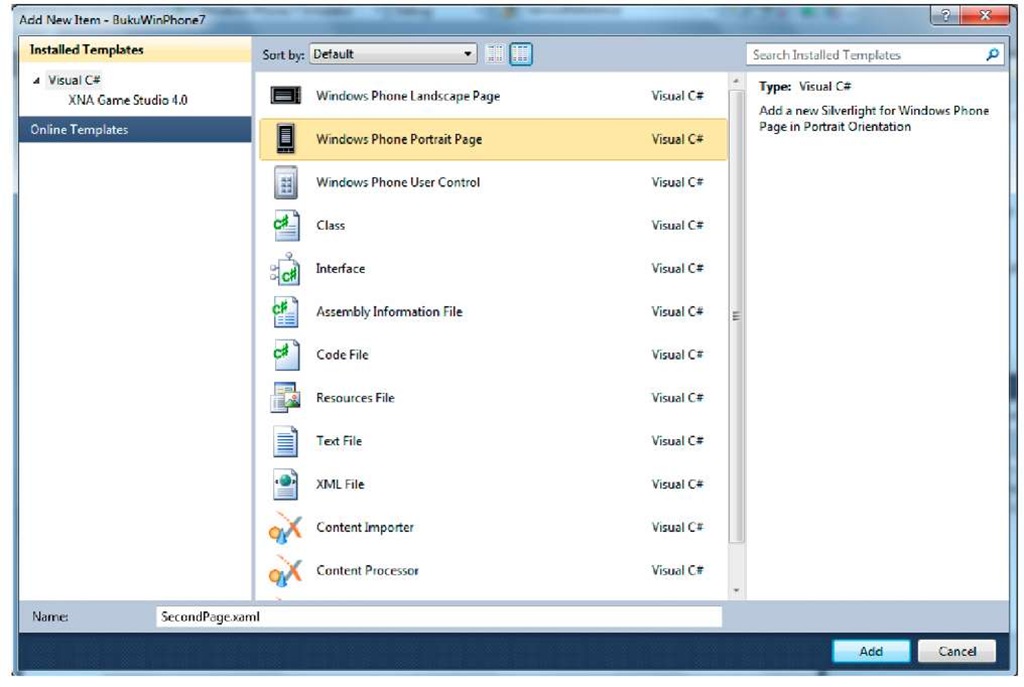
1. Right click on the project, Add New Item and select Windows Phone Portrait Page. Rename the file as you wish, in this example WebService.xaml, then click Add.
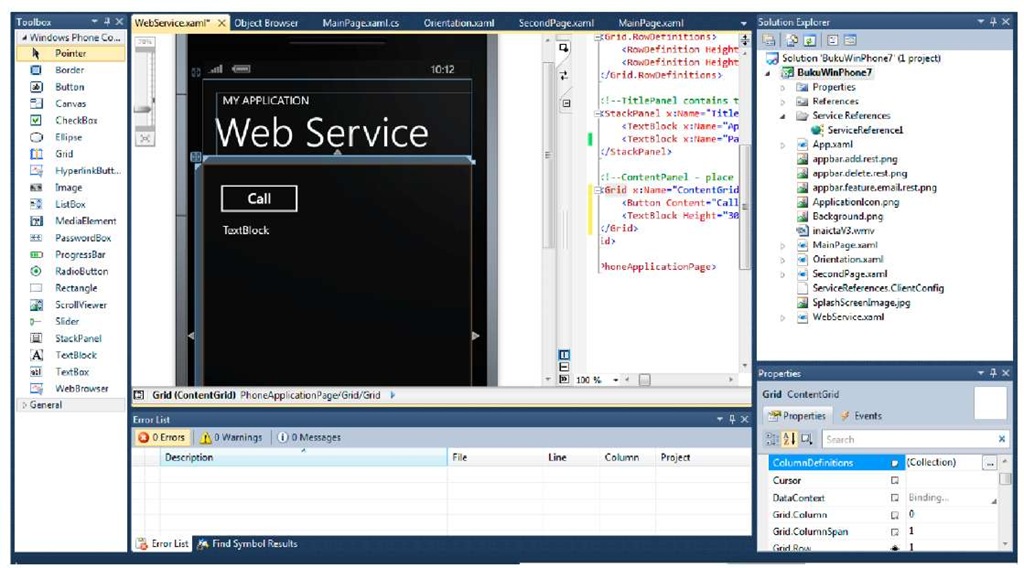
2. Insert a Button and a TextBox. The scenario is that when the button is pressed, we will call for a web service via an auto-generated proxy class.
3. Double-click on the button to add event handler. Type in the following code:
First we initialize proxy from the service. Define handler when request is done, then call the function that will be used. On the above example, when the web service request is done, the content of the TextBox will become "HelloWorld".
4. Now set Orientation.xaml as the initial page for the application by changing the property on WMAppManifest manifest file.
On Task section, change the value of NavigationPage into WebService.xaml
5. Press F5 to see results.
Note:
Don’t forget to set this page as the first page your application goes to if you continue from the previous project. Learn how to do so here.
Using Standard HTTP Request
In this section we will see how to consume a service in form of plain HTTP or RESTful. Silverlight and Windows Phone SDK have a System.Net standard package to send request through ftp and http. The scenario used in this case is to consume a real live service, which is service from a website that provides weather information.
This below is the URL for the service with <city_name> as input parameter. http://www.google.com/ig/api?weather=jakarta
1. If you are still using the project from the previous section, let’s add a little modification on the WebService.xaml file. If you are new to this, then create a new file by following these steps.
2. Insert the code below into the button’s event handler
There are two things done here. First, create a request by entering a URL address in WebClient class. Request will later be done asynchronously so that it will not disturb the application’s responsiveness. The second part is what to do after the request is done. In the above example, the result retrieved from the request is written into a TextBlock.
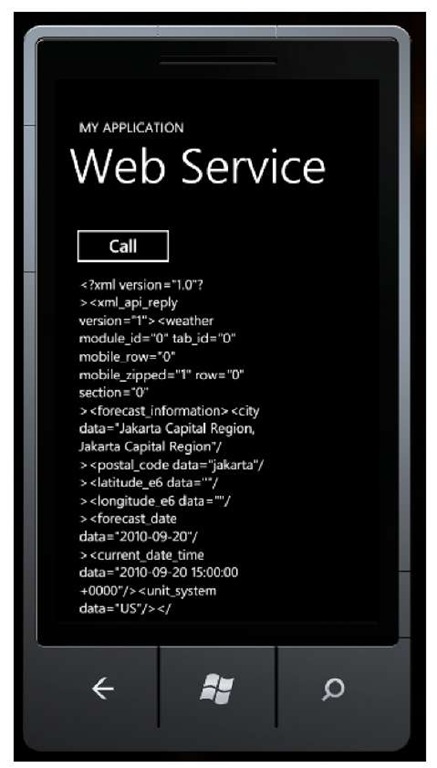
3. Press F5 and see the results. Press button to call the service.
Download speed will be very dependent to your PC connection. The same thing applies in the real device. You can see that the service data can be retrieved successfully. Data can then be processed further before being displayed to users.


![tmp1C-71_thumb[2] tmp1C-71_thumb[2]](http://what-when-how.com/wp-content/uploads/2011/08/tmp1C71_thumb2_thumb.jpg)
![tmp1C-72_thumb[2] tmp1C-72_thumb[2]](http://what-when-how.com/wp-content/uploads/2011/08/tmp1C72_thumb2_thumb.jpg)
![tmp1C-73_thumb[2] tmp1C-73_thumb[2]](http://what-when-how.com/wp-content/uploads/2011/08/tmp1C73_thumb2_thumb.jpg)
![tmp1C-74_thumb[2] tmp1C-74_thumb[2]](http://what-when-how.com/wp-content/uploads/2011/08/tmp1C74_thumb2_thumb.jpg)
![tmp1C-75_thumb[2] tmp1C-75_thumb[2]](http://what-when-how.com/wp-content/uploads/2011/08/tmp1C75_thumb2_thumb.jpg)
![tmp1C-76_thumb[2] tmp1C-76_thumb[2]](http://what-when-how.com/wp-content/uploads/2011/08/tmp1C76_thumb2_thumb.jpg)

