GETTING A BETTER VIEW
One of the reasons that the Organizer works so well is that it can be customized to your preferences. There are several different options available for displaying your images and image information, and each one of those can be customized to your liking. Now, when I say customized, I don’t mean that you can change all of the content to only display what you want, but that you can drag the dividers between the different panels to resize them into an arrangement that is perfect for you.
THUMBNAILS
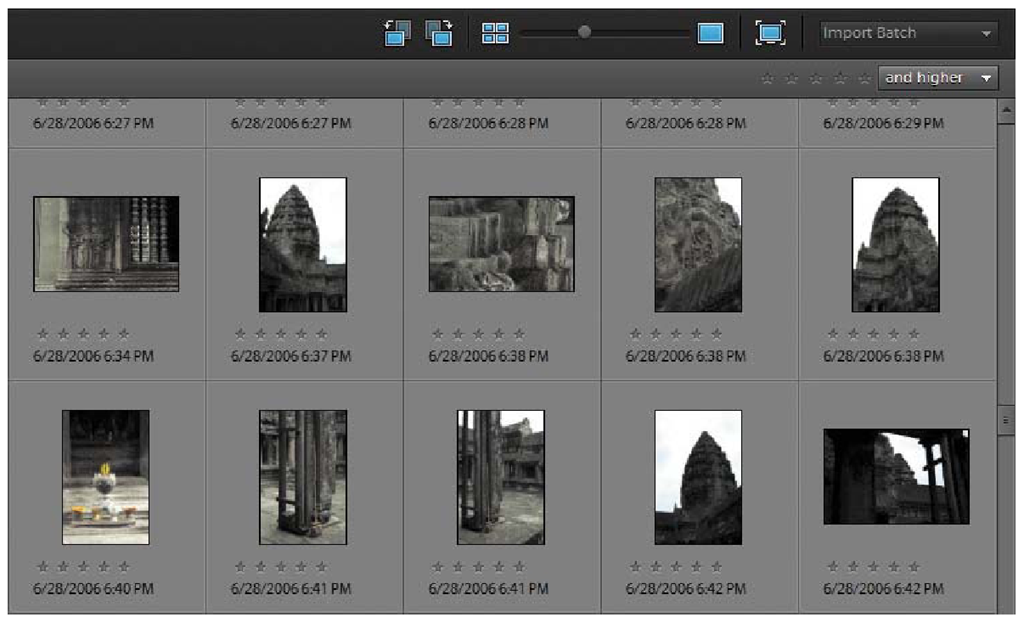
The default view in the Media Browser is to show images in a thumbnail configuration. The default size of the thumbnails may be just to your liking, but if it isn’t, you’re in luck, because you can control just how large or small the thumbnails are. To change the size of the thumbnails, move the thumbnail slider at the top of the Media Browser (Figure 2.19). To make thumbnails incrementally larger, press Control-+ (plus) (Command-+). To make thumbnails incrementally smaller, press Control- – (minus) (Command- -).
FIGURE 2.19
The thumbnail size can be changed using the slider and controls at the top of the Media Browser.
SINGLE PHOTO VIEW
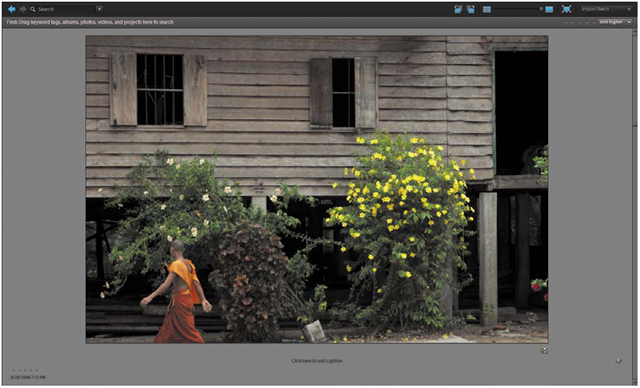
If you really want a good look at your image, you can take it into Single Photo view. Do this by moving the thumbnail slider all the way to the right, clicking the Single Photo icon to the right of the slider, or double-clicking the image. While in Single Photo view, you can add a caption to your image by clicking the "Click here to add caption" text under the image (Figure 2.20). To return to the thumbnail view, double-click the image once more.
FIGURE 2.20
Single Photo view.
FULL SCREEN VIEW
What’s that you say? You tried Single Photo view but it still wasn’t enough for you and your 30-inch mega-screen? Well then, maybe it’s time you moved into Full Screen view. Look for the button to the right of the thumbnail size slider (it’s just to the right of the Single Photo icon). When you hover the mouse pointer over the icon, you will see a pop-up that says View, Edit, Organize in Full Screen – F11. That’s your clue to click it and go large. Another option for going full screen is to click the Display Options icon in the upper-right portion of the screen and look for the View, Edit, Organize in Full Screen option in the drop-down menu. You may have also noticed that the keyboard shortcut to jump into Full Screen view is F11. If you are using a Mac, make sure that the F11 key is not already assigned to another function, as is usually the case.
When you are in Full Screen view, there are a few things you can do to have a little fun. First, you can zoom in and out of the image using the same keyboard shortcuts I described for changing thumbnail sizes. If you have a mouse with a scroll wheel, you can use it to change the zoom view of your image. Click the image to zoom in to a 100 percent view. You can use the mouse to move the image around at this magnification. Click once again to zoom back out to a "fit screen" view.
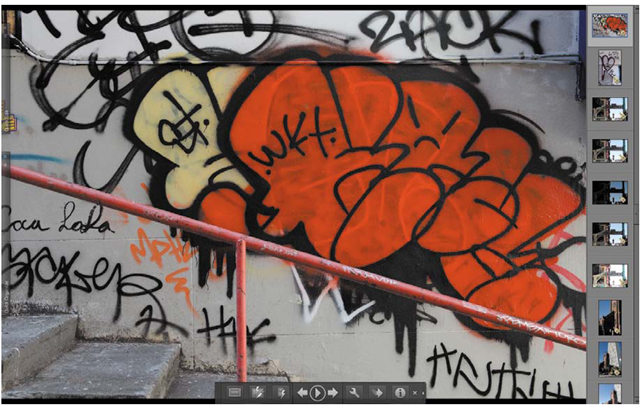
To browse a slideshow of your images, press the spacebar or click the play button at the bottom of the screen (Figure 2.21). To stop, press the pause button. To manually move through the pictures, use the left arrow and right arrow keys on your keyboard; there is also a set of left and right arrows next to the play button that will do the same thing.
FIGURE 2.21
Maximize your image by using Full Screen view.
If you want to jump to a specific image, you can launch the Film Strip view. Click the button on the far left of the play button or use the keyboard shortcut Control-F (Command-F). This will bring up a thumbnail strip of images on the right side of your screen that you can quickly scroll through. Click an image in the strip to see the fullscreen version.
To exit the Full Screen view, click the X on the right side of the control panel or press the Escape key.
Using full Screen View as a Slideshow
The Full Screen view is a great way of giving a slideshow of your images, but here’s a little suggestion. Create an album of the images that you want to use in the show first. Once the images are in the album, you can drag them into whatever order you like. Then click the first image in the album, launch Full Screen view, and click the play button to begin your customized show.
VIEWING IMAGE PROPERTIES
This little gem of an info box is turned off by default, but I always end up turning it on and docking it to the bottom of the right-hand panel. To access image info, select an image and then select Window > Properties. You can also use the keyboard shortcut Alt-Enter (Option-Enter).
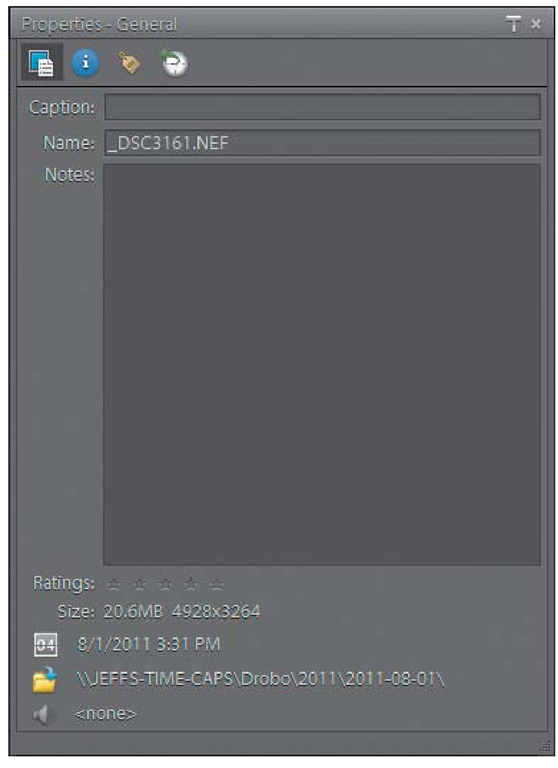
The Properties panel contains four groups of information related to your image. The first is General, which you can see by clicking the left-most icon (it looks like a piece of paper in front of a blue box). General is where you will see the image file name, any captions or notes you added to the file, ratings, size, time of capture, and file location. You can also use this area to add notes or captions by typing in the appropriate text box (Figure 2.22).
FIGURE 2.22
The General section of the Properties panel.
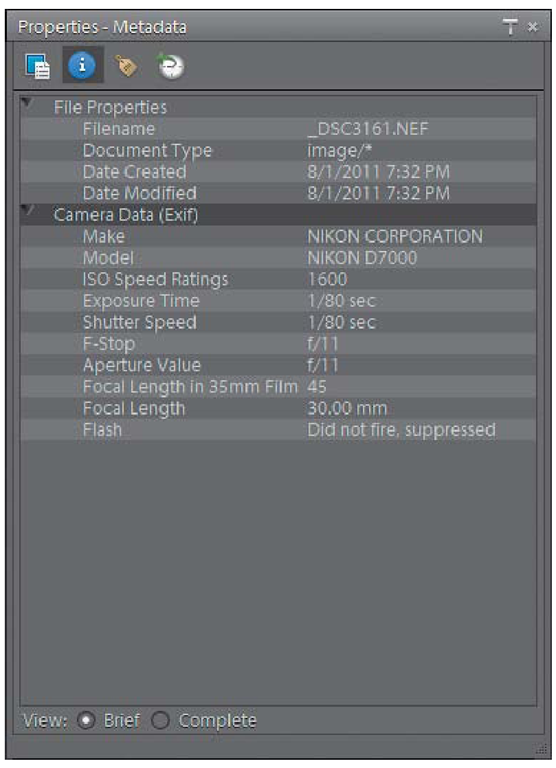
Click the info button (the blue dot with the letter i in the middle) for access to all of the image metadata. Metadata is the information recorded to the image by your camera, and it includes such things as date, time, camera model, lens, shutter speed, ISO, and so on. To see a more extensive list of metadata, click the Complete radio button at the bottom of the panel (Figure 2.23).
The other two Properties views will allow you to see any keyword tags associated with the image, and the image’s history.
To dock the Properties panel to your task pane, click the small T-shaped icon on the right side of the Image Properties title bar. This will add the panel underneath the keyword tags. To undock, simply click that same icon (it changes shape just a little when docked), or click the small X on the title bar to close the panel completely.
FIGURE 2.23
The Metadata section displays the camera shooting data for the image.
Assignments
Now that you have imported some images, let’s get organized. Here are a few assignments to get you going.
Get Familiar with the Organizer
Your sorting and tagging will go better if you are comfortable with how your workspace is organized. Adjust your thumbnails so that you can see them comfortably. Then go into Single Photo view and use the left arrow and right arrow keys to skim through your images. Put the mouse pointer between the panels and try resizing them as well. Want to get rid of that task pane for a while? Look in the Window menu for the Hide Task Pane command. Press F11 to go full screen and get familiar with all that real estate.
Tags Are Key
Look at some of your images in the Media Browser and see if they have some qualities in common. Now create a keyword and try tagging them. Remember that you can use multiple keywords on one image. After you have a few different keywords, try isolating those images in the Media Browser by selecting the check boxes next to the keywords in the Keyword Tag panel.
Time for Some Albums
Remember that keywords and albums are different and yet very similar. Create an album called Email and then move some photos in there that you can send off to family and friends. (If you aren’t sure how to do that quite yet, don’t worry. We will cover that in a later topic. )
Clean Up Thumbnails with Stacks
Try selecting all of the photos from one of your shoots or import sessions. Now let the Organizer suggest some image stacks. When you are happy with the stacks, click Done, locate all of your individual stacks, and try unstacking them to get a feel for it.
