By : James W Zubrick
Email: j.zubrick@hvcc.edu
Forgetting the Glass
Look, the Corning people went to a lot of trouble to turn out a piece of glass (Fig. 24) that fits perfectly in both a glass joint and a rubber adapter, so use it!
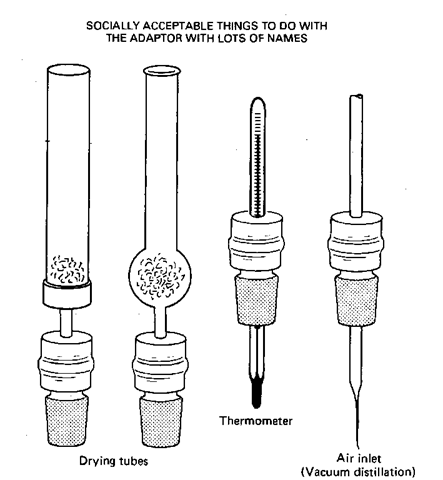
Fig. 23 Unusual, yet proper uses of the adapter with lots of names.
Fig. 24 The glassless glass adapter.
Inserting Adapter Upside Down
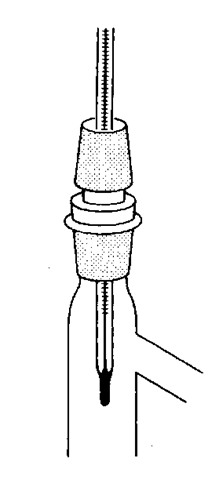
This one (Fig. 25) is really ingenious. If you’re tempted in this direction, go sit in the corner and repeat over and over, “Only glass joints fit glass joints”
Fig. 25 The adapter stands on its head.
Inserting Adapter Upside Down Sans Glass
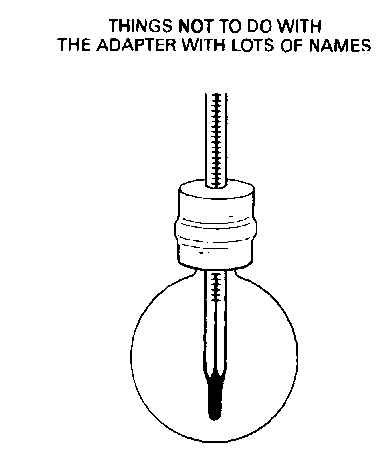
I don’t know whether to relate this problem (Fig. 26) to glass forgetting, or upside-downness, since it is both. Help me out. If I don’t see you trying to use an adapter upside down without the glass, I won’t have to make such a decision. So, don’t do it.
GREASING THE JOINTS
In all my time as an instructor, I’ve never had my students go overboard on greasing the joints, and they never got them stuck. Just lucky, I guess. Some instructors, however, use grease with a passion, and raise the roof over it. The entire concept of greasing joints is not as slippery as it may seem.
To Grease or Not To Grease
Generally you’ll grease joints on two occasions. One, when doing vacuum work to make a tight seal that can be undone; the other, doing reactions with strong base that can etch the joints. Normally you don’t have to protect the joints during acid or neutral reactions.
Fig. 26 The adapter on its head, without the head.
Preparation of the Joints
Chances are you’ve inherited a set of jointware coated with 47 semesters of grease. First wipe off any grease with a towel. Then soak a rag in any hydrocarbon solvent (hexane, ligroin, petroleum ether—and no flames, these burn like gasoline) and wipe the joint again. Wash off any remaining grease with a strong soap solution. You may have to repeat the hydrocarbon-soap treatments to get a clean, grease-free joint.
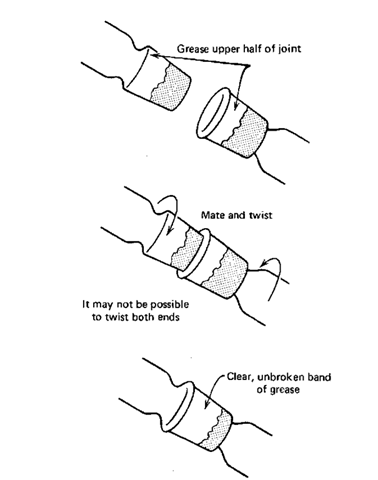
Into the Grease Pit (Fig. 27)
First, use only enough to do the job! Spread it thinly along the upper part of the joints, only. Push the joints together with a twisting motion. The joint should turn clear from one third to one half of the way down the joint. At no time should the entire joint clear! This means you have too much grease and must start back at Preparation of the Joints.
Don’t interrupt the clear band around the joint. This is called uneven greasing and will cause you headaches later on.
STORING STUFF AND STICKING STOPPERS
At the end of a grueling lab session, you’re naturally anxious to leave. The reaction mixture is sitting in the joint flask, all through reacting for the day, waiting in anticipation for the next lab. You put the correct glass stopper in the flask, clean up, and leave.
The next time, the stopper is stuck!
Stuck but good! And you can probably kiss your flask, stopper, product and grade goodbye!
Fig. 27 Greasing ground glass joints.
Frozen!
Some material has gotten into the glass joint seal, dried out, and cemented the flask shut. There are a few good cures, but several excellent preventive medicines.
Corks!
Yes, corks. Old-fashioned, non-stick-in-the-joint corks.
If the material you have to store does not attack cork, this is the cheapest, cleanest method of closing off a flask.
A well-greased glass stopper can be used for materials that attack cork, but only if the stopper has a good coating of stopcock grease. Unfortunately, this grease can get into your product.
Do not use rubber stoppers!
Organic liquids can make rubber stoppers swell up like beach balls. The rubber dissolves and ruins your product, and the stopper won’t come out either. Ever.
The point is
Dismantle all ground glass joints before you leave!
CORKING A VESSEL
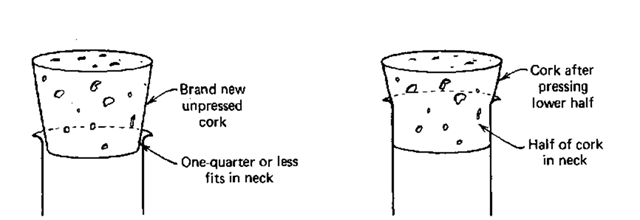
If winemakers corked their bottles like some people cork their flasks, there’d be few one ophiles and we’d probably judge good years for salad dressings rather than wines. You don’t just take a new cork and stick it down into the neck of the flask, vial, or what have you. You must press the cork first. Then as it expands, it makes a very good seal and doesn’t pop off.
A brand new cork, before pressing or rolling, should fit only about one-quarter of the way into the neck of the flask or vial. Then you roll the lower half of the cork on your clean bench top to soften and press the small end. Now stopper your container. The cork will slowly expand a bit and make a very tight seal (Fig. 28).
Fig. 28 Corking a vessel.
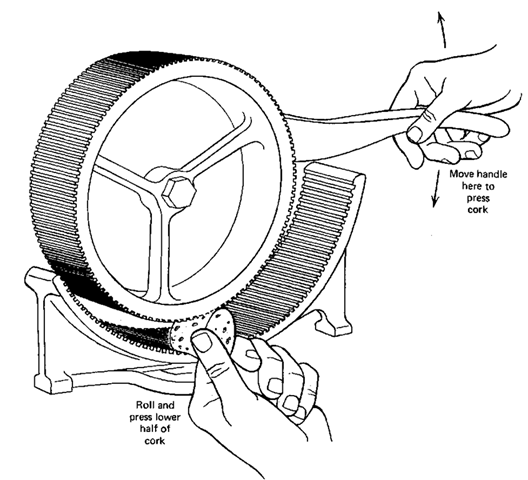
Fig. 29 A wall-mounted cork press.
THE CORK PRESS
Rather than rolling the cork on the benchtop, you might have the use of a cork press. You put the small end of the cork into the curved jaws of the press, and when you push the lever up and down, the grooved wheel rolls and mashes the cork at the same time (Fig. 29). Mind your fingers!
