This topic covers the following:
■ Using open source tools to create an application
■ Effectively using graphical assets given to you by a designer
■ Working efficiently with other developers on the same project
In the previous topic, you set up the open source tools necessary to create a Flash application. In this topic, you will see how to use those tools to create an application for a hypothetical website that allows you to view recipes online. While doing that, you will concentrate on those tools and explore some of the useful features they provide. You will also see how to create a smooth workflow between multiple people working on a single project.
The sample application you’ll create will read in an XML file that lists details about several recipes. It will then display a list of recipes with a quick preview of the currently selected recipe. When the user clicks a More Details button, the full recipe will be displayed. You’ll create three versions of this application in this topic: an ActionScript 3 Flash-based application, an ActionScript 3 Flex-based application, and lastly an ActionScript 2 Flash-based version.
Getting assets from designers
Flash development is often very user-interface-centric, which oftentimes means creating visually pleasing graphical assets. It is a rare person who can cross both worlds of development and design. As you’ll see from the examples later in this topic, I am not one of those people. I rely on the artistic ability of the designer I’m working with to make things that look good. During my Flash development career, I’ve worked with two main types of designers.
The first type of designers includes those who are used to working in the Flash IDE environment. They can both create static art and work with the timeline to create animations. With a little guidance, they can set up their work in a way that completely relieves me of having to modify it. This might mean sticking to some simple naming conventions or adding unique instance names to objects they create.
The other type of designers includes those who focus completely on the visual experience and expect me to take their work and somehow transform it into something functional. They might work in the Flash IDE but are equally as likely to work in Adobe Illustrator, in Adobe Photoshop, or in any other graphically oriented environment.
Although this topic focuses on open source development tools, there are some great open source design tools. Some of those tools include the following:
■ Paint.NET: http://www.getpaint.net/
■ GIMP: http://www.gimp.org/
■ Blender: http://www.blender.org/
In the next section, you’ll learn how to work with designers who can deliver a SWF with a logical structure and naming scheme. Later in this topic, you will learn how to use swfmill to transform simple graphics into a more complex SWF structure.
Integrating SWFs from designers
When working with designers who are capable of delivering content to you that’s ready to use, a short planning session before the work starts can save you countless hours later in the development cycle. During this planning session, you should come up with a way to organize the artwork and a simple set of naming conventions to use both within the art and for the names of the art files.
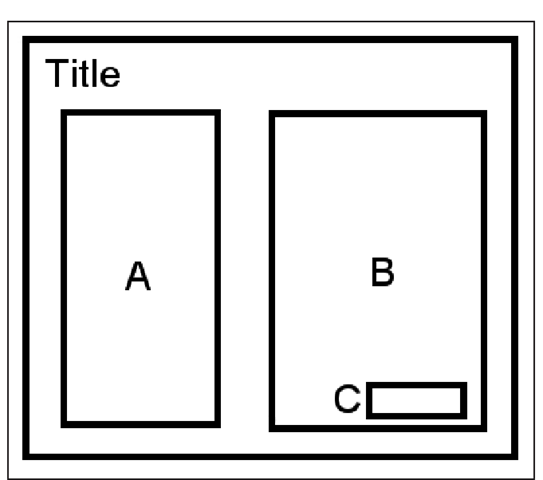
The first step in this planning session might be to create a quick wireframe that contains the different elements that will be present in the interface. The wireframe should try to identify the different components of the UI, without specifying how they will look. A simple wireframe for the recipe-viewing application in this topic might look like this:
The next step is to decide what the different pieces are and how to organize them. For the sample wireframe shown here, you might create the following guidelines:
■ The artwork will be delivered as assets in a SWF.
■ “Title” will be a static text element entirely under the control of the designer.
■ The section labeled “A” will be used for a list of recipe names. The designer will create a MovieClip with an instance name of recipeList_mc that will live on the stage in the Flash IDE.
The developer will programmatically populate it with text fields.
■ The section labeled “B” will be used for some details about the currently selected recipe. It will be a MovieClip with an instance name of recipeDetails_mc. Within this MovieClip, there will be the following elements:
■ A TextField named prepTime_txt that should be filled in with the amount of prep time that the recipe requires
■ A TextField named description_txt that should be filled in with a short description of the currently selected recipe
■ A Button (“C”) with an instance name of details_btn that should trigger the display of the details of the currently selected recipe
For those of you not familiar with the Flash IDE or the ActionScript API, MovieClip, TextField, and Button are all native constructs in the Flash environment. The designer can easily create these using the IDE, and the developer can manipulate them through ActionScript (asyou’ll see later in this topic).
After a wireframe is made and a set of conventions is created, the designer is free to go off and create the content. At the same time, the developer is free to begin developing the component without waiting for the designer to finish. This sort of parallel development can help cut development time.
By coming up with this list of guidelines, it gives the designer great flexibility in the look of the application. If he decides to change the layout by putting “A” above “B” instead of next to it, or if he decides to completely rework the artwork and color scheme, he’s free to do so at any point in the development cycle without involving the developer, as long as the same logical structure is followed.
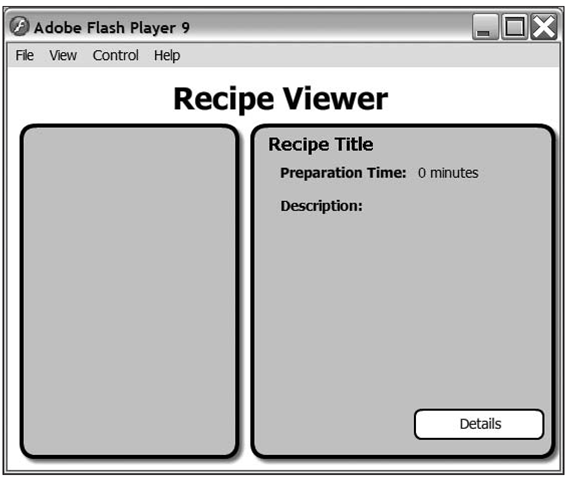
At this point, it’s often helpful for either the designer or the developer to quickly mock up the interface in the Flash IDE so both have something to work from. See Figure 4-1 for a mock-up of the example interface.
Figure 4-1. The developer-made mocked-up interface for the Recipe Viewer application
After you have the assets delivered from the designer, the method to integrate those assets is a little bit different depending on whether you’re doing ActionScript 3 development with the Flex SDK or doing ActionScript 2 development using MTASC as your compiler. Later in this topic I’ll go over both of these scenarios.
Creating some data
The first step to displaying some useful information is to create that information. Since you’re building a recipe-viewing application, you need to come up with a list of recipes. You’ll hold the list in an XML file to make it easy to parse out the different parts.
Creating the XML file
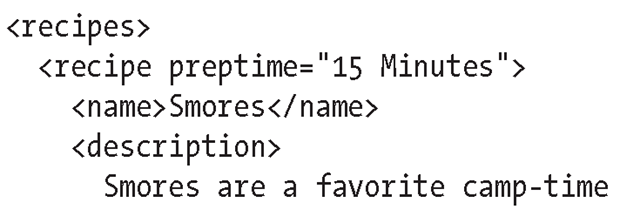
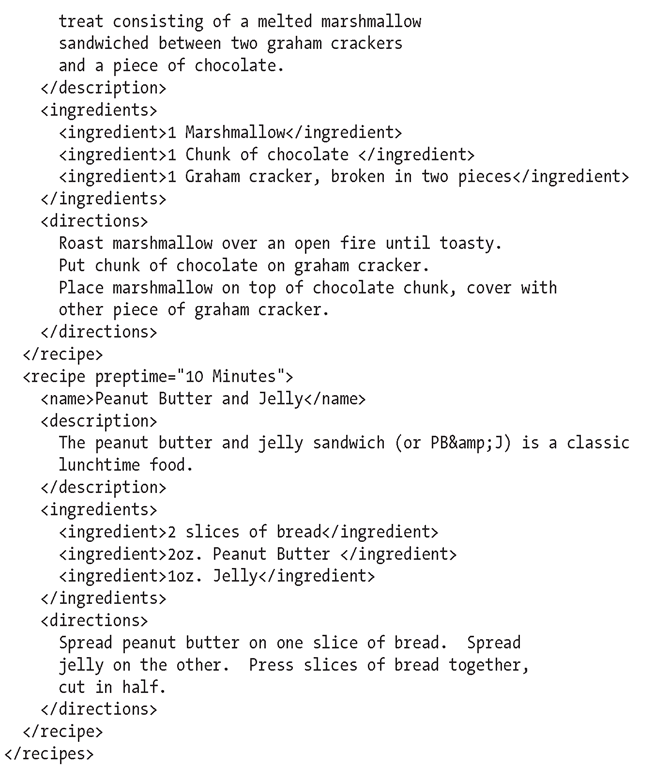
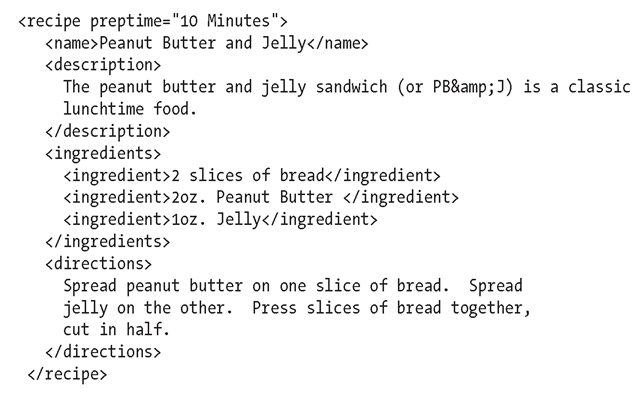
Create a new file called recipes.xml in your project folder. Then add a couple of your favorite recipes to it in the following format:
Both FlashDevelop and Eclipse allow you to create and edit XML documents. In FlashDevelop, select the File > New > XML Document menu option. Depending on how your Eclipse environment is set up, you might find an identical menu option, or you may have to select File > New > Other and choose XML from the resulting dialog box.
With an XML data file and some sample mock assets, you’re ready to start developing the recipe-viewing application.
By using an XML file like this, you could later swap out a static XML file with the results from a web service that either you or another developer creates.
ActionScript 3 development
There are two significantly different workflows for ActionScript 3 development. One uses a Flash-based development model with Sprites, MovieClips, and so on. The other follows a Flex-based model using the Flex components that are often declared in MXML files in addition to ActionScript files. Using FlashDevelop to accomplish both of those workflows is described in the following sections. If you’re using OS X or Linux, you should be aware that it’s also possible to do ActionScript 3 development using FDT. If you’re interested in that, the later “ActionScript 2 development” section closely mimics what you will see in that environment.
Creating a Flash application with FlashDevelop
If you don’t, you can create a new FlashDevelop project from scratch or copy the one provided in the downloadable archive for this topic from the friends of ED website.
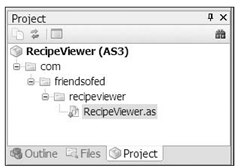
Figure 4-2. The modified package structure of the Recipe Viewer sample application
To better organize the application. Specifically, you’ll put the main application class in a package structure called com.friendsofed.recipeviewer. To do this, create three new directories named com, friendsofed, and recipeviewer within each other by right-clicking in the FlashDevelop Project panel and selecting Add > New Folder. Once that’s done, move the RecipeViewer.as file into that newly created directory. The final file layout should resemble Figure 4-2. After doing that, update the package line at the top of the class to reflect the new structure:
Entering the code
To begin the new development for this project, you’ll add a new data object class to represent a single recipe. While you’re making that, let’s add the ability to parse out a single recipe XML node to the values in that class.
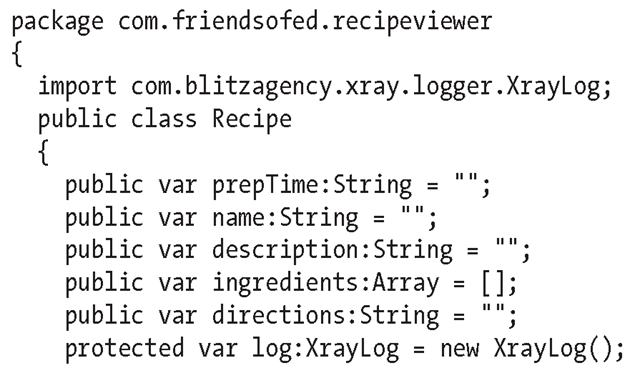
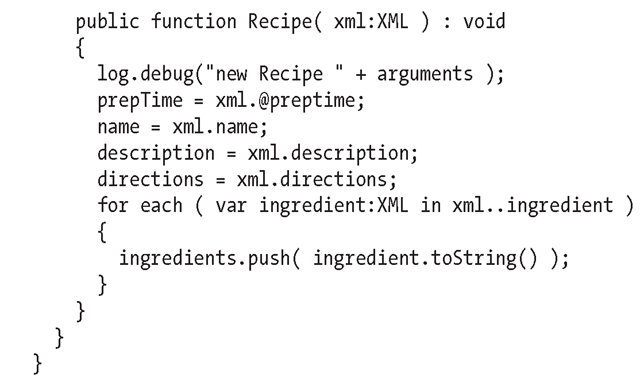
Right-click the recipeviewer folder in your Project panel, and select Add > New Class. Give the file a name of Recipe.as, and enter the following code:
This class has several public variables to hold some details about a single recipe. The constructor takes an XML node and is capable of parsing a single <recipe> node from the sample file using E4X. The following is example input that it can parse from the XML format:
While typing your code, you may notice a small pop-up list sometimes appears (see Figure 4-3). This is a context-aware code completion mechanism of FlashDevelop that you can access at any time by pressing Ctrl+spacebar. You can continue typing your code and ignore it, or you can use the up/down arrows on your keyboard to select one of the suggested completions and then press Enter to use it. Pressing the Escape key will cause the window to close if it’s obscuring a part of the code you want to view.
Figure 4-3. The FlashDevelop context-aware completion list
FlashDevelop also has code-folding capabilities. In the far-left margin of the text editor are a series of small boxes with minus signs in them. Clicking these will collapse the visible portion of the code, hiding the block-level element that was represented by that box. This allows you to hide the code of a class, function, or control structure (if, for, while, and so on) so you can see the “big picture.”
In the code you entered, notice the use of the XrayLog object.
Later, during development, you’ll also need to be able to access the ingredient list as a formatted string, so while you’re writing this class, let’s add a quick helper method that will concatenate all the ingredients, one per line, into a string:
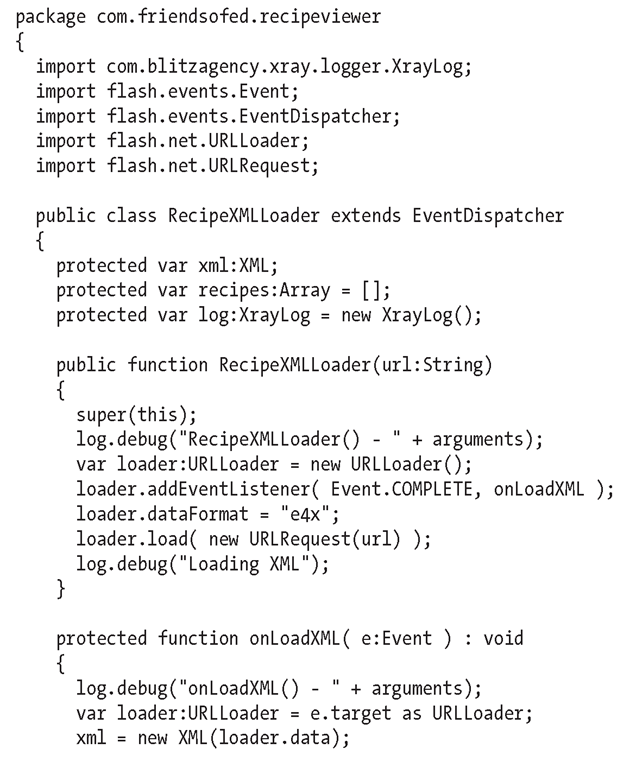
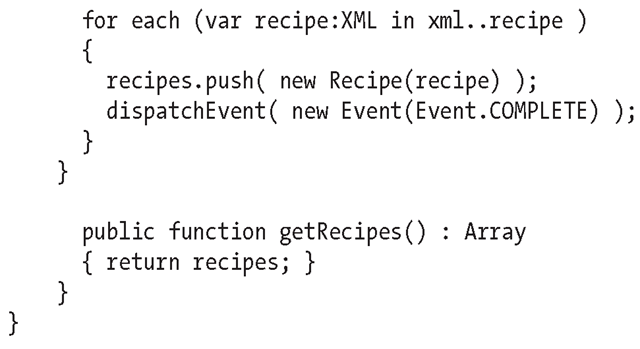
Next, create a new class in the recipeviewer folder called RecipeXMLLoader, and enter the following code. This will allow you to load and parse the XML data file you previously created.
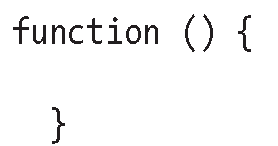
While entering in this class, try to take advantage of FlashDevelop’s snippets feature. Snippets are small chunks of commonly used code that can be inserted into your file quickly. They help reduce the amount of typing you need to do. To use the snippets feature, press Ctrl+B. A pop-up menu will appear with the available snippets. Select one using the keyboard and then press Enter. This will insert a block of code into your file. For instance, the function snippet inserts the following code:
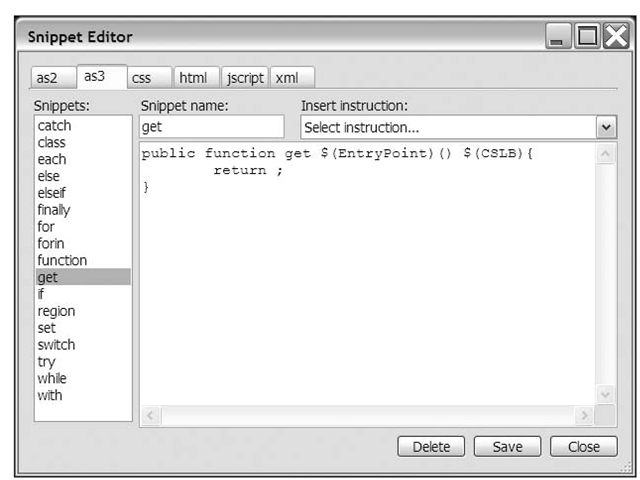
This also places your cursor just to the left of the parentheses, allowing you to type a new function name. There are many premade snippets; to view them, select the Tools > General Tools > Snippet Editor menu option. This will display the Snippet Editor dialog box, as shown in Figure 4-4. Along the top of that dialog box are tabs for the different languages for which FlashDevelop has snippets.
Figure 4-4. The FlashDevelop Snippet Editor dialog box
Besides viewing the available snippets, you can also create your own in the Snippet Editor dialog box by entering a new name for your snippet and the code that you want to appear when the snippet is selected, and then clicking the Save button. Snippets can contain special variables like $(EntryPoint) in the previous example. The $(EntryPoint) variable tells FlashDevelop where to place the cursor when the snippet is inserted. You can find other variables and what they mean in the Insert instruction pull-down menu.
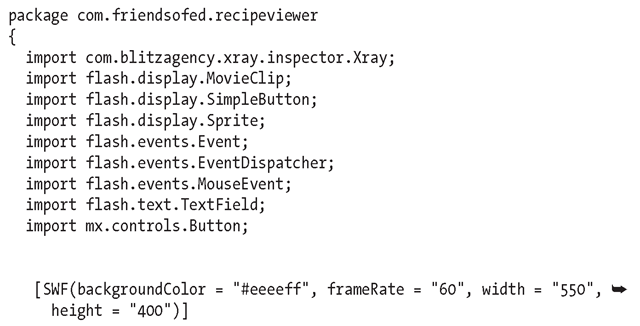
After you’ve created the RecipeXMLLoader class, you can fill out the rest of your RecipeViewer class. Open the RecipeViewer.as file, and modify it as follows:
Add a SWF metatag before the class declaration. Metatags are specified in ActionScript 3 with bracket notation. The SWF metatag defines properties for the size, frame rate, and background color of the exported Flash application.
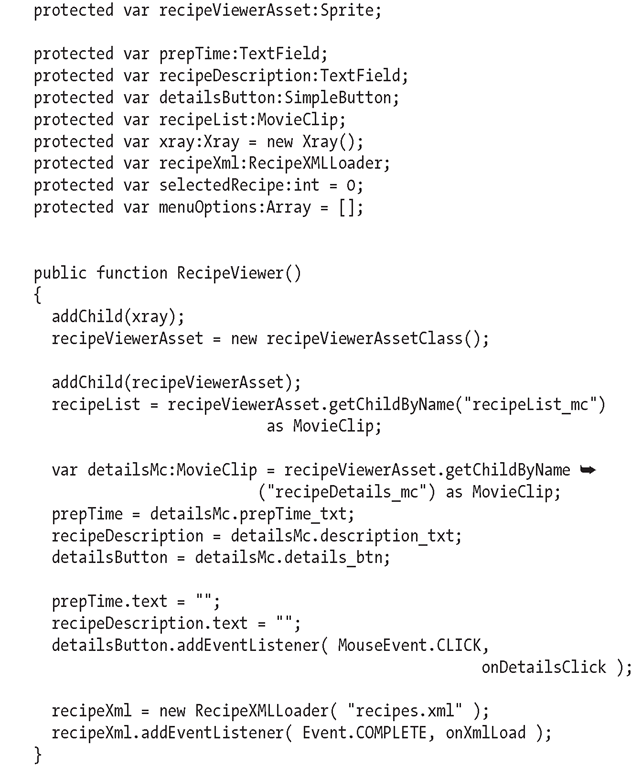
Next, add a new variable in your class declaration, and embed a mocked-up RecipeViewerAssets.swf file. The Embed metatag causes the Flex compiler to embed an asset into the application and make it available using the variable declared after it. Here you’re using it to learn how to embed the RecipeViewerUI symbol from a SWF provided to you by a designer or other source. You can also embed graphic files in JPEG, GIF, or PNG format if your designers prefer to work with tools that output those formats.
The download for this topic comes with a sample RecipeViewerArtAssets.swf file that you can use for this topic. Simply copy that file into your project directory so that FlashDevelop and the Flex compiler can find it.
Next, modify the RecipeViewer constructor, as shown here:
This assigns various parts of the UI to variables that you can access later and starts the loading of the XML file that contains the recipe data. The constructor also sets up a click handler, so when a user clicks the Details button, the onDetailsClick method is called.
Next, create a new onXmlLoad method, as shown here:
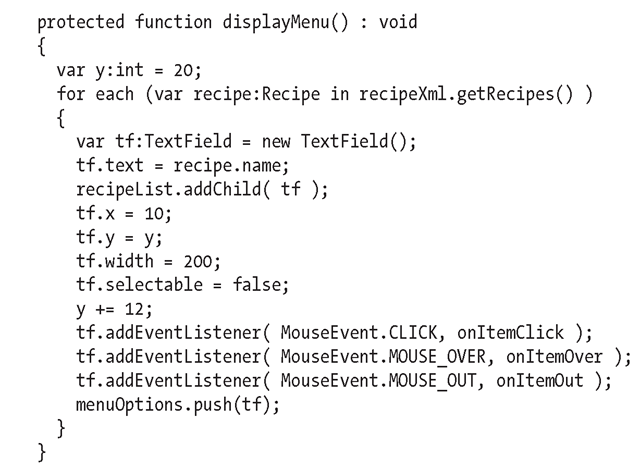
This serves as an event handler and is called once the XML file is loaded into the application. When that’s complete, you want to set up the menu of available recipes and display the first one in the list, so let’s call two methods to do that. The code for those new methods follows:
The display Menu method dynamically creates a TextField object for each recipe that was loaded. It sets three mouse event handlers to handle clicking and changing the color of the text when the mouse hovers over or out of the recipe label.
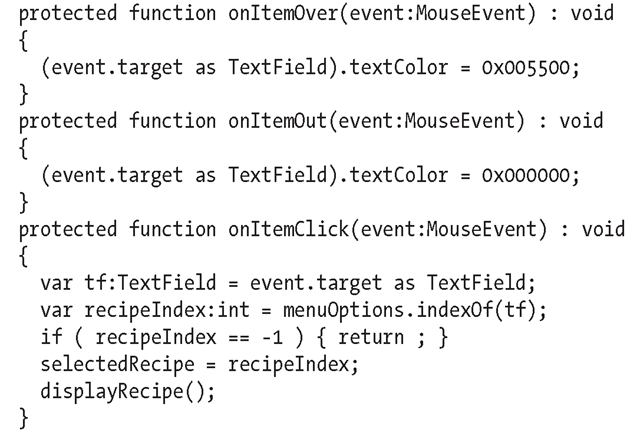
Next, write the code for those three mouse event handlers:
The onItemOver and onItemOut methods handle changing the color of the text as the user hovers over the field. When an item is clicked in the menu, the onItemClick method will display the new recipe in the right-side panel of the UI using the displayRecipe() method.
Finish up this class with the following code:
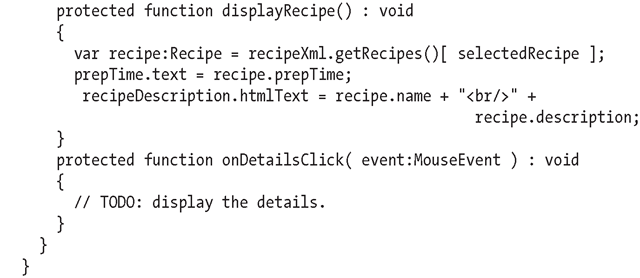
The display Recipe method takes care of actually showing the recipe in the panel on the right. It uses the prepTime and recipe Description variables that you set up in the constructor of the class. You also created a blank onDetailsClick event handler to take care of a click on the Details button; you’ll finish that later in this topic.
