Expand Your Awareness
Time-lapse photography has been practiced for decades and it never seems to grow old. From the early work of Dr. John Ott in the 1930s to the phenomenal motion photography of Ron Fricke in films like Koyaanisqatsi to Baraka in the 1980s and 1990s, time-lapse photography has allowed us to see the world with a fresh point of view. This technique of stopping the camera and shooting frames at an even and given rate allows viewers to see events sped up in time. It is the complement to slow-motion photography, and it reveals the movement in the world around us in a way that we could never experience from normal observation. Ott’s early experiments showed the blossoming of flowers, and Fricke’s work captured the flow of clouds like turbulent water and the flow of human urban movement like blood pulsing in our veins.
Time is often considered the fourth dimension, and time-lapse filming steps into this arena. This kind of stop motion allows us to observe nature in the forms and textures that we understand as natural, since we are using photographic images, but it delivers the added dimension of an expanded view of time. As a result of these properties, scientists have turned to time-lapse photography to help understand our universe and our place in it. Astronomers observe the skies and stars at night using time-lapse sequences. It allows them to see the patterns of movement and development around us. When John Ott started using time-lapse photography, he became fixated on the blossoming of flowers. This observation led him to become an expert on the effects of light, and he used that information to improve our lives through a better understanding of ultraviolet and infrared rays.
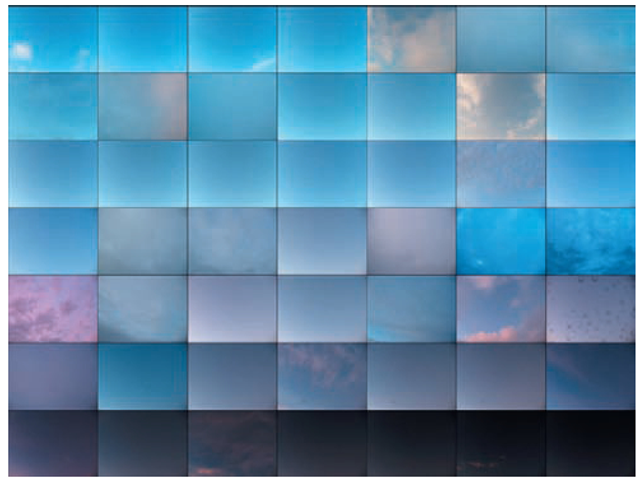
In San Francisco, an experiment is taking place on the roof of the Exploratorium. Ken Murphy, an artist with a background in electronics, mounted a stationary camera on the roof and is capturing the moving sky above the building. His project is called A History of the Sky. He shoots one 1024 X 768 high-resolution frame on a digital camera every 10 seconds each day, so one movie is the evolution of that day compressed into a short 6 minute sequence. He then places all of the movies for each day of the year next to each other in a grid formation synchronized to the second, and it is easy to see the changing patterns of light and weather over a year and how the ebb and flow of these patterns work. It is both scientific and aesthetic in nature.
FIG 4.1 A sequence of time-lapse frames from Ken Murphy’s A History of the Sky,
"I’ve found that A History of the Sky elicits a wide range of emotional responses in viewers. By presenting a visual representation of an entire year in just a few minutes, one gets the sense of the fleeting nature of time, which can have a powerful emotional impact."
Ken Murphy
The Intervalometer
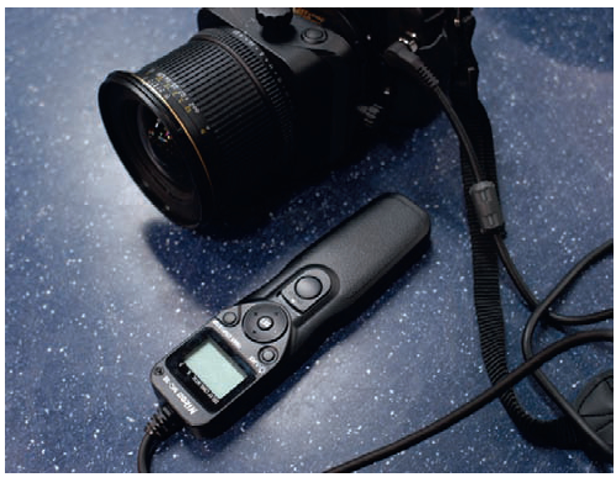
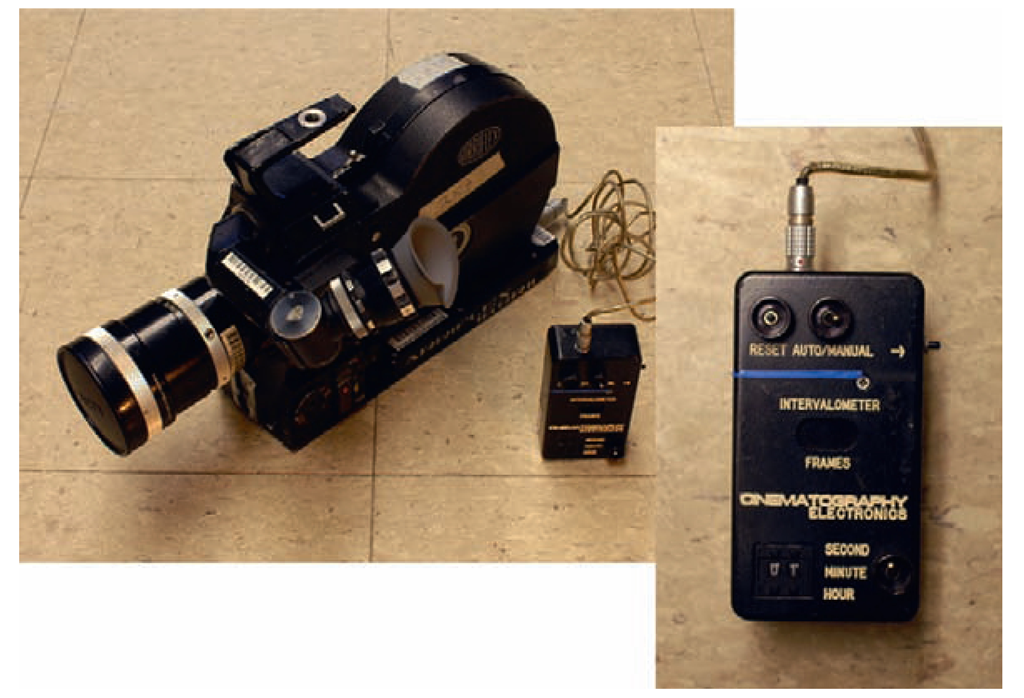
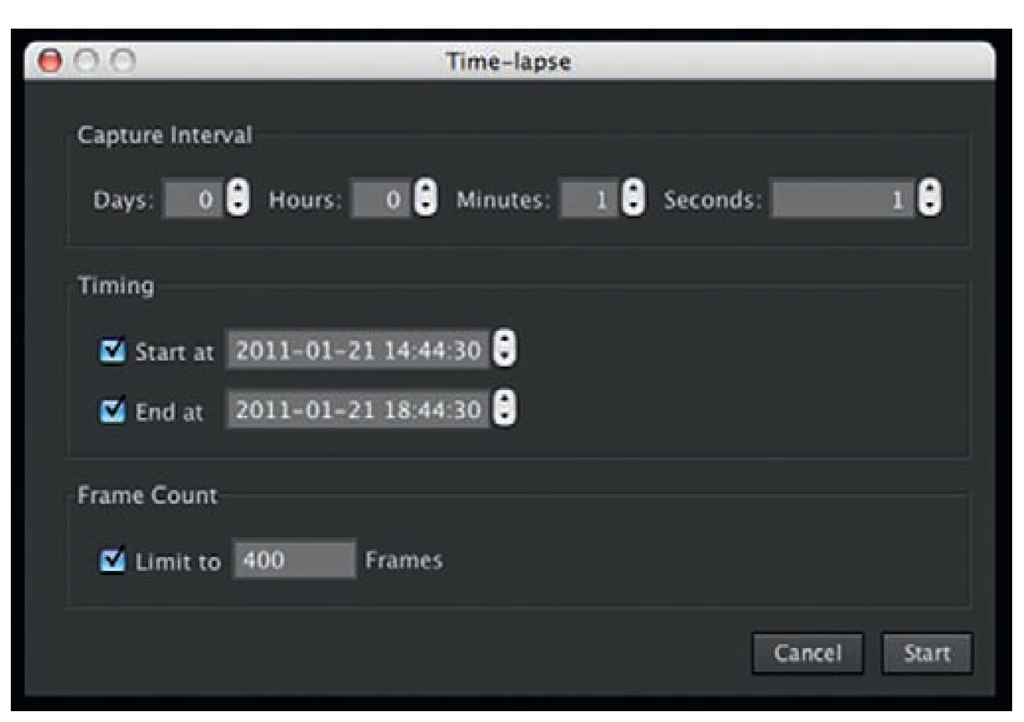
The only way to observe the natural evolution and timing of any event is to record that event at an even rate or interval of shooting. In pixilation, the camera operator can shoot frames at random times, depending on what is going on between frames. Pure time-lapse filming must be shot at equal intervals, so the regular or irregular timing of an event can be observed. This can be a tedious shooting process unless the shutter of the camera is hooked up to a clock that releases the shutter at a particular rate. This clock is called the intervalometer. Some digital still cameras, like Nikon, have an intervalometer built in, but most require a special remote shutter-release component that has the ability to program in time-lapse events. Film cameras also require special intervalometer timers to be attached to them for shutter-release capabilities. The other option for digital video or still cameras is to hook them up to capture software programs, like Dragon, Stop Motion Pro, or Framethief. They all have intervalometers as an option for shooting.
Fig 4.2 a remote shutter release that has an intervalometer option.
FIG 4.3 A film camera intervalometer that controls its time shutter release.
FIG 4.4 The control panel for the time-lapse option in Dragon Stop Motion software.
This idea of an expanded awareness of the world around us can easily be demonstrated in the following exercise.
Take a single-frame digital still camera and power it from the adapter that you plug into the wall. Hook up the camera to a computer that has a capture software program with an intervalometer (time-lapse) option. Mount the camera high on a tripod over the bed where you sleep at night. Stabilize the camera with sand bags or tape down the tripod to the hard floor. Set the shutter, iris, and focus to "manual" mode. Have a small nightlight in the bedroom that gives off a small amount of light, enough to give the room a low exposure with all the other lights off. Leave this light on as you go to sleep. Set the iris to f 5.6 or wider (i.e., f 2.8) and adjust the shutter to whatever is required to get a decent exposure with just the nightlight on. Just before you go to bed, set the intervalometer to shoot every 15 seconds at your optimum exposure. The daylight may overexpose the frame when morning light comes through the window, but do not be concerned with this. Set the camera maximum frame count to 2000. If you shoot a frame every 15 seconds, there will be 4 frames for every minute of sleep. There will be 60 (60 minutes to an hour) times 4 frames for every hour of sleep (240 frames), and if you sleep 8 hours, then you will have 1920 frames available (8 X 240). You will see what your sleeping habits are and have a greater understanding of a part of your life of which you were never aware. For a little extra fun, you can mount a clock near the lens with a small light on it so you can associate your sleeping patterns with a specific time. This is the power of time-lapse photography.
Understand Your Subject
To make a successful time-lapse film, you must choose an appropriate subject and study it carefully before shooting the first frame. Some events cannot be controlled or predicted, but making initial observations will tell you the length of the event, the extremes of the potential transformation in the event, the way light and exposures change during the event, and the external conditions that need to be accounted for to set a stable camera. Companies like Harbortronics build special housing and controls for time-lapse cameras that allow you to shoot outdoors in most any condition. As Eric Hanson, a veteran effects artist and associate professor at USC, states,
"We shoot primarily during trips to remote wilderness areas, thus there is some preplanning using Google Earth and the like, but much is reserved for serendipity, as weather and geography are always an unknown. We did some elaborate preplanning once when shooting from the lower ‘Diving Board’ of Half Dome in Yosemite Valley, where we wanted to pay homage to Ansel Adams’s ‘Black Monolith’ shot. We found the exact time of the terminator shadow sweeping across the face in his shot by writing a script to download time-lapse frames of a webcam of Half Dome, studying it over many months and determining when the best time of year and day would be to shoot. Of course our work is dwarfed by Ansel’s, but it was an interesting and fun process"
A wonderful tool can help you plan the path of the sun when you are scouting out a potential time-lapse location: an iPhone application called Sun Seeker. It shows you the path of the sun with a superimposed line over any live camera view from your iPhone. It calculates the path from day to night any time of the year, so you can plan ahead knowing where the sun will be if you scout a location months in advance.
When you choose a subject for time-lapse filming, think about the environments that you go through every day. These are the environments you understand from constant observation and might make the best subjects. You will know where you want to set the camera, what occurs during any period of time, and where any movement is concentrated. It is important to have dramatic transformation in the environment or find an action that is too slow to perceive. The dramatic transformation makes for an interesting sequence, and the slow action or transformation sped up with time-lapse film is fascinating to see and potentially revealing from an observational point of view.


