VIPER Tips
Here are a few more VIPER tips before you move on:
• Never trust VIPER as your final render. If something looks odd, always make a true render (by pressing F9 or F10) to check final surfacing.
• You can use VIPER to see animated textures by selecting Make Preview from the Preview drop-down list in the VIPER window.
• Press Esc to abort a VIPER preview in progress.
• Click Draft Mode in the VIPER window to reduce redraw time (and render quality).
• Clicking on a particular surface in the VIPER window instantly selects it in the Surface Editor’s Surface Name list. This is a great feature and can save you a lot of time on complex textured scenes.
• VIPER is available only in Layout, not Modeler.
• To move beyond VIPER, visit www.worley.com and check out the FPrime plug-in. This killer LightWave plug-in allows real-time previews of just about everything in Layout, including reflections, ray-tracing, and transparency.
Common Surface Settings
To take you even further into the LightWave Surface Editor, try Exercise 3.2.
Exercise 3.2 Applying a Reflection to a Surface
You may sometimes have a project that requires you to use a building, vehicle, machine, toilet, or something completely different from what you’re used to working with. This could be an object that you’ve created yourself, purchased, or downloaded from public archives on the Internet. Follow these steps to apply a simple reflection to a surface:
1. Be sure to save any work you’ve completed thus far. Start Layout, or if it’s already running, choose File > Clear Scene.
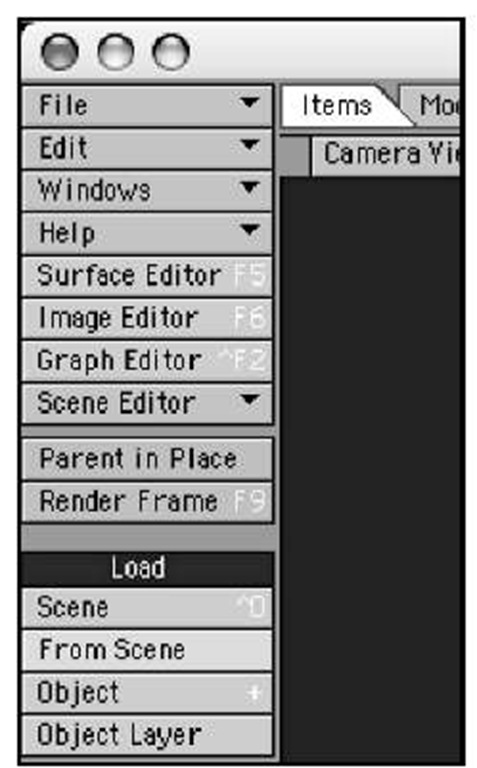
2. From the DVD that accompanies this topic. To load the scene, go to the Items tab, and then on the left side of the interface, click the Scene button under the Load category, as in Figure 3.22.
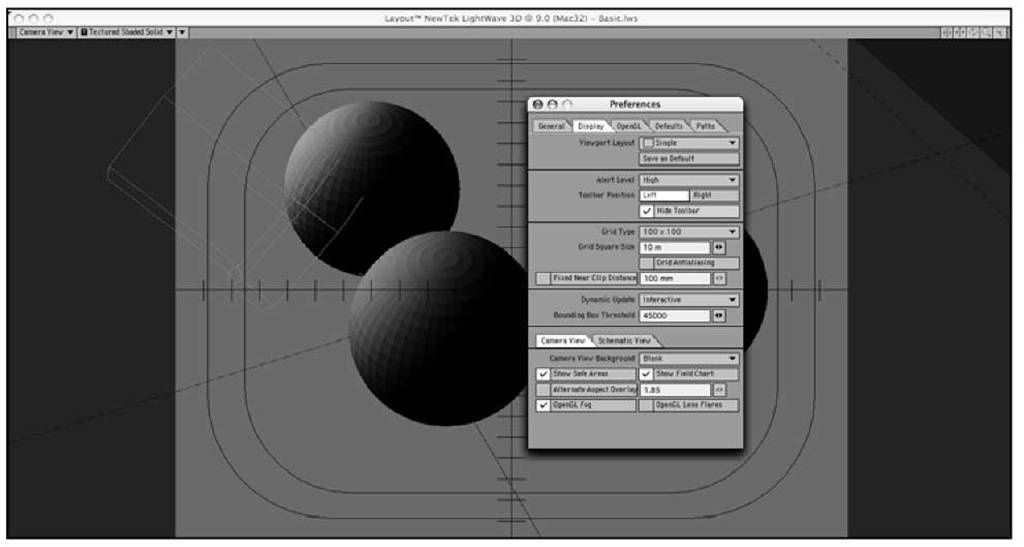
Here’s a very handy tip: You can hide all the toolbars and menus in Layout and work with just the keyboard and mouse. Press d on the keyboard to access the Display Options tab of the Preferences panel. Select Hide Toolbar (see Figure 3.23).
Figure 3.22
Load a basic scene into LightWave to set up some surfaces.
Figure 3.24
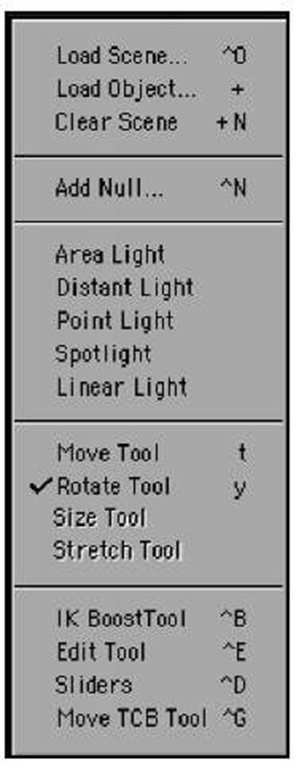
Display Load Scene and other valuable commands in this contextual menu by Ctrl+Shift+ clicking in the Layout window.
Now when in Layout, you can access the Surface Editor (or any other panel) by Ctrl+Shift +clicking in the Layout window (using either the left or right mouse button).This pops up the list of commands and menus you’ve just hidden away (see Figure 3.24)! Press d again to access the Display Options panel to unhide the toolbar. Now that you know where things are located, just use Alt+F2 to hide and unhide the toolbar. You can also open the Surface Editor quickly by pressing F5.
Figure 3.23 You can use the Display Options tab to hide Layout’s toolbars.
Note
Remember that you should be using LightWave’s default interface configuration for all tutorials in this topic.To make sure you are, press Alt+FI0 on the keyboard to call up the Configure Menus panel. Click the Default button from the Presets drop-down list at the top-right side of the panel’s interface. If it is dimmed, you already have the default interface set. Click Done to close the panel.
3. After the scene has been loaded, click the Surface Editor button on the left side of the interface to open the Surface Editor panel.
You can see that by default, the object name appears in the Surface Name list.
4. Clicking the small triangle to the left of the BasicBalls filename opens and closes the Surface Name list for that particular object.
All the surfaces associated with the BasicBall object appear, as shown in Figure 3.25.
Figure 3.25 When an object is selected in Layout and the Surface Editor is opened, the selected object’s surfaces are listed.
Note
If you have more surfaces than you do space in the Surface Name list, a scroll bar appears. Simply click and drag to view the entire surface list.
5. LightWave enables you to resize the Surface Editor panel simply by clicking and dragging on the edge of the panel. Click and drag the bottom edge to stretch out the panel. Conversely, you can collapse the panel by clicking the small triangle centered at the top of the interface, and you can simply select your surfaces from the Surface drop-down list.
Note
Naming your surfaces is half the battle when building 3D models. If you name your surfaces carefully, you’ll save oodles of time when you have many surface settings to apply. Organization is key! You name your surfaces in Modeler, as explained in previous topics.
6. In Layout, make sure you’re in the Camera view. You should be already, because the scene was saved this way before you loaded it. If not, switch to Camera view by selecting the drop-down list at the top-left side of the viewport title bar. Then, select the Backing surface from the list within the Surface Editor.
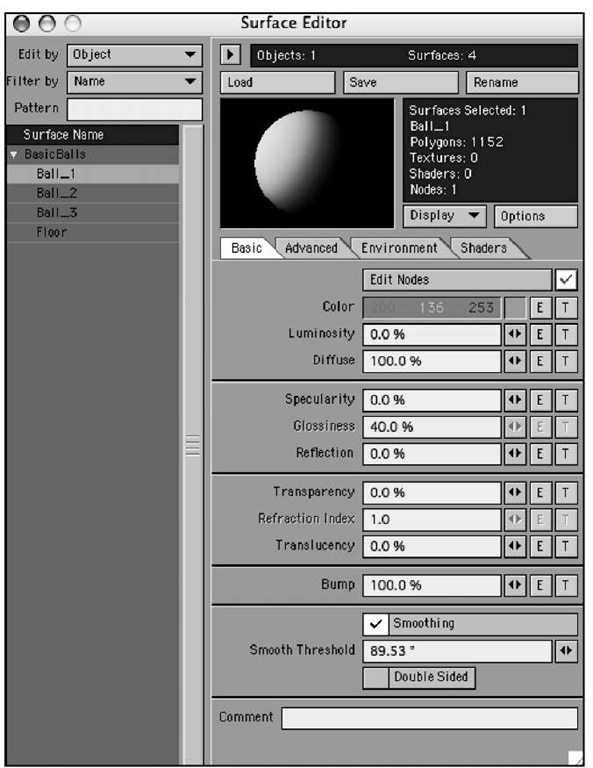
When a surface is selected, the name appears in the information window to the right of the surface preview. The number of polygons associated with that surface also appears. In this case, the selected surface, Ball_1, has 1,152 polygons, as shown in Figure 3.26. You’ll also see a display at the very top of the surface panel that indicates the number of objects and surfaces in the scene.
Figure 3.26 Summary information on the selected surface is displayed at the top right of the Surface Editor panel.
7. Because you simply can’t have dull balls, you need to shine them up a bit. Make them look pretty. You can even make them look like glass, or brass! First, you want the color of the glass to be a soft grayish blue color, so set the RGB value to 180, 180,200.
There are a few ways to set a color to the glass surface of the watch. Under the Basic tab within the Surface Editor, you’ll see the Color listing at the top. There is an RGB value indicator with a small color sample. This small area offers you a lot of control:
• Left-clicking on the small, colored square next to the RGB values makes the standard system color palette appear. Here, you can choose your color in RGB (red, green, blue), HSV (hue, saturation, value), or from custom colors you may have set up previously.
• Right-clicking and dragging on the small colored square next to the RGB values in the Surface Editor changes all three values at once. This is great for increasing or decreasing the color brightness.
• Clicking the left mouse button on either the red, green, or blue numeric value and dragging left or right increases or decreases the color value. You will instantly see the small color square next to the RGB values change. You’ll also see the sample display update.
• If you’re not keen on setting RGB values and prefer HSV values instead, rest easy. Clicking once on the RGB values with the right mouse button changes the selection to HSV (Figure 3.27).
Figure 3.27 Right-clicking on any RGB value in the Surface Editor’s Basic tab changes the color-selection tool to HSV mode, and vice-versa.
Note
HSV represents hue, saturation, and value. It describes colors directly by their overall color, unlike RGB values, which are three discrete subcolors. HSV is another way to change color values. However, you might have more flexibility using RGB values.
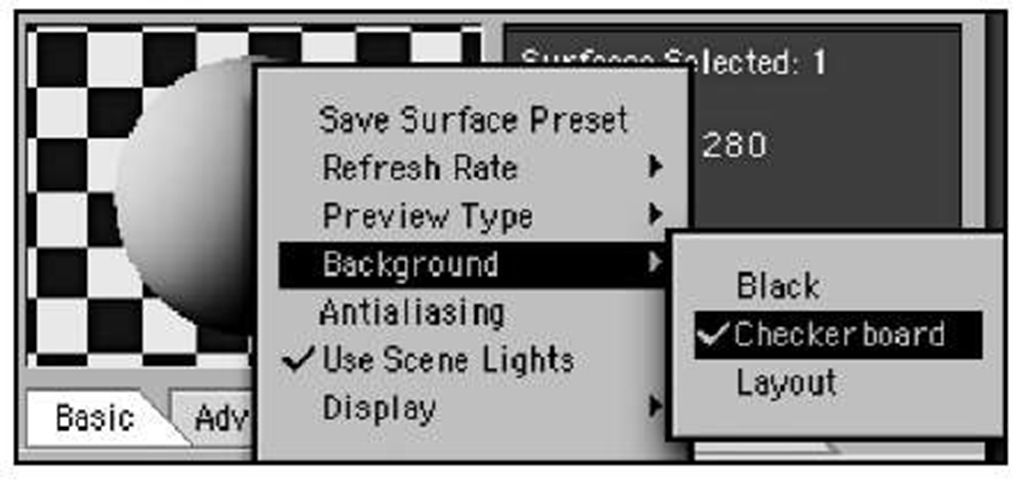
• Make sure you’re using the display preview options as you like them. Right-click on the surface preview window to show more controls and options (Figure 3.28).
Figure 3.28 Right-clicking on the surface preview window in the Surface Editor offers more control over how the surface is displayed. Here,you can set a checkerboard background, which is great for transparent surfaces.
With the Glass surface set to the soft gray color, you still need to see what’s under it! You’ll need to make the glass transparent and shiny. This next tutorial discusses surfacing the glass while introducing you to the rest of the Surface Editor.
