The Dope Track
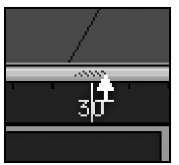
There’s a hidden feature in the Layout timeline that you may or may not have found. If you move your mouse just above the timeline, right in the center, a small arrow appears, as shown in Figure 2.9.
When you see the arrow, click the bar that separates the Layout view and the timeline. The LightWave 9 Dope Track appears, offering additional control over your keyframes. See, it’s all about control—the more you have, the better!
Figure 2.9
Just above the timeline in Layout, you can click to open the Dope Track.
A Dope Track is a short or mini version of a dope sheet. What’s a dope sheet, you ask? It is a page that outlines all of your keyframes, motions, and timing. LightWave v9 has its own Dope Sheet feature, which we’ll get to later in this topic. For now, the Dope Track is a simplified version of the Dope Sheet that offers you enhanced control over your keyframes. You’ll use this during animation tutorials later in this topic.
Exercise 2.2 Working with the Dope Track
To get an idea of how the Dope Track works, do the following:
1. Click the top center of the timeline to pop open the Dope Track.
2. You should still have your three-keyframe animation in Layout from the previous exercise, and you can use that. This scene is nothing more than one camera with three keyframes applied at 0, 30, and 60.
3. You’ll see what looks like a second timeline appear above the first timeline, as in Figure 2.10.
Figure 2.10 When the Dope Track is opened, you’ll see what appears to be an additional timeline, above the standard timeline.
4. With just three keyframes applied to the camera, you can see their representations in the Dope Track.
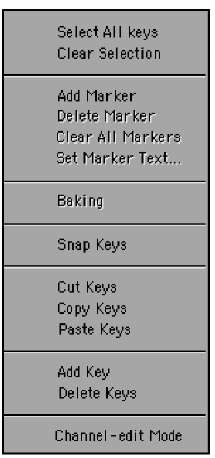
5. If you right-click on one of the keyframes in the Dope Track, you get a list of commands available to you, as in Figure 2.11.
Note
Mac users! Remember to Cmd-click key to simulate right mouse button functions. Hey, did you go out and get a two-button mouse yet?
Figure 2.11
Right-click on one of the keyframes in the Dope Track, and you are greeted by a list of tools.
Some of these commands are ghosted with such a simple scene. However, as you build more complex animations, you’ll find these tools very useful. Here are some tips to demonstrate the power of the Dope Track:
• The Dope Track shows keyframes for objects based on their individual X-, Y-,and Z- axes, as opposed to those of the overall scene. If you create a keyframe for an object when its axes are aligned with those of the main scene, and then use the Rotation tool to change the object’s heading, pitch, or bank, the keyframe you made will still be there, but you’ll no longer see it in the Dope Track. That’s because the object’s relative axes will be different from those of the scene.
• The Dope Track enables you to adjust objects’ X, Y, and Z positions independently, for any given keyframe.
• In the Dope Track, the left mouse button selects keyframes.
• Hold down the Alt key and click-drag in the Dope Track to select a range of frames called a local zone. In this zone, you can bake keyframes for Move and Rotate operations. Baking is the process of converting frames interpolated by LightWave into actual keyframes. Conversely, holding down both the Alt and Shift keys sets a zone, allowing you to bake a keyframe for all objects in the scene.
• If you hold the Alt key and click-drag to select a range of keyframes in the Dope Track, you can make copies of those keyframes while leaving the originals untouched.
• To delete a zone you might have created with the previous step, hold down the Ctrl and Alt keys and drag.
• You can grab the arrows on either end of a zone to make it longer or shorter. Or, grab in the center to move a zone.
• You can snap keyframes in the Dope Track. LightWave’s General Options (press o in Layout) allow you to turn on a feature called fractional keyframes. With this feature enabled, you can snap the selected keyframe to the closest whole keyframe, such as 1,2, or 5. A fractional keyframe is in between a whole keyframe, such as 1.3 or 2.7.
• A really cool feature of the Dope Track is support for copying and pasting keyframes. When you paste copied keyframes in the dope track, their placement is determined by the slider in the timeline: The first pasted frame is inserted at the slider position.
Note
Don’t worry about all of the details of the Dope Track right now. Review the information here,then when it’s time to animate later in the topic, you’ll see this section in action.
Layout Viewports
Like Modeler, Layout has multiple viewports. Look at Figure 2.12. Here, you can see the viewport controls at the top of the Layout window, as you did in Modeler.
Figure 2.13 shows the viewing options available for each viewport you’re working in, such as Light view or Camera view.
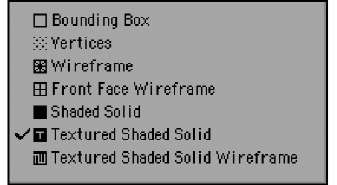
Figure 2.14 shows the viewport render-style pull-down, which allows you to view objects in Layout as bounding-box or wireframe forms or as solids, even with textures applied.
Figure 2.12 The default Perspective view in Modeler can be changed to any other viewport style from the drop-down at the top of the interface.
Figure 2.13
Click the list at the top of the Layout viewport to change which view you work in.
Figure 2.14 You can also choose how the objects in the viewport will be drawn.
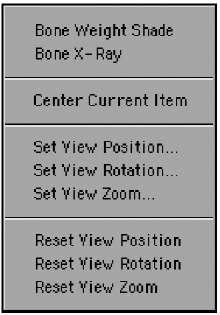
You’ll find that you change these views often, depending on the project at hand. Just to the right of the viewport styles drop-down at the top of the frame are additional view options (Figure 2.15), such as Bone X-Ray mode. This mode enables you to see any bones applied to an object, even if the object is solid, hence the X-Ray title.
Multiple Viewports
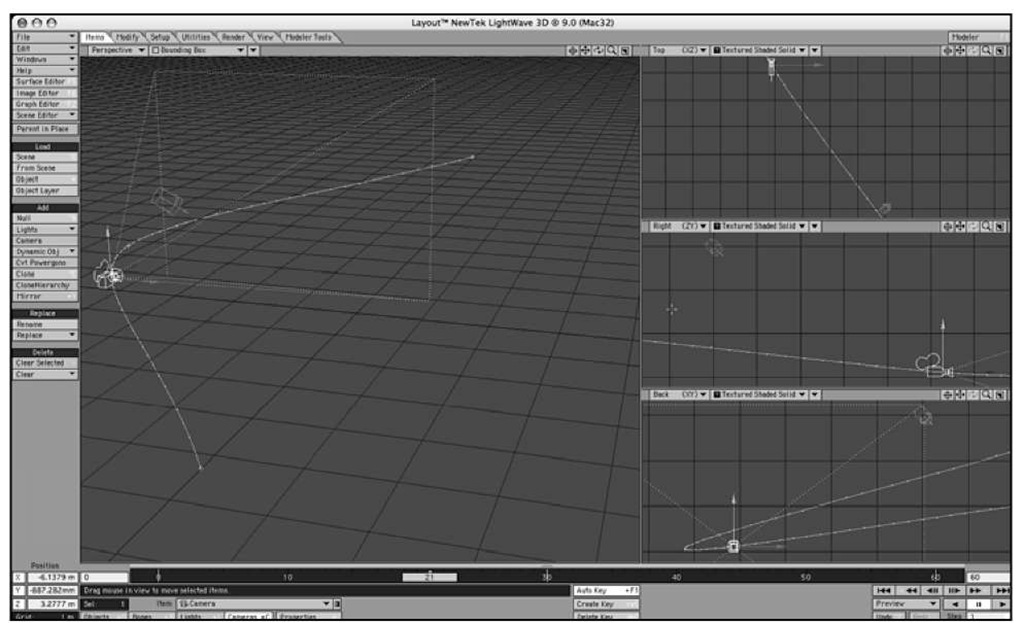
You might be one of the select few who can work in multiple viewports while animating. If you’re not sure whether that’s your style, press F3, and you’ll see a quad view just like LightWave Modeler (Figure 2.16).
But wait, there’s more! Press F3 again, and again. You cycle through all of LightWave Layout’s available viewport arrangements. You can press F4 to go back. Let’s say you have a quad view in Layout set,as shown in Figure 2.16.
Figure 2.15
Additional view options are available directly to the right of the viewport render styles dropdown, at the top of LightWave Layout.
You can set any view to any style you want—for example, you can make two views a Perspective view, one view a Top view, and the other a Camera view. Many animators like to make the Layout viewports match that of Modeler. However, you might find that working in large single views, one at a time, is quite useful.
Figure 2.16 Pressing the F3 key cycles you through LightWave Layout’s available viewport arrangements.
Note
A great way to work in Layout is to employ your numeric keypad or use the number keys across the top of your keyboard. Press 1 to jump to the Back view looking down the Z-axis; press 2 for the Top view looking down the Y-axis. As you can guess, pressing 3 takes you to the Right view looking down the X-axis. Press 4 to get to a Perspective view, 5 for a Light view,and 6 to switch to a Camera view. Do this as you work, and you’ll be flipping back and forth between views without thinking about it.
Viewport Movement Control
To the top right of any Layout viewport are the viewport movement controls, just as you found in Modeler (Figure 2.17).
It’s important to note that you cannot use these controls all the time, in every view. Their availability varies depending on which view you’re working in. In Perspective view, the default viewport, these tools are all available. The five buttons are as follows:
Figure 2.17
At the upper-right side of the Layout interface are the viewport movement controls. Click, hold the mouse button down, and drag the mouse to use them.
• Center Current Item. This first button stays on when clicked. Click it again to turn it off. It keeps the currently selected item—be it a camera, light, or object— centered at all times.
• Move. The Move button enables you to move your view around in the Perspective, Top, Side, and Back/Front viewports.
• Rotate. Click, hold, and drag to rotate your viewport in the Perspective view only.
• Zoom. The Zoom viewport tool is useful for all views except Light view and Camera view.
• Expand. The Expand view control is great to quickly maximize any viewport. For example, let’s say you’re using LightWave Layout with a Quad viewport style like Modeler. Click this button in any viewport to maximize it to full screen. Click it again to return to your Quad view.
Use these viewport controls to properly take a look at your scene. They can help you stay aware of what’s going on, and controls like the Center Current Item button can help you quickly find an item you’ve misplaced in the scene: Click the Center Current Item button, then select the missing item from the Selected Item list (see Figure 2.3), and the lost item will instantly jump into view. Zoom out slightly, and you can see where it is in relation to the rest of your scene.
