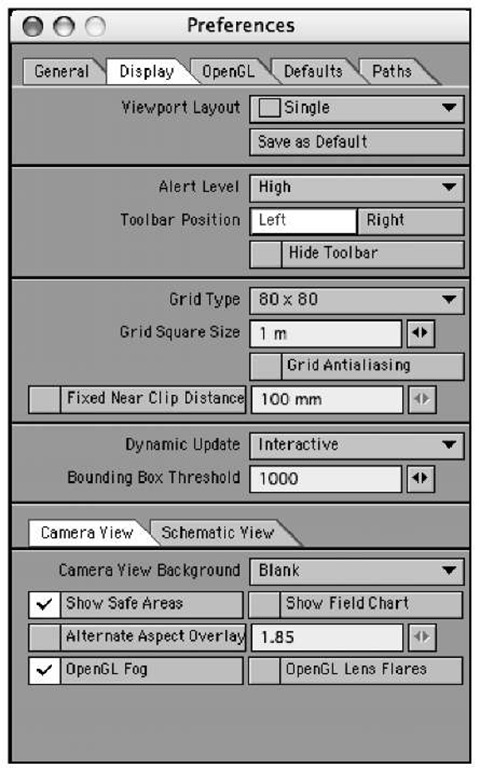
LightWave, like many programs, has its own set of preferences. However, because LightWave is not native to particular operating systems and utilizes its own custom interface, accessing these options is not as easy as finding an Edit button at top of your computer screen. Instead, press d or o. The d key calls up Display Options, as shown in Figure 2.51.
If you had pressed o, the General Options tab would have appeared, but both panels are embedded in the Preferences panel. Within the Display Options tab, you have specific control over settings that pertain to what you see in Layout. These are options concerning grid size,overlay colors, and many OpenGL options.
Figure 2.51 Open LightWave’s Preferences panel by pressing the d or o key. Here,you can see the Display Options tab, which opens when you press d.
The OpenGL, or Graphics Library, is the color shaded and textured views you see in Layout. Your video card determines how many OpenGL options you can support, but these days, even the simplest gaming cards work tremendously with LightWave. You can tell LightWave to turn on many OpenGL options concerning lens flares, textures, reflections, and even transparency. The new Preferences panel in LightWave v9 is extensive, but there are a few key areas you can read about here.
Bounding Box Threshold
An important value in the Display Options tab is Bounding Box Threshold. You might have installed LightWave and hopped right into Modeler. The model you have created ended up being made up of 5,000 points and 5,200 polygons. When you send your object to Layout for animating, you see the object, but as soon as you move it, it turns into a wireframe box. What’s going on? This is LightWave’s way of saving system resources. If your object is made up of too many points and polygons, it can significantly slow down your system when you try to move or rotate it. This is because LightWave needs to redraw the object in real time on every frame. If it can’t keep up, it stalls. The Bounding Box Threshold option allows you to set a limit of when LightWave has enough, so to speak. A basic 64 MB video card can have a bounding box threshold set to about 40,000. In other words, if your object is 35,000 polygons, it stays drawn all the time. If it’s more than 40,000 polygons, it turns into a bounding box upon any movement. Set this one time, and you can leave it. Note that this does not affect rendering in any way.
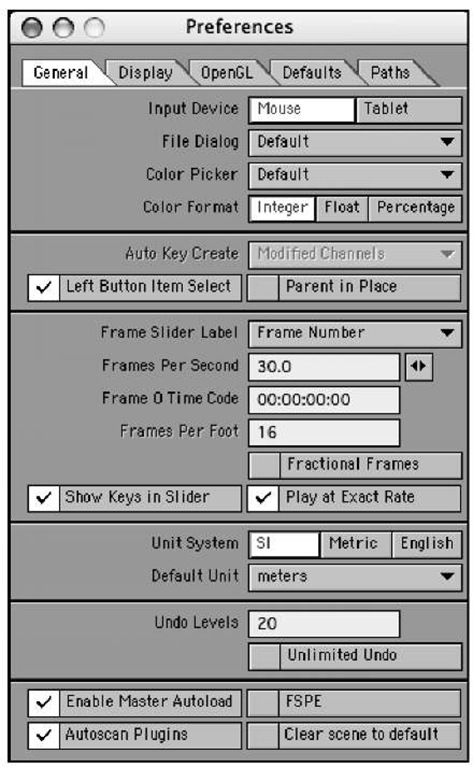
General Options
If you press o for General Options, you see a tab with a tad fewer variables than are found in Display Options, but nonetheless important (Figure 2.52). You can use these settings to change LightWave’s Input Device from a mouse to a tablet, and to set how your frame slider is viewed. By default, the LightWave timeline shows frames, but you can change this to show SMPTE (Society of Motion Picture and Television Engineers) time code units, film time code, or time in seconds. The most common setting is frames, as in frames per second.
LightWave also offers its own custom color picker, which you can turn on in this panel. When picking colors for backgrounds or surfaces, for example, this causes LightWave to calls up its own custom color picker rather than the one built into your Windows or Mac system software.
Finally, as mentioned previously, Layout offers multiple undo levels, which can be accessed in this category. Be careful with this. You can’t undo everything; primarily, this command is useful for undoing keyframe motions. Let’s say you add a few keyframes to your animation and decide you don’t like them. Press Ctrl+z a few times to undo. Again, if you accidentally click Remove Texture in the Surface Editor rather than Use Texture, there is no undo for that! So be cautious.
Figure 2.52 The General Options tab within the Preferences panel contains key settings for LightWave Layout.
The Next Step
This topic has taken you on a brief overview of Layout and how it’s organized. You have seen how the menus are arranged and how they work, and you took a tour of the tools available to you.
There is more to learn, and it’s about to get more exciting. Soon, you’ll be working completely on tutorials, learning firsthand the tools and how they work. What’s more, you’ll learn why you’re instructed to do what you’re doing. Subsequent topics guide you through the basics of lighting, textures, and motions. Then, you’ll take this knowledge into longer, full-blown projects.
Too often, topics just click you through, leaving the figuring out up to you. Inside LightWave v9′s tutorials are designed to ramp you up from beginner to intermediate to advanced tutorials, offering clear explanations along the way.
We have a big journey ahead of us, so take a break, get some caffeine, and get ready to rumble!


