Statistics
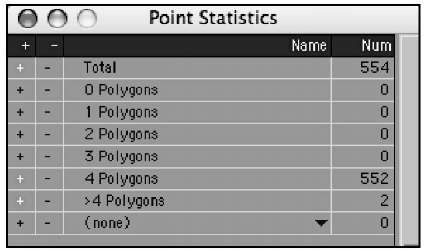
The Statistics panel (Figure 1.71) is another key panel you should keep open. It lets you view information about your points, polygons, surfaces, and much more. You’ll employ this panel throughout the topic. Note that it will change statistical information for both points and polygons based on which selection mode you’re working in. You can also use this panel to select specific surfaces you’ve set up and even subpatched polygons.
Figure 1.71 The Statistics panel,acces-sible from the bottom of the LightWave Modeler interface (also by pressing the w key), holds key information for points, polygons, surfaces, and more.
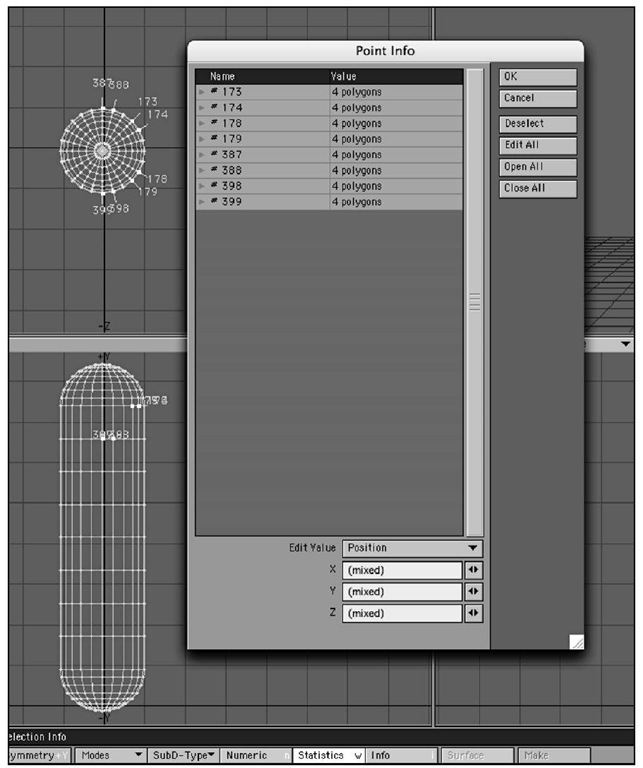
Info Panel
The Info panel (Figure 1.72) was a little-known feature in past versions of LightWave. Version 9 brings this panel to the forefront, with an access button at the bottom of the LightWave interface. This panel displays specific information about the points or polygons you have selected; the panel does not work in Edges selection mode. You can color wireframes with this panel, view surface names and groupings, and more.
Figure 1.72 The Info panel, accessible from the bottom of the Modeler interface, shows you information about point and polygon selections (but not edges).
Surface
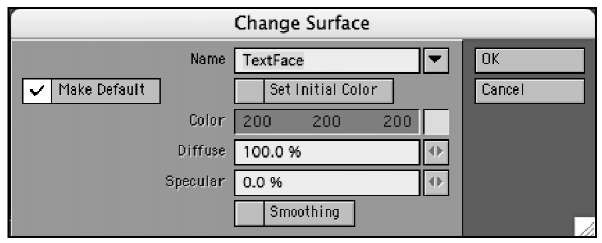
Another important button in Modeler is the Surface button located at the bottom of the interface. Be sure not to confuse this with the Surface Editor. Clicking the Surface button opens the Change Surface requester panel, which lets you define any polygon selection as a distinct surface within your model and assign it a name and a basic color. You’ll do most of your surfacing and texturing in Layout, but you use this panel to tell LightWave that the eyeballs on your character are white, that the polygons that make up the fingernails are green, and so on. If you don’t use this panel, your object will have only one surface to which colors and textures can be applied. Figure 1.73 shows the Change Surface panel.
Figure 1.73 The Change Surface panel, accessible from the bottom of the Modeler interface (or by pressing q), enables you to name and assign colors to polygonal regions.
Make
The Make control does not have a panel but just a single button at the bottom of the Modeler interface. Say you created a few points to build an object. After your points are laid down, you can click the Make button (or press the Enter key on your keyboard) to "make" the polygon.
Using and Understanding W,T, M, C, S
To the far right of the bottom of the interface is a set of tool buttons with single-letter labels W, T, M. C and S, plus an associated drop-down list (Figure 1.74). These tools are part of LightWave’s vertex map system, and you’ll use them regularly as your work progresses in Modeler.
Figure 1.74 The W,T,M,C,and S function controls.
The vertex map tools all work in a similar fashion, but each has a different function. To use one of these tools, click its button, select New from the drop-down list to the right, and the appropriate panel will appear. But what are these tools? They are simpler than you might think.
W,for Weights
The Weights tool’s main job, which we’ll discuss later in the topic, is to assign information to points or polygons in your model so that you can apply specific controls later in Layout. When you’re first learning to create 3D models, you won’t have much need of these functions. However, you can apply a SubPatch Weight to subpatched objects as well to change the shape of its curves. To do this, first select the W button for Weights. Then from the drop-down list to the right, choose SubPatch Weight. Go the Map menu tab at the top of the interface, and then on the left toolbar, select the Weights tool from the Weight category. Simply click and drag on a point of your subpatched object, and you can sharpen or smooth the curve. You’ll use this feature later during the modeling topics.
T, for Texture
The Texture mode enables you to create a new UV map for your objects. By first clicking the T button and then selecting New from the drop-down list, you can access the Create UV Map panel. UV maps are great for texturing complex objects, especially those with curves. Later in the texturing tutorials in this topic, you’ll see this panel in action.
M, for Morph
Morph (or endomorph) is a powerful feature in LightWave that enables you to move a point or set of points from one position to another over time. By first clicking the M button and then choosing New from the drop-down list to the right, you’ll be able to create a new endomorph. This endomorph simply records the position of points or polygons. You can make multiple endomorphs and then use the Morph Mixer in Layout to access this data, which is saved with the object. You’ll use this feature to change the shape of an object over time, such as a character talking or a car suddenly crashing and bending.
C, for Create Vertex Color Map
Create a new color vertex map with the C button. Vertex color maps tell Modeler to label specific point (vertices) selections so you can access them in Layout to apply additional surfacing and details. If you press F8 or go to the Edit drop-down menu, you can open the Vertex Map panel and see which vertex maps are applied to your objects.
S, for Selection Set
Finally, the last button in the row at the bottom of the Modeler interface is S, for Selection Set. This handy option enables you to select any collection of points and define them as group—a selection set. It’s like taking a bunch of points you’ve selected and giving them a group name. This group name can be accessed later in Layout for things like animated dynamics, cloth, and more. It’s also handy for creating selection sets around areas of your models to create endomorphs. For example, you can create a selection set of points around the eye area of a character. By opening the Statistics panel (press w), you can quickly select this group anytime and adjust it, changing the shape of the eye for example, and then move on. This is a handy feature. Don’t confuse it with the Surface button, which affects appearance and surfacing.
Modeler Options
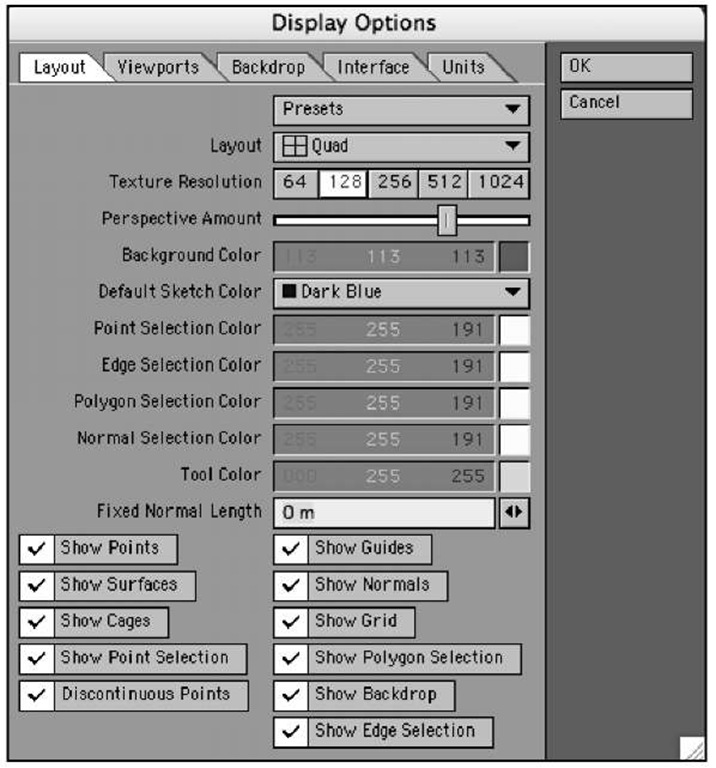
There’s one final area you should be aware of in LightWave Modeler: the Display Options panel (Figure 1.75), which you access by pressing d on your keyboard.
Here, you can tell Modeler to change the way the layout of the viewports looks or change what’s visible in the views. You can also use this panel to hide all your tools from view. What’s more, in this panel you can specify background images and place them in Modeler’s backdrop. Doing this enables you to work over a template, helping you build 3D models to real-world objects.You’ll do this in the character modeling section of the topic. Also in the Display Options panel, you can tell Modeler to work in English, Metric, or SI. The default is SI (System International), a common unit of measurement. This topic uses all default settings for tutorials.
Figure 1.75 Pressing d calls up the Display Options panel, which controls settings that determine how the LightWave interface is organized.
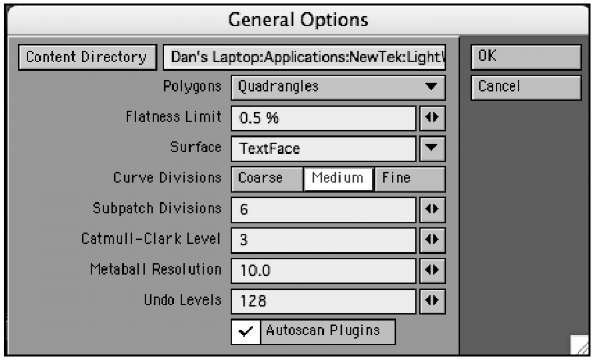
Now, if you press o on your keyboard (that’s the letter o), you get the General Options panel (Figure 1.76). Here, you can set LightWave’s content directory as well as Subpatch level and the number of undo operations you would like.
Figure 1.76 The General Options panel lets you set number of undos, content directory location, and more.
Note
The maximum number of undo operations available is 128. It’s a good idea to set this value to the max and leave it.The only reason it should be lower is if you have limited resources and are working with very large amounts of polygons. Undoing too many times on large objects can bring down even the best of systems.
Any value you set in the General Options panel will become the default once you quit Modeler because the program writes that information to LightWave’s configuration file.
The Next Step
This topic has taken you on a tour through LightWave Modeler. And although it’s not the most exciting topi in this topic, it is a topic you can come back to often when you ask yourself, "What was that tool for?" Throughout this topic, we mentioned that certain tools are used later in the topic. Be sure to go through every topic so that you can see how all these tools come together and so that you can learn just why they are included with your 3D software. There are a few other customizable areas that you should be aware of, but these tools work the same way in LightWave Layout, so we’ll cover them in that discussion. We’ll look at tools that enable you to edit your menus and set up custom keyboard shortcuts.
As the topic progresses, we’ll ramp up the complexity and get you into even bigger and cooler projects.
