Across the top of the Layout interface are seven tabs. As in Modeler, each tab reveals a menu of tools. When you click on one of these tabs (Figure 2.18), the toolset on the left side of the interface changes accordingly.
Figure 2.18 The LightWave Layout tab set, across the top of the interface.
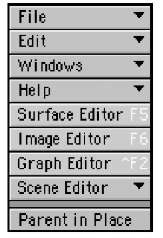
It’s important to note that the nine buttons at the top left of Layout (starting with the File drop-down) always appear, no matter what tab you’ve selected. These are key tools and commands you’ll use throughout LightWave, both in Modeler and Layout (Figure 2.19).
Figure 2.19
The nine buttons at the top left of LightWave Layout always appear, no matter what tab or menu you’re working in.
Note
Remember that we’re using the default LightWave tabs and menus throughout this topic. Although you can change the menus to look like anything you want, the default setup keeps these nine tool buttons at the top left of LightWave Layout.
File Menu
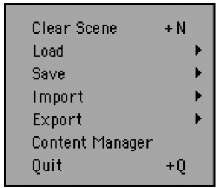
Let’s talk about the first of these buttons: the File drop-down menu. When we say drop-down menu (or just drop-down), we’re talking about a button that has a small tiny downward-pointing arrow. Click this button and you’ll find additional tools (Figure 2.20). Note that you do not need to click on the arrow to expand the menu; just click anywhere on the button.
The File drop-down menu allows you to load and save scenes, and use the new Save Scene Increment feature. Using this feature adds 001, 002, and so on to the end of your scene name each time you save. You can also export scenes through LightWave’s Content Manager.
Figure 2.20
The File menu dropdown always appears at the top left of the Layout interface.
Note
Pressing Ctrl+s (Mac or PC) on your keyboard tells LightWave to Save Scene As, whereas pressing Shift+s automatically saves a scene in increments.
Clear Scene
As the name implies, you can select Clear Scene, or press Shift+n, to clear your scene. After you perform this command, all that is left is a light and a camera. Be warned: You will not have an opportunity to save after you do this, and LightWave does not inform you that data might be lost. It asks you if you’re sure you want to clear the scene, but that’s it. So, save often!
Additionally, simply loading a new scene overrides your current scene. Therefore, using Clear Scene before you use Load Scene is a wasted step.
Load
The Load submenu in the File drop-down allows you to load scenes, load recent scenes, and load an item from a scene, which is a cool feature. You can also load objects and revert the current scene to its previously saved state.
The Load Items from Scene command in the Load submenu is especially handy for character animation. It allows you to load one scene into your current scene. For example, let’s say you create a cool-looking giraffe and set up a workable bone structure for it. Of course, you’ve saved that scene so that you can work with it later. Then, you’ve built a huge safari scene with textures, landscapes, and lighting. Now all you have to do is use Load Items from Scene and choose the giraffe scene. The giraffe and all of its motions and bones will be imported into your existing scene. This allows you to set up scenes on their own for both speed and productivity, but use them together for final results.
Import
This submenu provides access to LightWave add-on modules called plug-ins, which can be used to convert models and animations created in other programs. LightWave ships with just one such plug-in, Mocap_BVH_Setup, which lets you apply BioVision motion-capture data to your animations.
Export
Certain third-party applications still work very well with LightWave. However, LightWave’s core structure changed with version 6 in the year 2000, and many scenes were no longer compatible with third-party applications. Because of this, NewTek has added the ability to export your scene to LightWave version 5.6 with the Export command, which is also found under the File drop-down menu. And, you can export files in VRML (Virtual Reality Markup Language) and Shockwave 3D formats, used for displaying 3D objects on the Web. You can also export a list of your scenes images, either for later reference or for sharing scene information.
Content Manager
LightWave’s Content Manager is extremely handy for backing up your scenes and sending them to coworkers or clients. You see, LightWave’s scene file consists of objects or 3D models you create in Modeler. The objects in your scene hold surfacing data, whereas the scene file itself holds motion data. These data files can sometimes be located in various folders around your hard drive. The Content Manager gathers all of the files associated with the current scene and copies them to a directory you specify.
Edit Menu
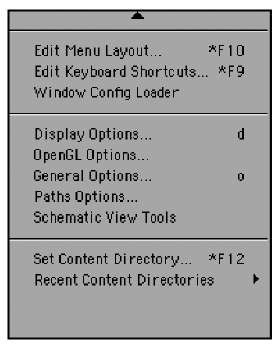
The Edit drop-down menu (Figure 2.21) is home to quite a few useful tools that enable you to edit menu and keyboard layouts, change window configurations, and even choose your Content Directory. The main features you’ll use in this dropdown list are the Edit Keyboard Shortcuts and Edit Menu Layout commands.
Undo and Redo
In most circumstances, you’ll use Ctrl+z to undo and the z key by itself to redo within LightWave. However, if you want, you can use toolset buttons to do so, too; they are found in the Edit drop-down list. Remember that you can set unlimited undos in LightWave Layout by pressing o for General Options.
Figure 2.21 The Edit drop-down menu gives you access to key tools like Edit Menu Layout and Edit Keyboard Shortcuts.
There are a few warnings to note about using undo. First, too many undos can kill your system resources! Also, remember that undos don’t apply to everything—that is, if you accidentally turn off a texture editor layer on your surface, there’s no going back. However, if you create some bad keyframes, undo is an easy way to set them up again.
Edit Keyboard Shortcuts
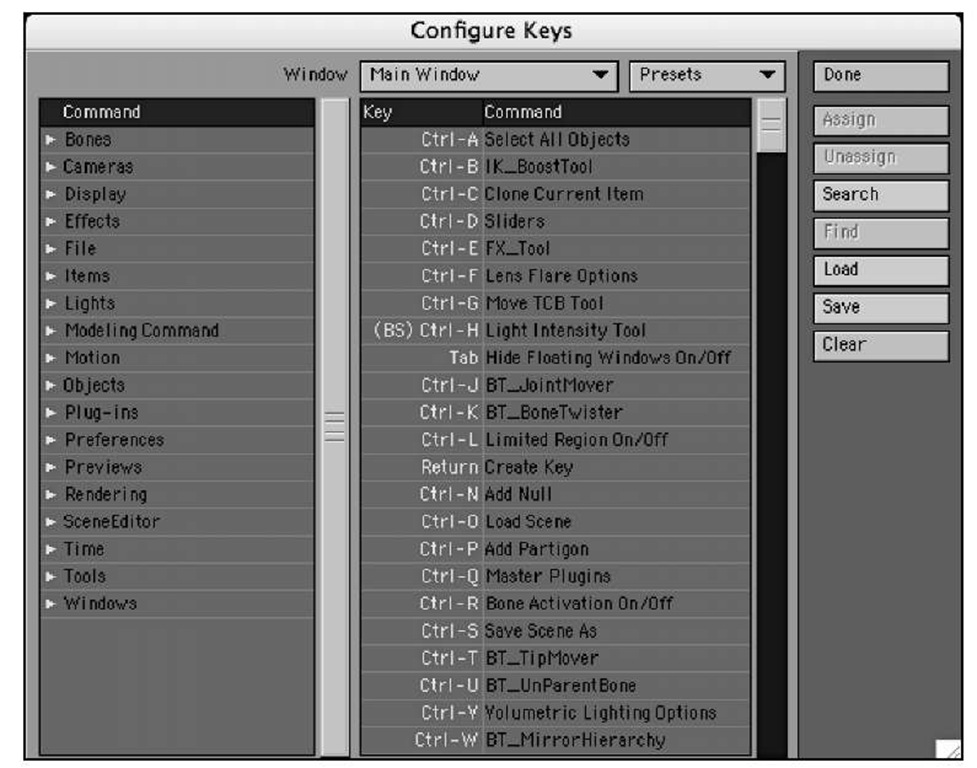
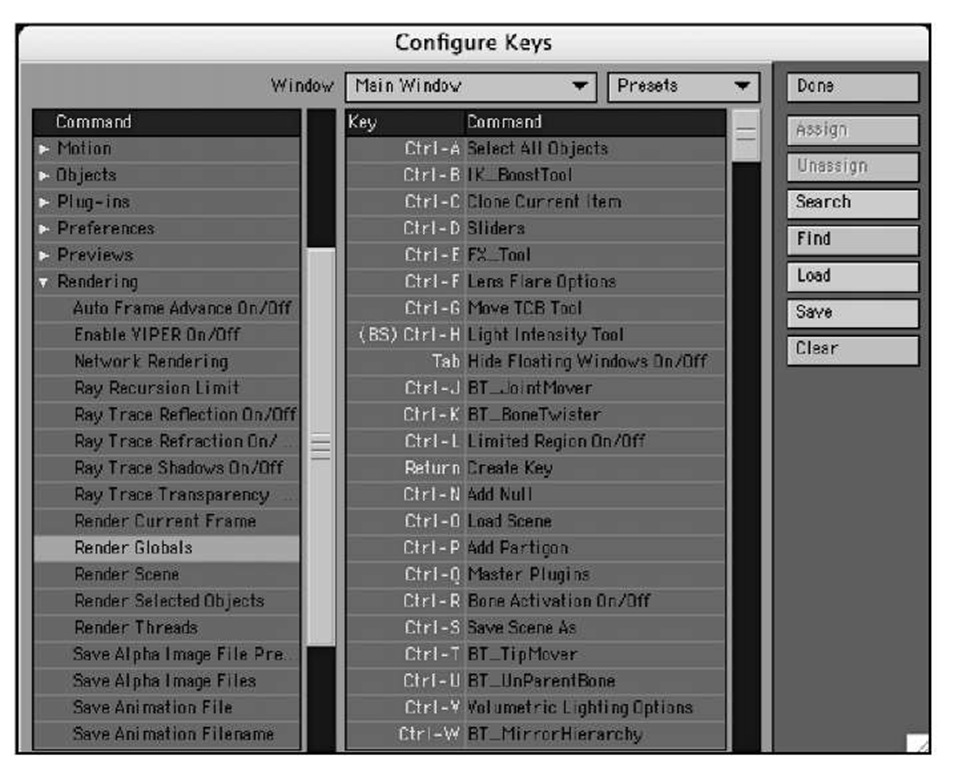
Everyone likes things customized to their liking, right? LightWave 3D gives you this freedom by allowing you to assign keyboard equivalents to commands throughout the program. This next exercise shows you how to use these Edit features. Figure 2.22 shows the Edit Keyboard Shortcuts selection.
Figure 2.22 The Edit Keyboard Shortcuts panel enables you to rearrange existing keyboard shortcuts as well as create new ones.
Exercise 2.3 Editing Keyboard Shortcuts
1. Click the Edit drop-down menu and choose the Edit Keyboard Shortcuts command, or press Alt+F9 (Option-F9 on the Mac).
2. A panel appears where you can choose any of LightWave’s tools and apply your own keyboard shortcut (see Figure 2.22).
Note
You can see any existing keyboard shortcut right on the Layout button.Any keyboard shortcut you apply will become visible on the buttons as a helpful reminder.
3. On the left side of the panel are the various commands Layout offers. On the right are keyboard shortcut listings. Scroll down the left side and select the Rendering listing. Click it to expand.
4. Within the Rendering commands, you find Render Globals, LightWave v9′s new global control panel. Select it, as shown in Figure 2.23.
Figure 2.23 It’s easy to select various commands from the categories. Here, the Render Globals command is selected.
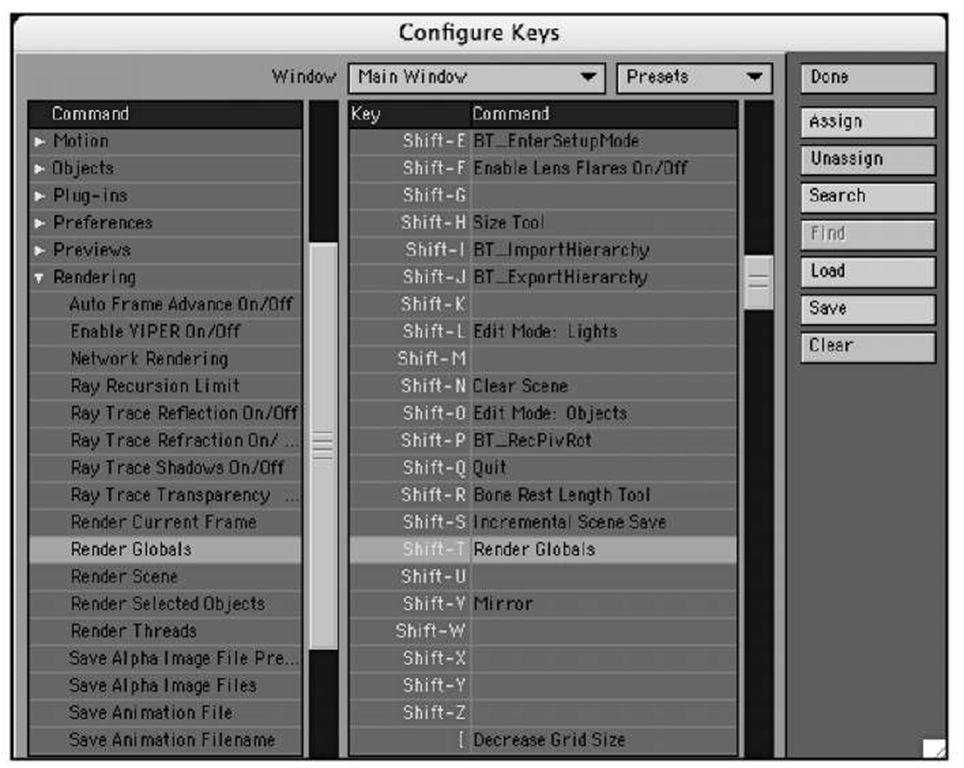
5. Scroll down the right column to choose a keyboard equivalent to assign the Render Globals command to, perhaps Shift-T.
6. Select the Shift-T keyboard shortcut in the window, and on the right, click the Assign button, as shown in Figure 2.24. Click the Save button to keep your changes.
7. Assign more keys to your liking, saving each as you go, and click Done.
Figure 2.24 Assigning keyboard shortcuts is easy. Just pick a command, pick a key, and click Assign.
You can always go back to LightWave’s default keyboard shortcuts by choosing the appropriate preset in the Configure Keys panel. Just click and select from the Presets drop-down at the top right of the panel. You can also set up keyboard shortcuts for the Graph Editor by choosing the option from the Window drop-down.
Another thing to remember is that you can apply these keyboard shortcuts in LightWave’s Modeler in the same way. Just select the Edit drop-down in Modeler and repeat the preceding steps.
Note
Be sure to use the Save button within the Configure Keys panel to save your keyboard setups. Should you choose to select the default preset, your changes are gone forever.
Edit Menu Layout
Changing keyboard equivalents is great, no question. But if you want to go one step better and really make LightWave your own, try editing the menus!
Exercise 2.4 Editing Menus
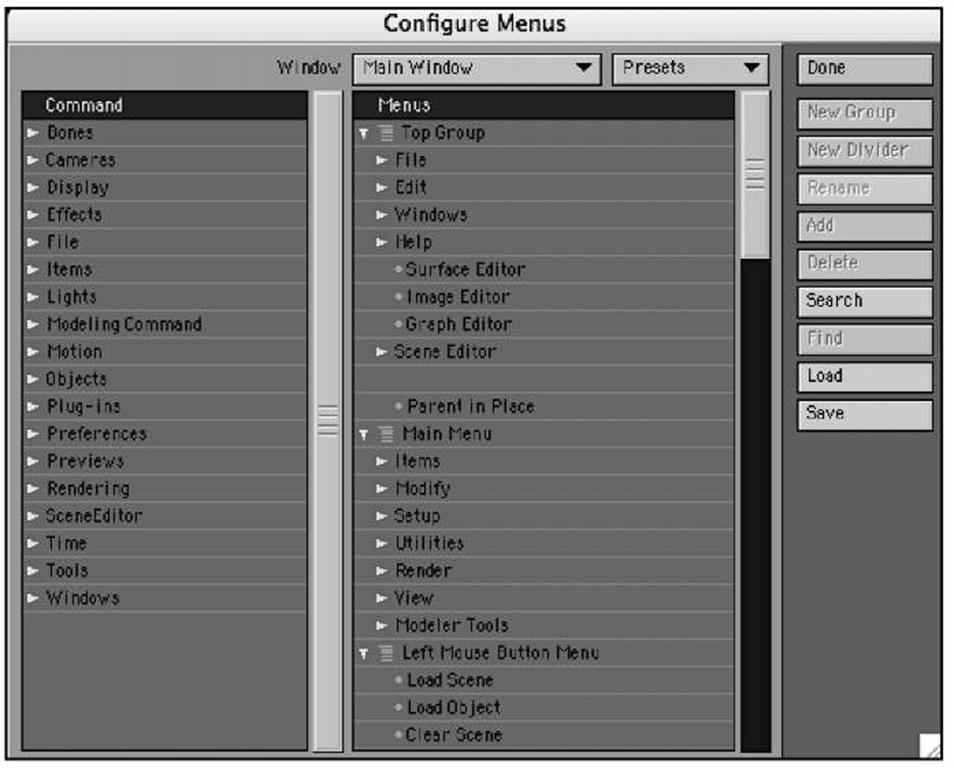
1. From the Edit drop-down list, select Edit Menu Layout or press Alt+F10 (0ption-F10 on a Mac). You are greeted with a panel that looks very similar to the Configure Keys panel from the previous exercise (Figure 2.25).
Figure 2.25 The Configure Menus panel, chosen from the Edit drop-down list’s Edit Menu Layout command.
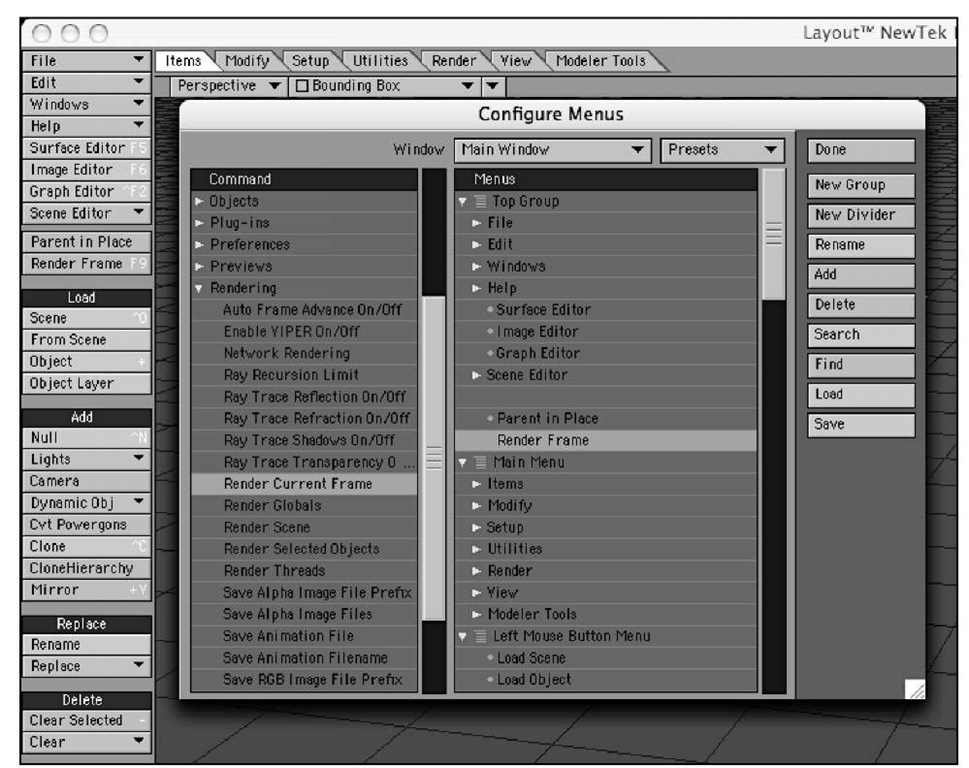
2. You’ll use the panel the way you did editing keyboard shortcuts. Most tools are already out on the interface, but this panel is great for moving buttons, adding new menus, or creating buttons for your third-party plug-ins. Select the Parent in Place listing from the Menus column on the right, as shown in Figure 2.26. This determines the location of your new button; it will appear just beneath the Parent in Place button in the Top Group of toolset buttons.
Figure 2.26 You can select and edit any existing menu in the Configure Menus panel.
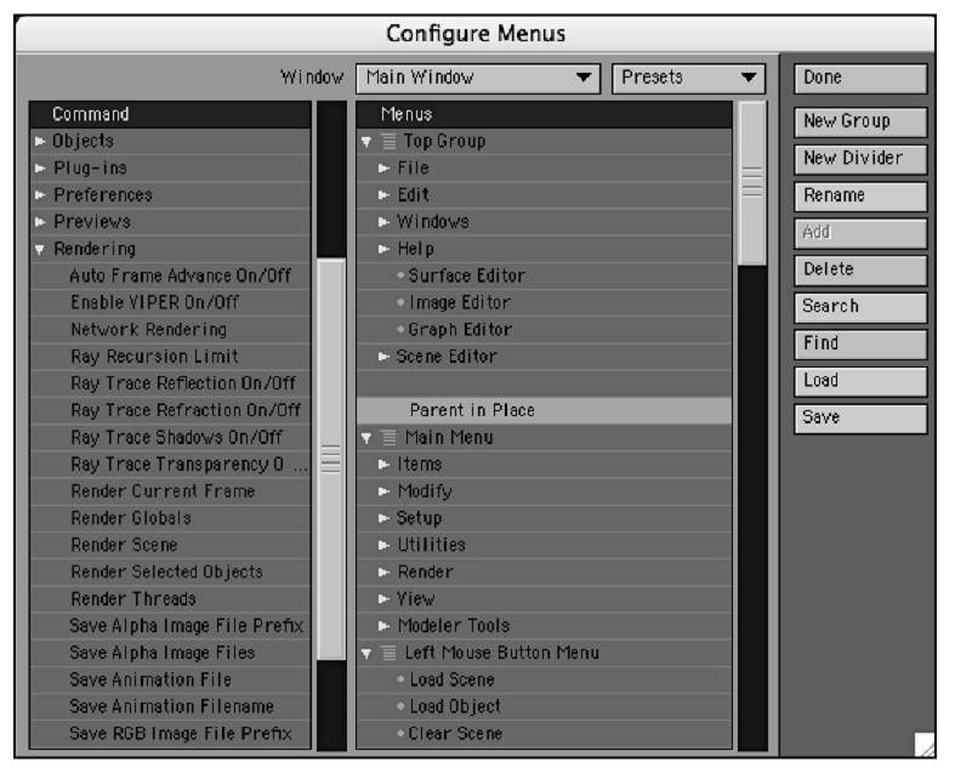
3. To the left of the panel, select the Rendering category. Expand it, and select Render Current Frame. This will be dimmed because it’s already assigned to the F9 key and has a button, but you can still create another button for it. Once it’s selected, click the Add button at the right of the panel and you’ll see the command added to the LightWave interface. Figure 2.27 shows the new Render Frame tool button, just below the Parent in Place tool.
Figure 2.27 Adding a custom interface button is as easy as the click of a button.
By adding the Render Current Frame command to the Top Group, you’ve assigned it to every tab, so it will always be visible within Layout. If you’d created this button within the Main Menu listings, it would apply only to the selected tab. You can select various tools from the command window on the left and select your new group. Then, click the Add button. You’ve now added buttons for commands in your own custom group. Feel free to select your new group and choose the Rename button to customize it. You can also drag entries up or down in the Menus column to reorder buttons within toolsets.
You should know a few things about using these configuration panels. When a command is dimmed, that means it’s already assigned. However, it does not mean that you can’t assign it again. Also, if you ever dislike the menus you’ve created, you can always choose Default from the Presets drop-down menu in the panel. To follow along with the rest of the topic, go ahead and choose the default presets.
