In the last topic, you created your first HelloWorld application and an Apple-Stock application with Xcode. In this topic, you’ll build on this foundation of iOS application programming with a focus on how to create the custom view class in Xcode and how to use the Debugger to eliminate bugs during the project development lifecycle.
First, let’s work on how to create a custom class together with Xcode. New programs are usually full of new classes. Here are three major reasons you may want to create new classes:
■ You can create a totally new class, with different functionality from anything else. If it’s a user interface class, it’ll probably be a subclass of UIView. If it’s not a view class, it’ll probably be a subclass of NSObj ect.
■ You can create a new class that works similarly to an old class but with some standardized differences. This new class will generally be a subclass of the old class.
■ You can create a new class that has specific event responses built in. This class will also generally be a subclass of the old class.
Creating a new class with Xcode is easier than you think. In this example, you’ll create a project called NewClass that will include a new class called LabeledWebView. It will be a subclass of UIView. When LabeledWebView is initialized, it’ll display both a web page and the URL of that web page on the iPhone screen by linking together some existing classes that you used in the last topic, such as label and webview. It will also display a toolbar at the top behind the label. In a way, it’s similar to the Safari browser window on the iPhone.
Again, you’ll build this project using the Window-Based Application template, and the device family is iPhone.
Creating a new class
When you have your new project going, the process of creating a new class (see table 4.1) is simple, with Xcode doing most of the work for you in creating the file.
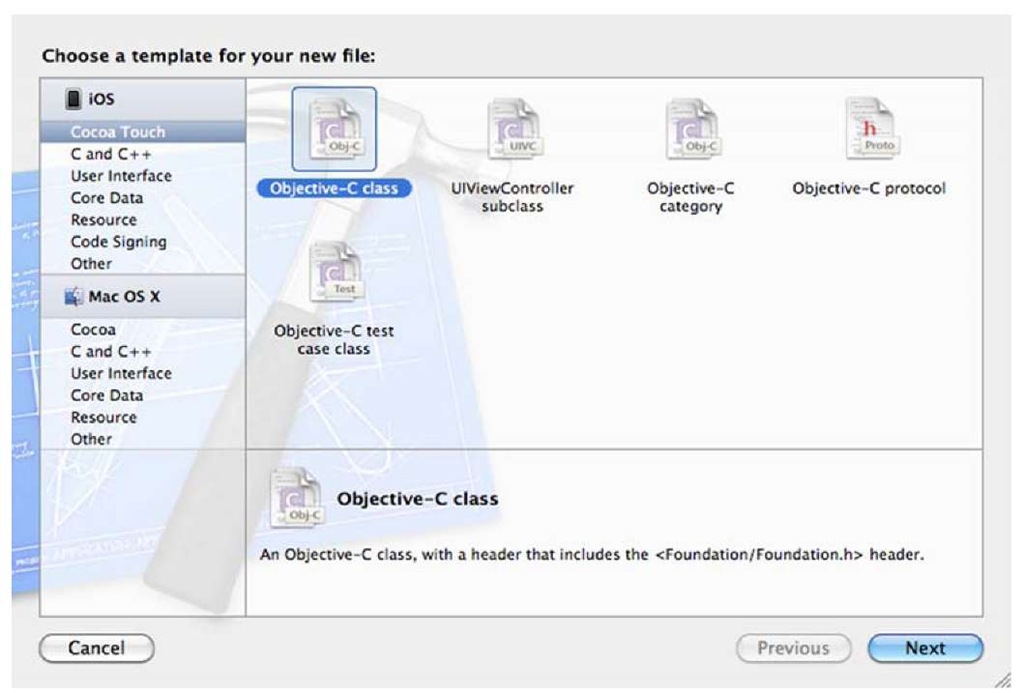
In the NewClass application, choose File > New File to create a new Objective-C class (as shown in figure 4.1). Select Objective-C class, and then click Next.
Table 4.1 Three steps to create a new class in Xcode
|
|
Step |
Description |
|
1. |
Create your new file. |
Choose File > New File. Choose the class to use as your parent from among the Cocoa Touch Classes options. Select a filename, preferably an intuitive name reflecting your object. When a subclass prompt window shows up, choose the subclass if there is one. Xcode should automatically create the header and source code files. |
|
2. |
Modify your files. |
If you weren’t able to select your preferred class to subclass, change that now by modifying the parent class in the @interface line of the header file. |
|
3. |
Import your object. |
Add an #import line for your class’s header in whatever file will be using it. |
Figure 4.1 Create a new Objective-C class under iOS.
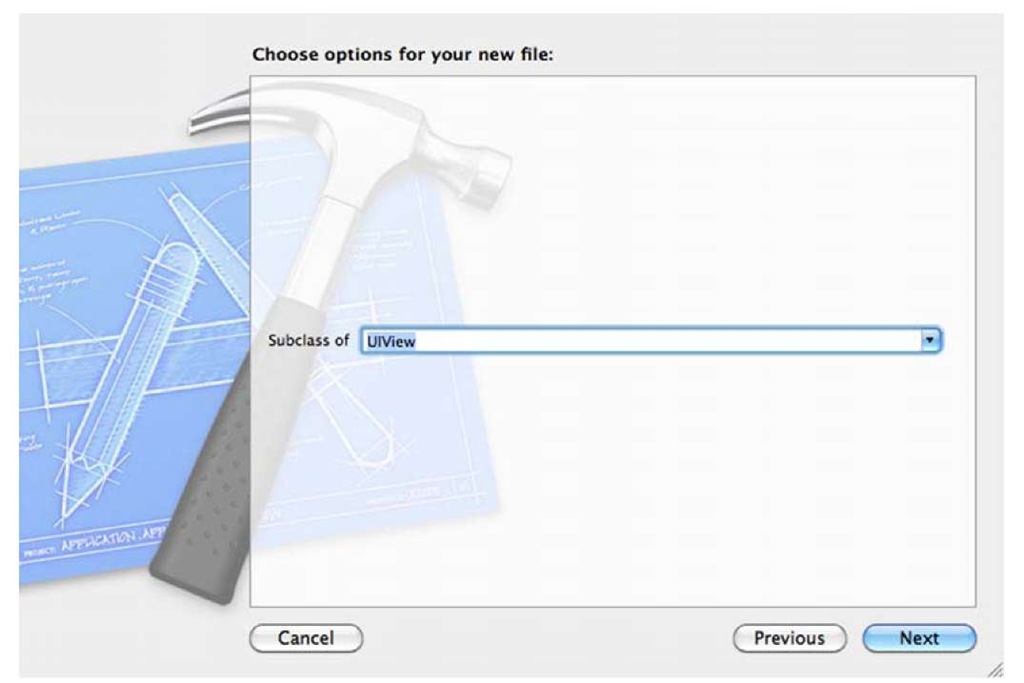
After clicking the Next button, you’ll be presented with a screen to select what class the new class is inheriting from (see figure 4.2). Under the Subclass drop-down menu, choose UIView as the subclass option for the new class, and then click Next.
When the Save window appears, type in the name of the new class. In this example, use LabeledWebView.
Now import your new LabeledWebView.h file into your application delegate’s .m (NewClassAppDelegate.m) file:
Click the Run button to make sure there are no errors in the code.
Afterward, it’s a simple matter of designing your new LabeledWebView class with the desired functionality. As we mentioned earlier, you’ll create an object that will display both a web page and the URL of that web page on the iPhone screen by linking together some existing classes.
The process has three steps, all of which we touch on in this section: you need to write your new header file, write your new source code file, and use the new class in your program.
Figure 4.2 Choose UIView as the subclass option of the new file.
The header file
As usual, you have the start of a header file already, thanks to Xcode. The following listing shows how to expand it to create your new class.
Listing 4.1 Header file for the LabeledWebView class
Within the header file, you make use of some common patterns that you saw back in the last topic. First, you declare some instance variables O that you want to use throughout your class. In this case, you have a label, a toolbar, and a web view. Then you define those instance variables as properties ©.
Finally, you declare a method loadURL: © that you want to make available outside the class. You plan to use this method to define the URL for the web view. Now you’re ready to edit the source code.
The source code file
The source code file contains the guts of your new class. With all the new instances and properties declared in the header file, it’s time to define the content inside the source code, as shown in the following listing.
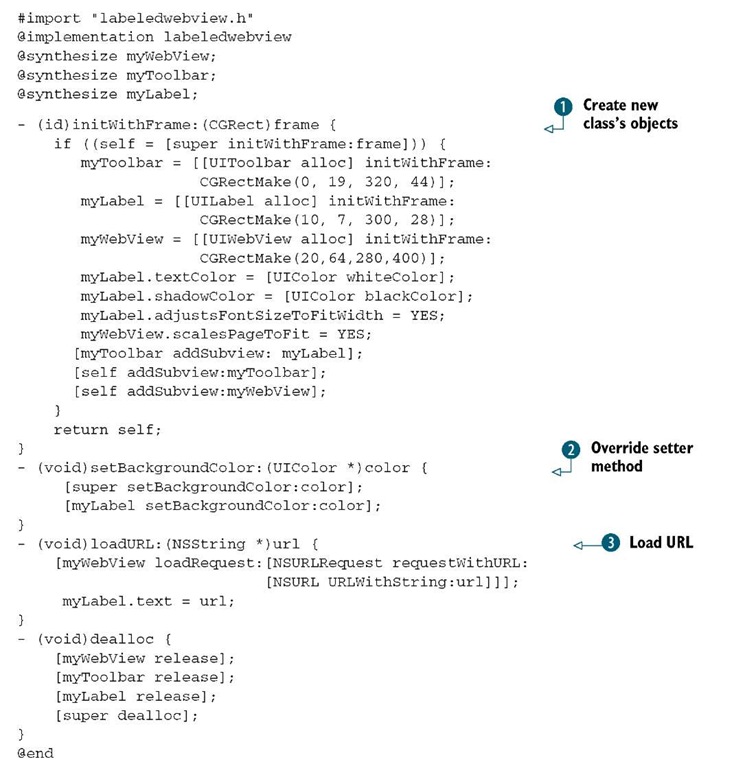
Listing 4.2 Source code file for a new class
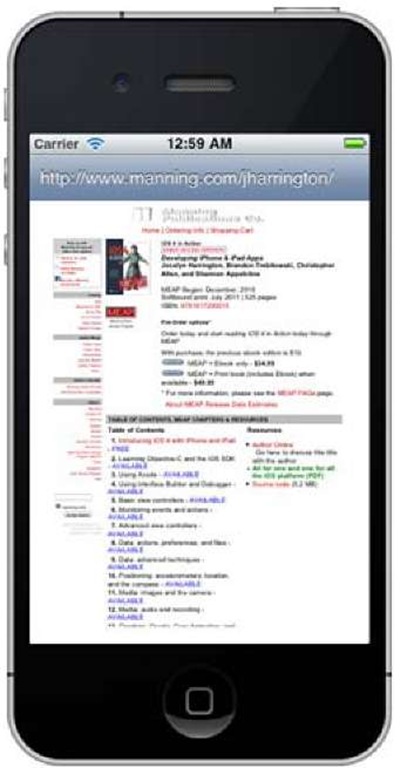
Figure 4.3 shows the results of the class creation in use. Next, we’ll explain the parts of the code that get you there before you put it all together in the app delegate.
Inside the source code, you first synthesize the three properties so the compiler will automatically create the setter and getter methods. You put together the pieces of your new class in the ini tWi thFrame: method. As usual, you call the parent’s init. Then, you create the three objects your new class will contain: a label, a toolbar, and a web view O. After setting some basic values for each, you make them subviews of your new LabeledWebView class. The code in C will override the setter method for background color property. When it’s called, you first pass the message to super and then set the label background color to match that of the parent view.
The real work occurs in the new loadURL: method G. You should be familiar with this method because you used a similar method to load the URL in the AppleStock application. (You can find more information on how webView loads URLs in topic 14.) That’s all you need to generate a fully functional web page, which is pretty amazing. If you play with it, you’ll find that it has much of the iPhone’s unique output functionality: you can pinch, tap, and zoom just like in Safari. You finish the method by setting the label to match your URL.
Figure 4.3 Brand-new class makes it easy to display a URL and call it up on the screen. You’ve finished the first step in building a web browser.
Your new class ends with the standard dealloc: method, where you clean up the objects that you allocated as part of your object creation.
In less than a page of code, you created an object that would require a lot more work if you were programming it by hand. So many tools are available to you in the iOS SDK that knocking out something like this is, as you can see, simplicity itself. You could definitely improve this example: you could link into the web view’s delegate protocol to update the label whenever the web view changes. But for now, we’re pleased with this example of Safari browser mockup.
Linking it in
Creating a new class isn’t enough: you also need to use it. Add the bolded code in the following listing into the application delegate (NewClassAppDelegate.m) to use your new subclass.
Listing 4.3 Using the new class in the app delegate file
The code is pretty simple. First, initialize the subclass of UIView with the full screen size. Then load the URL of this topic, iOS 4 in Action, and set the background color to transparent. The most important step is to add this new subview to the window.
That’s all! Click the Run button on Xcode toolbar, and without errors during the build you should see the iOS Simulator launch with the screen shown in figure 4.3.
Now you know how to create a new Objective-C file under Xcode. In the next section, we’ll cover the details of creating a new nib.


