Example: Exporting a Geocoded Map
Now you are ready to export the map to be used in other software applications.
Step 1 Click on File, and move the cursor down to Export Map.
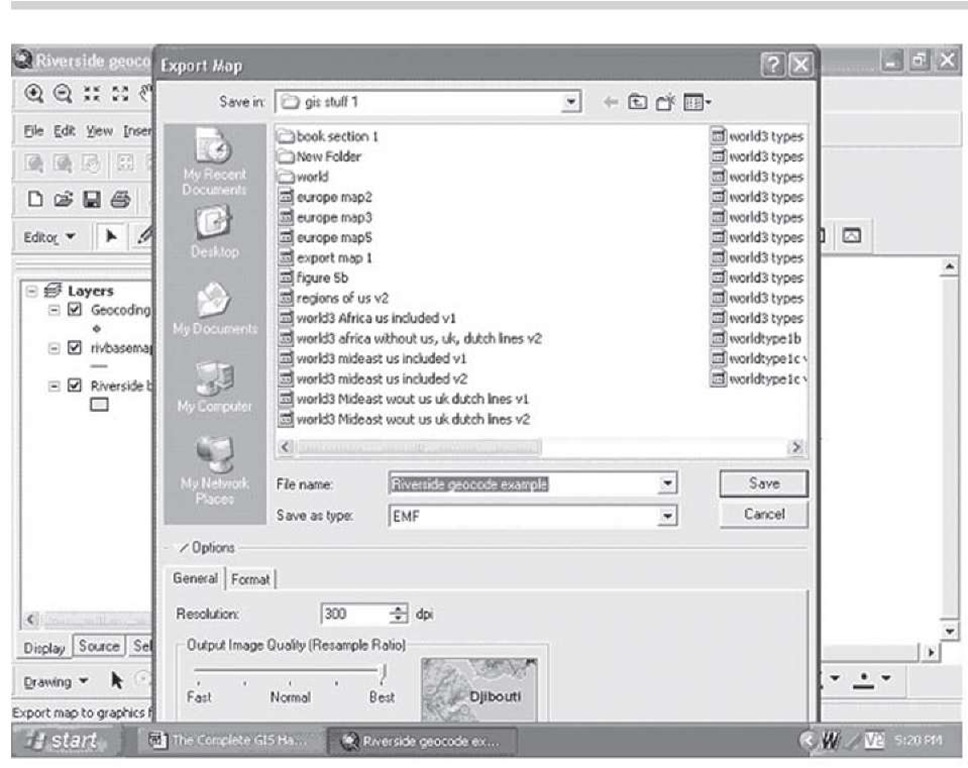
Step 2 The current name of the map file is given in the File name window, as well as the location on your hard disk that the computer is currently pointed to. You can change either or both of these to save the exported map in a convenient location.
Step 3 The default format is EMF—enhanced meta file—but there is a drop down menu which gives you a number of options, including JPEG, TIFF, PDF, BMP, PNG, and so on. If you have a preference, or know your software likes a particular form, you can select it. Then click on Save to export the map file, as in Figure 1.57.
FIGURE 1.57 Exporting the map
Now you are ready to import your exported map into another application, such as Microsoft PowerPoint.
Step 1 Minimize ArcMap, and open PowerPoint.
Step 2 Select a presentation style with a title on the top and the rest of the slide blank.
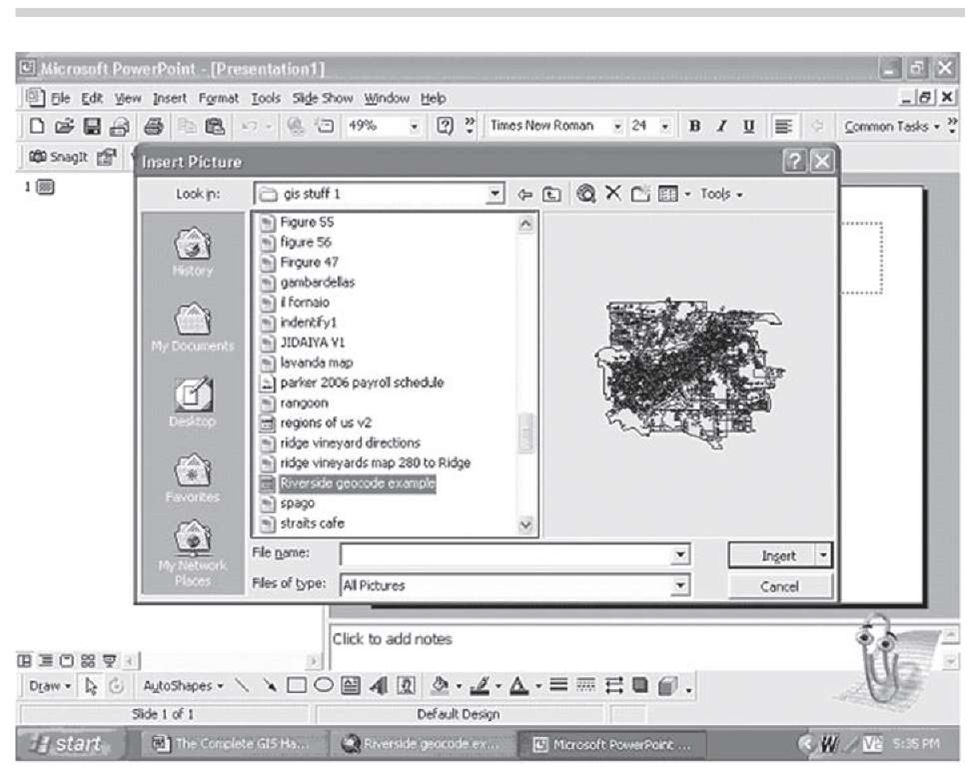
Step 3 Click on Insert, Picture, and from file; locate the file we just exported from ArcMap, and click on Insert to complete this action, as in Figure 1.58.
FIGURE 1.58 Exporting a map to PowerPoint
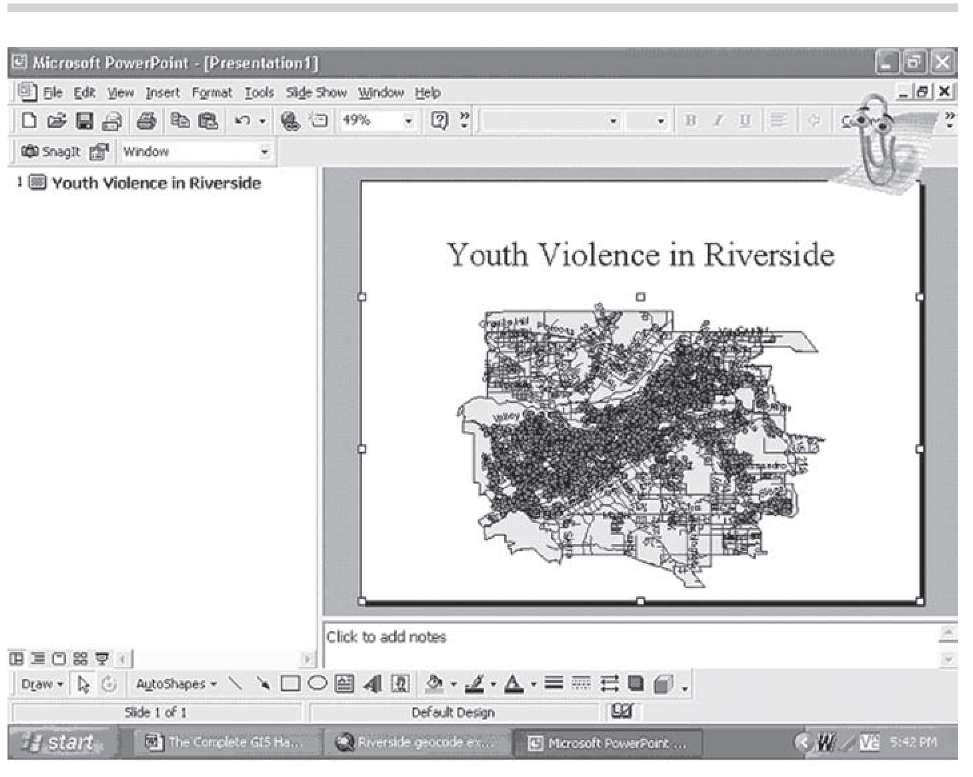
The map will now appear on a PowerPoint slide, and can be resized and repositioned in the usual fashion in that software application. The final version might look something like the slide in Figure 1.59.
FIGURE 1.59 PowerPoint image of the map created in ArcMap
Now that you know how to build the basic maps, save, and export them into report or presentation applications, you are ready to take your maps further in terms of the visual display of meaningful information. This leads to the topic of thematic maps, how to make them and how to interpret them, which we examine in the next section of this topic.


