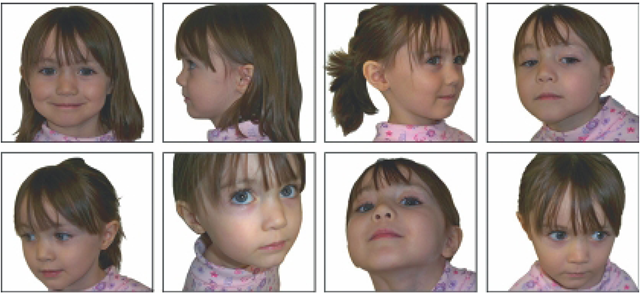
In this section, you will begin using the photograph reference to refine the overall shape of the face. You will rely on the photographs for the rest of the tutorial, so please make sure that you have downloaded all of them from www.digitialsculpting.net (Figure 3.14). There are eight photographs in total, including a front and side view and additional photographs taken from around Amy’s head. Once you are finished with this section, you will sculpt the nose, mouth, eyes, and ears.
FIG 3.14 Download All Reference Photographs.
Roughing In the Eye Sockets
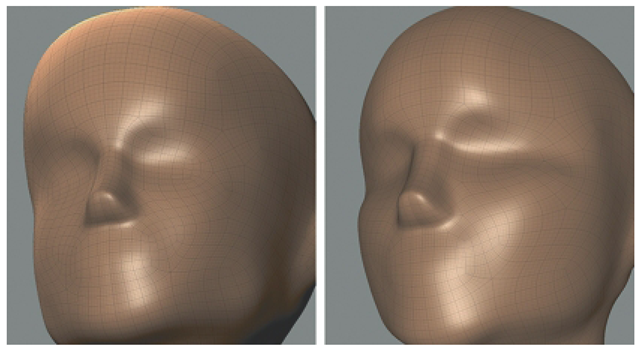
In the next steps, you will rough in the areas where the eyes will be sculpted by positioning the eye sockets. If the eye sockets are not in the correct place, it will make refining the face and creating the eyes more difficult later. This may be a challenging step, so take your time. First, check the Side camera sketch to see how far back the eyes are on the model compared with the position of the eyeballs on the sketch. This helps in repositioning the eye sockets. Then, switch to the Perspective camera and rotate the camera to see the front of the sculpture. Select the Bulge tool (size 35, strength 10) and make sure mirroring is enabled across the x axis. Keep mirroring on for all sculpting tools from now on, unless instructed to turn it off. Then, press Ctrl (Control on the Mac) to invert the Bulge tool and slowly push in the eye sockets. Continue the stroke to the outside corner of the eye sockets with less pressure as you move along the outside of the face. The indentation created by continuing the stroke to the side of the face will help to define the cheek area (Figure 3.15). After pushing back the eye sockets, use the Grab tool to sculpt the cheek and forehead.
In traditional clay sculpture, the sculptor would put her thumbs at the bridge of the nose and dig out the clay to position the eye sockets and continue digging out clay to just before the temples. Roughing in the eye sockets and the indentation on the sides of the head will make the next steps much easier. Check the side camera sketch again to see where the sockets are in the model compared to where the eyeball is on the sketch.
Shaping the Face
What follows is a suggested workflow to sculpt the basic shape of Amy’s face, using the reference photographs. You will position the Perspective camera to match with the views as seen in specific reference photographs and make camera bookmarks. Then, you will sculpt the model to match what you see in the photographs. You will repeat this process for several of the reference photographs. For now, sculpt in the same layer that you created earlier and keep the subdivisions at level 2. Remember that your model may differ to varying degrees from what you see in the figures – which is fine – just keep sculpting. As you progress, your model will begin to resemble Amy.
FIG 3.15 Repositioning and Roughing In the Eye Sockets and Sculpting the Forehead and Cheeks.
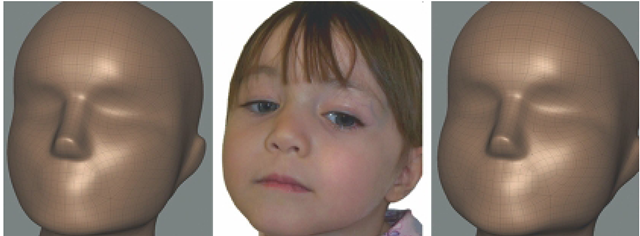
Look at photo1.jpg; notice that you can barely see Amy’s right ear. Now, rotate the Perspective camera so that the view is similar to photo01.jpg. When you position the camera to match with the photograph, you can see most of the model’s right ear. This difference occurs because the model does not have Amy’s chubby cheeks (Figure 3.16). Take a minute to make a camera bookmark. This will help you refer back to this viewpoint as needed. Then, with the Grab tool, pull the model’s cheeks to match with the photograph. Notice that, in this view, you can also see that the forehead needs to be rounded and the chin and jawline need to be sculpted to look like the reference photograph.
To sculpt the jawline, use the Grab tool to push up under the jaw, and use the Bulge tool to define the edge of the jaw. Take time to make these adjustments and any others that you see while studying photo1.jpg and comparing it with the model. Remember to smooth the model as you sculpt.
You do not have to sculpt in the same position as the reference photographs at all the time; this would be impossible to do. At some point, you will need to rotate the camera to see other parts of the model even though you are still working from a specific reference photograph. Move the camera around the model as needed to sculpt, and then use the camera bookmarks to reposition the camera back to the same view as the reference photograph to check your work.
FIG 3.16 Position the Camera to Match with Photo01.jpg and Sculpt What You See. As You Work, Use Camera Bookmarks to Save the Views that Match with the Reference Photographs.
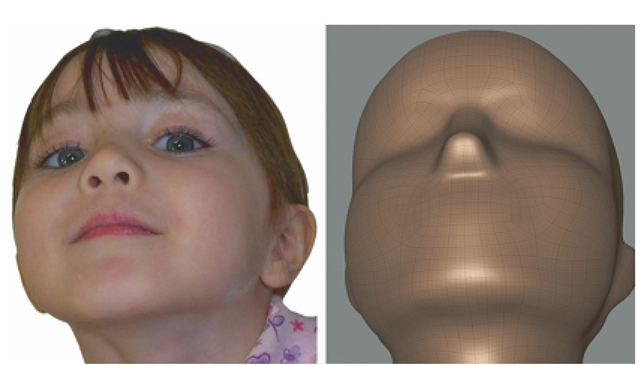
FIG 3.17 Roll the Camera to Match with Photo02.jpg and Sculpt the Sides of the Head, Face, and Jawline.
When you are finished with photo1.jpg, move on to photo02.jpg. Remember to make a camera bookmark when you have the scene view in a position similar to that of photo02.jpg (Figure 3.17). To match with the view in photo02.jpg, roll the camera by pressing Shift + MMB. In this view, sculpt the top and sides of the head, fill in the sides of the face, and begin to sculpt the jawline. As you sculpt, check your work with the reference sketches in the Front and Side camera.
Use a combination of the Bulge, Grab, Wax, and Smooth tools at varying sizes and strengths to continue sculpting. However, experiment with other tools such as the Sculpt and Flatten tools to see how they work.As you gain experience with Mudbox, you may discover that you prefer different tools or tool combinations than the ones we are suggesting – use the sculpting tools that work best for you.
Study the remaining reference photographs to continue sculpting the model. Make camera bookmarks for all reference photographs like you did with the first two. Continue to sculpt the cheeks, jawline, chin, forehead, sides of the head, and neck based on what you see in the photographs. Once you have worked your way through all reference photographs, review the model by looking at it through the first camera bookmark. How did the changes you made in one view affect the others? You may find that you have to resculpt certain areas to get them to match with the reference photographs. Remember that sculpting is a push-pull dance until you find the happy medium where the model begins to resemble Amy.
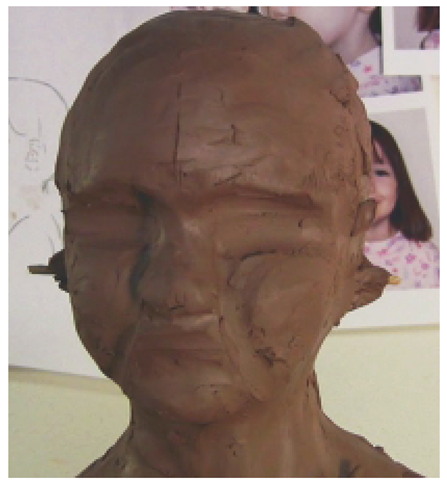
Refining the shape of the head and face, using the reference photographs, was challenging, but certainly it’s worth the effort. The steps that you have taken, so far, have laid down the foundation needed to sculpt the main facial features like the nose, mouth, and eyes. At this point, you should have a model that is beginning to resemble Amy (Figure 3.18).
FIG 3.18 Traditional Sculpture Roughed In.
