Most digital movies are of familiar things, such as family, nature scenes, or maybe a live event of some kind. Thinking about what you want to accomplish with your movie, prior to recording, will result in a better-looking final product. While it isn’t necessary (or even probable) to storyboard most live recording opportunities, keeping some basic fundamentals about framing of shots and technique in mind will add a more polished look to the final production.
For the purpose of illustration, most tasks in this part of the topic focus on an exchange between a customer in a coffee shop and the barista behind the counter. The progression of tasks illustrates how to effectively draw the viewer’s focus to something specific within your movie, while maintaining a sense of continuity.
Getting the Best Result
Planning Your Shot
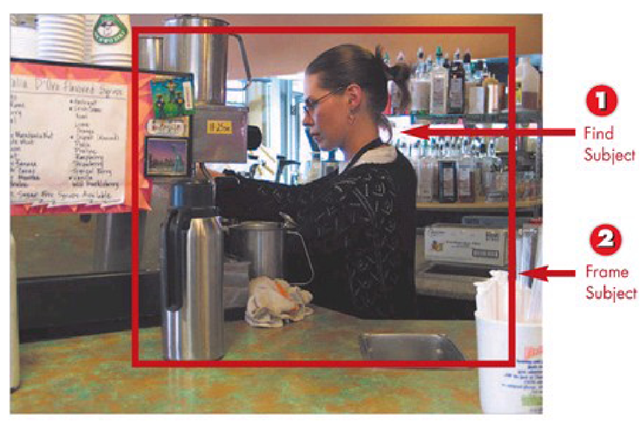
1 Find the subject of your movie. In this example I have captured someone making a coffee drink.
2 Frame your subject in the viewfinder, leaving room for potential movements, so zooming isn’t required.
INTRODUCTION
Planning a shot is as simple as looking for what you want to capture in a situation and then framing it with the lens.
TIP Art of Framing
One of the best ways to learn video framing is to study paintings. Go to the local art museum and look at paintings depicting real objects (ignore the abstract stuff). Pay special attention to where painters position people and objects within the paintings. Apply this positioning to the people and objects you see in the camcorder’s viewfinder.
Positioning the Camcorder
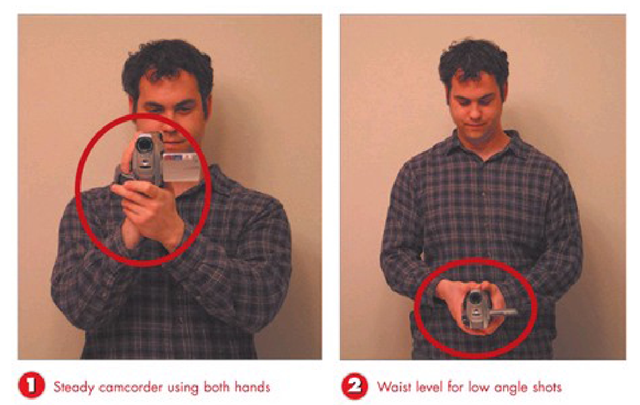
1 Hold the camcorder slightly out from your body with both hands at chest height or higher for liigh angle shots.
2 Hold the camcorder slightly out from your body with both hands at waist height or below for low angle shots.
INTRODUCTION
When no tripod is available, holding the camcorder steady is vital. Keeping both hands on the camcorder reduces potential cam-corder jerks. TIP
Stabilizing the Camera
When no tripod is available, get creative with solutions for getting the right camera angle and keeping it stable. Tables are generally waist high, which makes them a stable location for shooting low angle shots. A ladder is a good place to rest a camera for high angle shots, when no tripod is present.
Properly Framing Headroom
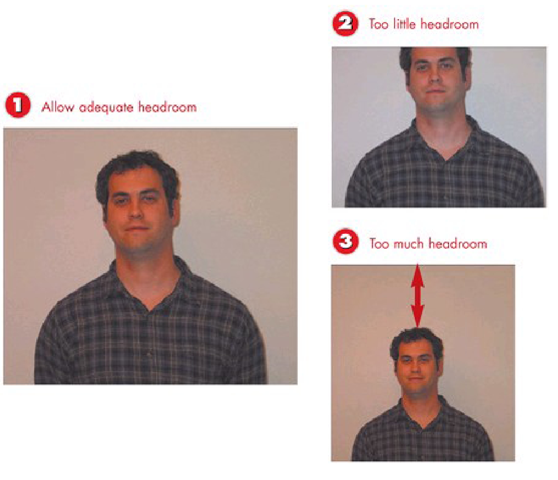
1 Frame your subject with enough headroom so that the head isn’t cut off, while not leaving the head floating in space.
2 Not enough headroom draws attention below the subject’s face.
3 Too much headroom minimizes the importance of the person in the frame.
I
NTRODUCTION
Establishing appropriate headroom helps keep focus on the person you are recording. This is especially important when shooting close-ups because you don’t want to accidentally cut off some-one’s head in the picture.
HINT Extreme Close-Up
If you are specifically recording facial reaction, framing the face from the hairline to just below the mouth places more emphasis on emotional response.
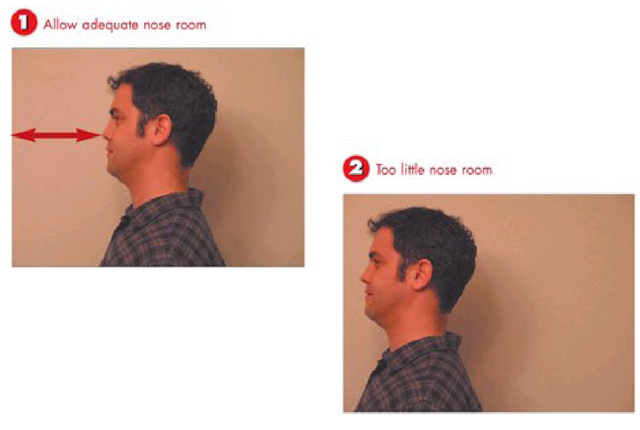
Properly Framing Nose Room
Frame the subject of your shot with enough room to allow forward progress in the frame. Putting the subject at the edge of the frame leaves nowhere to go but off camera.
INTRODUCTION
Nose room is the space between the tip of a person’s nose in a profile shot and the edge of the picture. Nose room leads the subject through a frame. Leaving room in front of a person allows them move forward in the frame.
TIP Walking Through the Frame
If you want to move a character from one scene to the next, have them walk into the frame from one side and out on the opposite side.
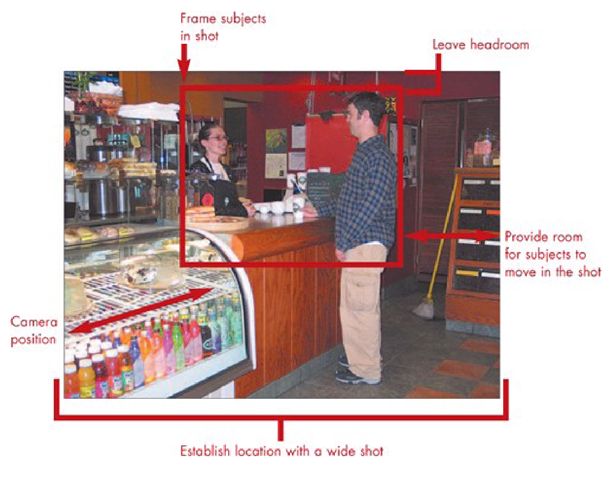
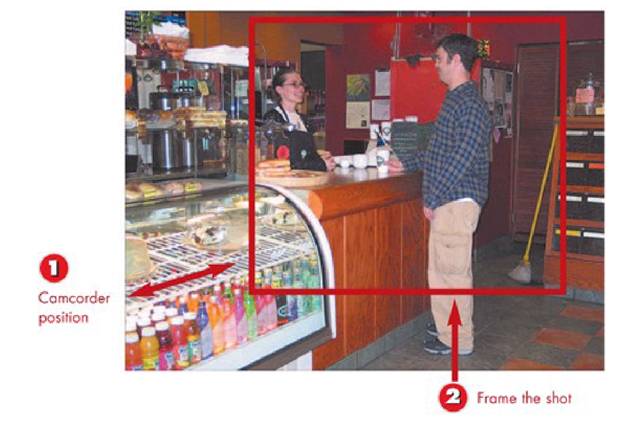
Shooting a Wide Shot
1 Position your camcorder approximately 10 feet from the action to capture surrounding details in addition to the subject of the movie.
2 Frame the subject in the background, drawing focus to what’s taking place where the subject is in the scene. Flere you can see surrounding details about the coffee counter.
INTRODUCTION
Wide shots keep a scene in perspective with the surrounding environment. Wide shots include background details to illustrate a location.
TIP Adding to the Conversation
If an additional person will be walking into frame to the left, position your subject to the right of center, leaving room for the third to join the frame.
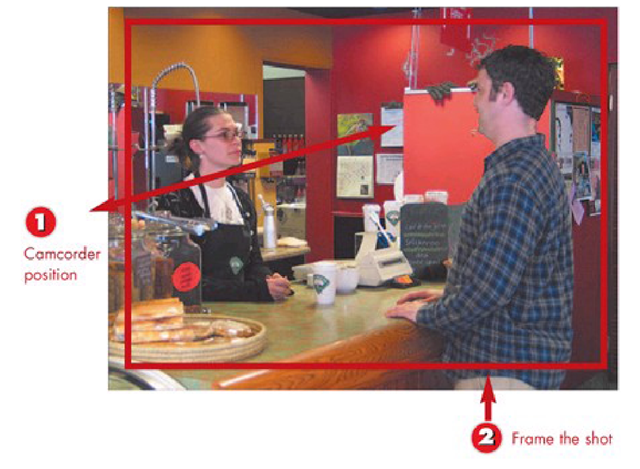
Shooting a Medium Close-up Shot
1 Position the camcorder so that few background details are available in frame, approximately 2-5 feet from the action.
2 Frame the subject with just enough background to leave room for movement in the frame.
INTRODUCTION
Medium close-up shots bring the faces of people into better focus, adding more intimacy to the conversation.
HINT Waist Up
Medium range shots generally capture people from the waist up. Just be careful that you aren’t capturing only a portion of the background that won’t have context in the medium range shot.
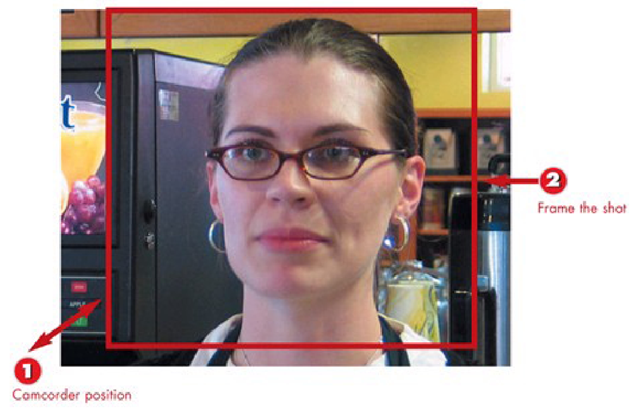
Shooting a Close-up Shot
1 Bring the camcorder in close enough to capture the primary subject of the shot, without getting any background detail.
2 Frame the subject tightly in the shot.
INTRODUCTION
Close-up shots draw the viewer’s eye directly to the object you want them to focus on.
TIP Forget the Background
When taking close up shots, don’t worry about keeping the background in focus. The viewer’s attention should be on the face or object in the close-up, making it acceptable to have objects in the background look slightly fuzzy and out of focus.
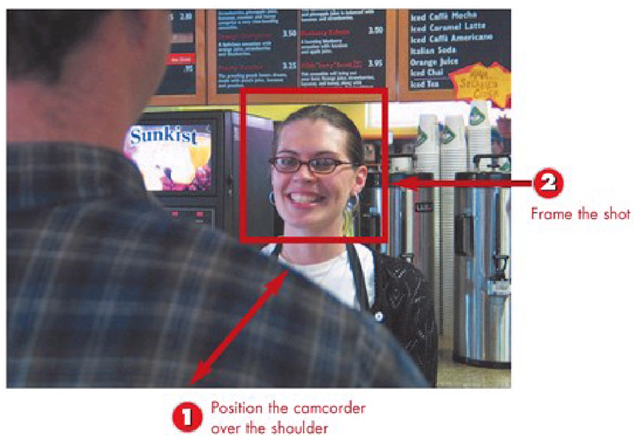
Creating an Over-the-Shoulder Shot
1 Position the camcorder above and behind the shoulder of one party in the conversation.
2 Make the person facing the camcorder the main focus of the shot.
INTRODUCTION
Shooting over-the-shoulder (OTS) of one party in a conversation puts the viewer in the conversation.
TIP Advanced Over-the-Shoulder
If an extra camcorder is available, or if you want to record two takes, also shoot a close- up of the party whose shoulder appears in the OTS shot so that you can give the viewer both parts of the conversation onscreen in the finished movie.
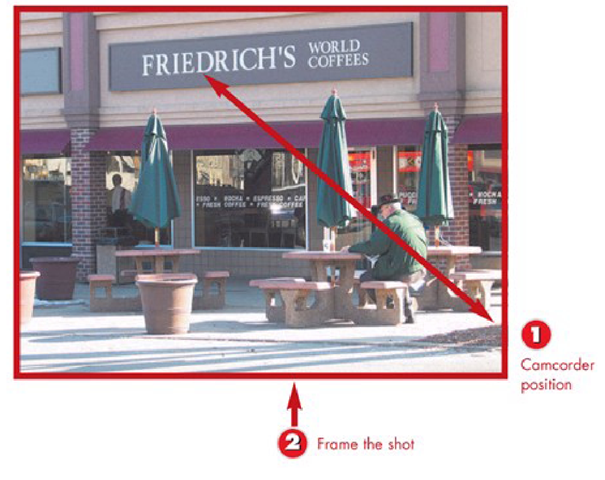
Creating an Establishing Shot
1 Position the camcorder away from the scene to capture all background detail of the shot.
2 Frame the shot to include as much background detail as possible.
INTRODUCTION
Establishing shots set the stage for events about to take place. These shots often define location. Taken literally, an establishing shot tells the viewer, "This is where the scene you are about to watch takes place."
TIP Establishing Wide Shot
A wide shot is often used to establish the scene, with all action in the scene taking place framed in medium close-up range.
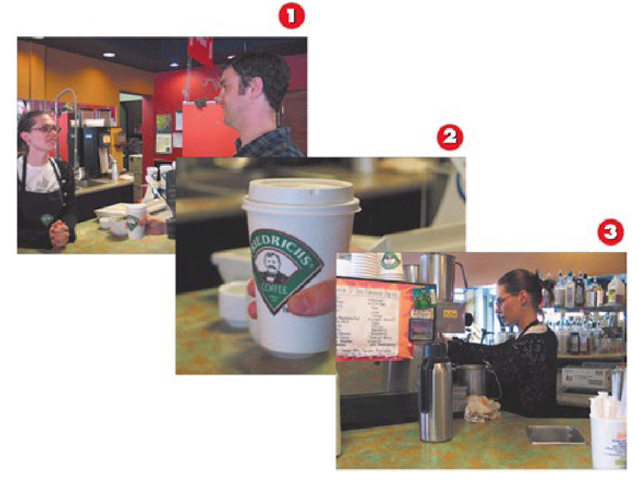
Creating a Cutaway Shot
1 Frame the main action in a shot. In this case, dialog at the coffee counter.
2 Shoot something to shift focus from the main action, allowing for an advance in time. A close up on the coffee cup shifts the viewer’s attention.
3 Return to the main action framing the current scene on camera. The barista is now making a drink at the espresso machine.
INTRODUCTION
A cutaway shot is any shot not focused on the main action of the scene. It is generally used to jump ahead in time without confusing the viewer.
HINT Crowd Shots
One of the most common uses for a cutaway is crowd shots at sporting events. Putting in a crowd shot makes it easy to change angles without confusing the viewer.
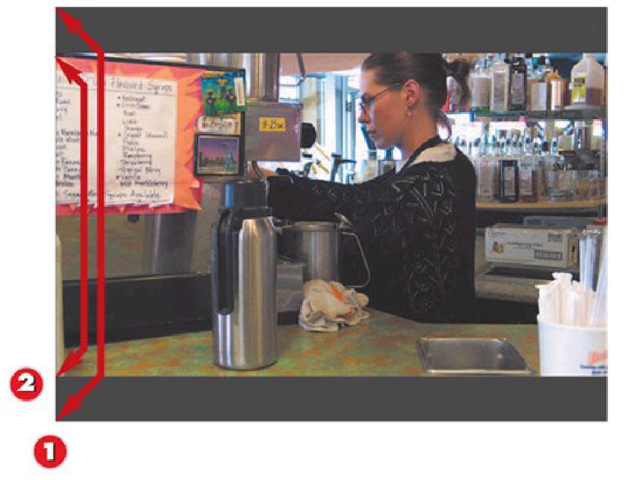
Shooting Video in 16:9 Format
1 Most DV camcorders capture video with an aspect ratio of 4:3, which is represented by the full picture extending to the outside edge of the gray bars.
2 The inside edge of the gray bars represents where this picture gets cut off when shooting in 16:9.
INTRODUCTION
16:9 refers to the aspect ratio common to widescreen movie format. Shooting in 16:9 requires planning for more room at the top and bottom of the screen. HINT
HDTV Playback
If you own an HD television, recording in 16:9 produces video with the native HD aspect ratio. While you won’t get HD quality video without an HD camcorder, this eliminates the need for the TV to stretch the picture.
HINT Gray Bars
The gray bars in the photo above illustrate where most digital camcorders cut the image to fit the 16:9 aspect ratio.
Shooting Video in 4:3 Format
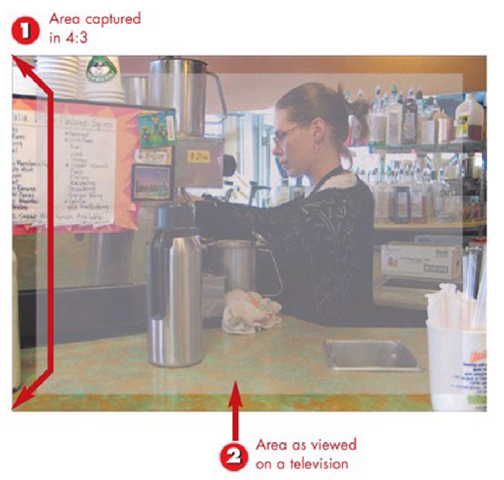
1 Recording in 4:3 results in what you see is what you get movie making.
2 Oversampling by television sets, which causes portions of the video image to display off screen, means leaving important details out of the outside 10% of the screen.
INTRODUCTION
4:3 is the aspect ratio for normal full-screen television. DV camcorders shoot in this mode by default.
TIP Switching Between Aspect Ratios
Use the same aspect ratio for all video clips included in one movie project. Most video editing programs render all footage to the same aspect ratio, which results in distorted video when both 16:9 and 4:3 aspect ratios are used in the same project.
