Objectives
• Learn to preplan your document.
• Discuss sketching layout of document.
• Discover importance of paper type, folds, and binding in planning process.
• Study production and delivery options.
• Understand impact of costs in decision-making process.
Introduction
In the previous topic, you learned about the hardware and software used in desktop publishing. Now it is time to get down to the actual process of creating a document. It may be tempting to open a DTP program and immediately begin entering text and inserting images. While this might seem like the quickest way to complete a project, it is not the best way. A little planning at this stage will really pay off in the end. Using the planning guide at the end of this topic will make it easy to track your decisions.
Preplanning
Audience
Before you begin creating a document, you need to determine who will make up your audience. At first, your prospects may seem obvious. However, there could be additional audience members you did not initially consider. Actually taking the time to write down who your audience is can help you uncover these additional possibilities. For example, if you are creating a brochure to advertise the next meeting of an organization, you likely will assume that your audience will consist of members from that organization. However, you should also consider that prospective members, or even those who have never heard of your club, might also see the brochure. If you would like to attract these readers as new members or educate them about the organization, you should incorporate additional information that you would not necessarily include for your original group.
Sometimes, putting yourself in the place of your reader is the best way to decide what each member of the audience might want to know. In the brochure example, your members know what the organization does, but others might not. Therefore, placing the organization’s mission statement in a prominent position on the brochure may be helpful. As you are preplanning, think about anyone who could possibly read the final product.
Purpose
Once you have considered your audience, think about the purpose of your product. Is it to inform, to advertise, to seek input, or perhaps to meet a requirement? Again, the response to the purpose question may be surprising. For example, if you are creating a calendar with important dates, it is obvious that the dates are to inform. However, calendars often have photographs or graphics above the calendar. What purpose do these images serve? Are they selected also to inform or merely to attract attention? Knowing why you are producing the calendar may help you make decisions about what to include.
Time Frame
One of the most important considerations when creating a document is to consider the schedule under which it is to be produced. In a business environment you are seldom working alone. There are often several people involved in the process. If photographs are to be included, a photographer may be used. The means of publication, such as photocopy or professional printing, has to be taken into consideration. How much time is needed to complete that stage of the project? If the document has to be bound or even stapled, then the person responsible for that task must be kept informed. If the completed project is to be mailed, then the person assigned that responsibility must be part of the process. The list could go on and on.
As a result, one of the steps to planning must include the time frame or schedule that will be followed. Because everyone in the process must meet his or her deadline in order for the final product to appear on schedule, each person needs to be aware of the plan as it evolves and agree to the deadlines established.
Even at this early stage of design, it is important to proofread and verify the information you record. After each planning meeting, a summary of all the decisions made needs to be sent to each person participating in the project. This will help ensure that any recording errors are quickly recognized, so they can then be corrected. Each person who receives the summary should proof it carefully, and then notify the person compiling the information of any changes that need to be made.
Layout
Thumbnail Sketch
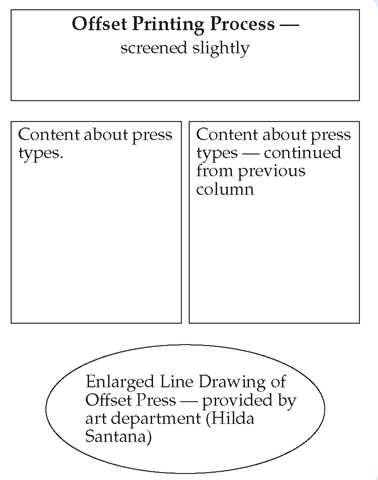
Once preplanning is complete, the next task is to create a thumbnail sketch of your document. This does not have to be a complicated drawing. It is a working document that will let you "think" on paper about what you have in mind. Using stick figures for drawings and boxes labeled as text is all that is necessary (see Figure 2.1). Working in pencil is also a good idea so that you can erase and move parts as needed.
Figure 2.1
A thumbnail sketch is a good way to plan a document before opening your DTP software.
Working as a team can be challenging, particularly when tight deadlines are involved. It is critical that you understand your importance to the team and its goals. If you are a procrastinator, you should realize that your decisions affect everyone in the group. Putting off your obligations hurts everyone. If you discover that you cannot complete your part of an assignment in the time frame originally established, you are ethically bound to notify the team. It’s always tempting to hope for a last-minute rescue, but that’s not always realistic. It is far better to notify the team so they can make any necessary decisions in a timely manner.
Figure 2.2
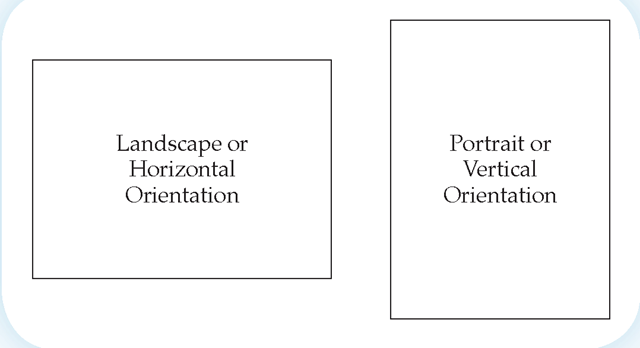
One of the first decisions you will have to make when you open your DTP software is whether it is to be designed in landscape or portrait orientation.
Orientation
Since most paper is cut in a rectangular shape, you must decide if you want your page printed with a vertical or horizontal orientation as shown in Figure 2.2. Vertical pages are printed in portrait orientation and horizontal ones in landscape orientation. Most bound documents are printed vertically. Flyers that will be folded into thirds are usually printed so the page is oriented horizontally. Often booklets are printed horizontally and then folded, creating the appearance of a vertical document.
Page Organization
As you are working on your sketch, think about the organization that you want to use. What should come first? What needs to be last? How many pages will you need? Let your mind explore all the possibilities. Use your thumbnail sketches as a guide.
If you are creating a document of less than ten pages, sketch each page. If it is a long document such as a report, many of the interior pages may be similar. For those, you can merely sketch one page showing the general layout and then indicate how many there will be.
Page Arrangement
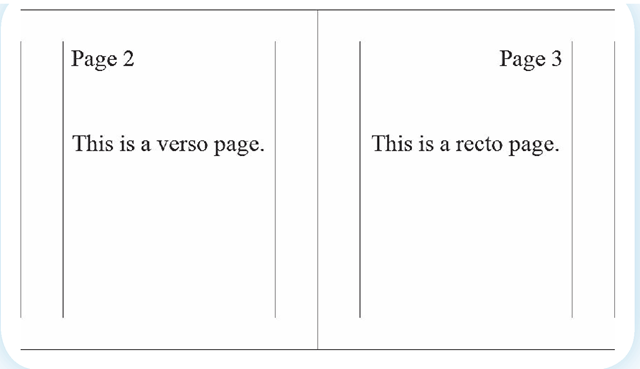
If your document is going to consist of more than a single page, you need to decide how the pages will be arranged. Pages printed on only one side generally have the same margins for every page and the same header/ footer information that contains the page number. Pages that are printed front and back so that they face each other (facing pages) may have slightly wider interior margins, or gutter, to allow binding space. Their headers/footers will also be reversed so that the page numbers appear on opposite sides as shown in Figure 2.3. The odd-numbered pages are called recto pages and the even are called verso pages. In a topic, the first page is always the recto page.
Orientation is the vertical or horizontal position in which a page is printed.
Portrait orientation is a page design in which the shortest side is the top of the page.
Landscape orientation is a page design in which the longest side is the top of the page.
Figure 2.3
If you select the option to have facing pages, each side will be slightly different.
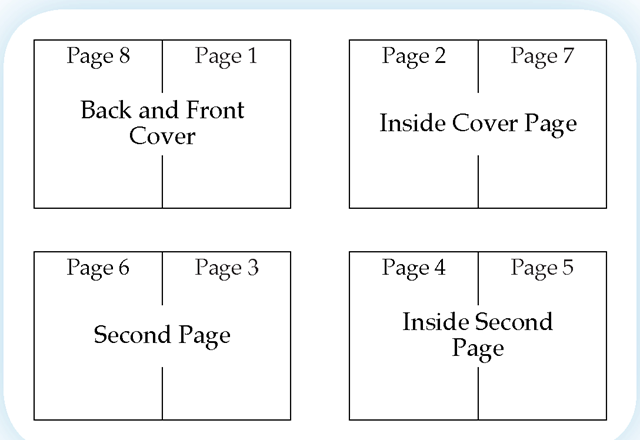
One of the problems that inexperienced desktop publisher designers have is with managing the page arrangements of booklets. A booklet consists of two "pages" printed on a single sheet of paper, that is then folded. The problem occurs because pages that are designed sequentially do not appear in the order in which they were created, as shown in Figure 2.4.
In the figure, you can see that "page" 1 (a recto page) appears on the right side of the page and "page" 8 is on the left. Fortunately, desktop publishing software has a booklet option that takes the guesswork out of the process.
Figure 2.4
Because of the folds used to create booklets, the page arrangement can be confusing.
Paper
Part of the planning process includes a decision about both the size and type of the paper used. These are not always easy choices. Cost and even mailing requirements have to be factored into the decision.


