…
1. Condition.
The crankshaft is one of the most highly stressed engine components. The stress increases four times as the engine speed doubles. The crankshaft is rejected if there is any sign of a crack, because a cracked crankshaft may break (Fig. 20.57) if continues in service. Crankshaft cracks in high production passenger car engines can be detected with a close visual inspection. High-rpm racing crankshafts should be checked with Magnaflux to detect any minute crack that may lead to failure.
A crankshaft broken at the front of the number one crank pin.
A crankshaft-bearing journal.
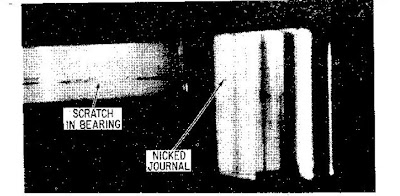
Bearing journal scoring, one of the most common crankshaft defects appears as scratches around the journal circumference, generally near the centre of the journal (Fig. 20.58). Dirt and grit carried in the oil enter between the journal and bearing. If these particles are large enough to get through the oil clearance, they partially embed in the bearing and scratch the journal. Dirt can also be left on the journal during assembly. The most important factor for the maximum journal life is the continuous supply of clean lubricating oil.
Careless handling caused the crankshaft nick on the right journal.
Crankshaft journals can have nicks or pits in them. Nicks are formed by carelessness when the journal is bumped with another part while exposed or while being assembled (Fig. 20.59). Pits can be caused by corrosion.
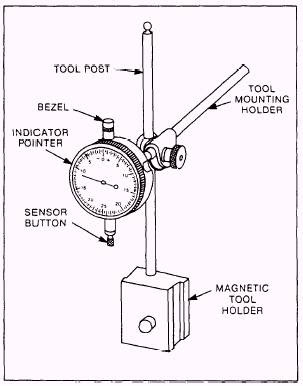
A bent crankshaft can be detected by a dial gauge by supporting the end main bearing journals in V-blocks. A dial gauge installed on the middle-bearing journal shows run-out as the crankshaft is turned. In the absence of V-blocks, the crankshaft can be supported by the two upper half end bearings in the block (Fig. 20.60) and the other bearing shells are removed. A dial gauge is used in the same manner to indicate the shaft bend or run-out.
Checking crankshaft run-out with a dial gauge with only the end main bearing shells installed.
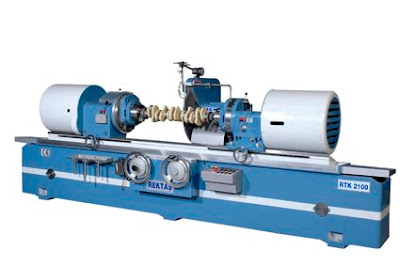
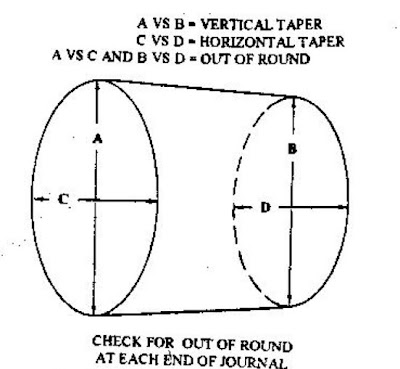
Journals wear out-of-round and become tapered. Out-of-round and taper are measured using a micrometer by taking measurements at a number of different locations on each journal. Rough journals and slight bends can be rectified by grinding the journals on true centres. Forged shafts with excess bend should be straightened before grinding. Figure 20.61 shows a typical crankshaft grinder.
Grinding a crankshaft.
A crankshaft is replaced, if a relatively inexpensive standard production shaft is damaged beyond grinding limits. Excessive damage is pictured in Fig. 20.62. For more expensive racing crankshafts, or crankshafts suitable for modifications, can have the journals build up by welding or by special metal spray techniques. They are then straightened and reground. This process is expensive and, therefore, is used only when it becomes less costly than purchasing a new Special crankshaft.
Fig. 20.62.
A badly damaged crankshaft caused by a broken connecting rod.
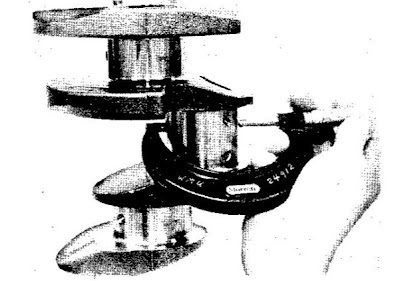
Crankshaft journal measurement.
2. Service.
Main bearing and connecting rod journals should be measured using a micrometer at the location shown in Fig. 20.63. If the crankshaft journal taper or out-of-round exceeds the manufacturer’s specifications, the journals must be ground undersize and fitted with the correct undersize bearings. When the journals are ground undersize, the journal shoulder to the original radius must be maintained.
Measuring the size of the connecting rod journal of crankshaft.
Inspection of the crankshaft may indicate any abnormalities (Fig. 20.64). When a shaft is in good condition, the bearing journals are only polished with fine polishing cloth. The polishing abrasive should be moved in the direction opposite to that of rotation to minimize the effects of microscopic ‘teeth’ that result from polishing.
If crankshaft wear, bend, or scoring is beyond limits, it is reground to a standard undersize. Crankshaft grinding is done on special grinding equipment by a highly skilled operator. Undersize bearings are used with the shafts ground to undersize.
Dynamic oil seals, which are accessible, are replaced each time the engine is disassembled. Seals are inexpensive, compared to the work involved if they leak later on. Replacement of seals is, therefore, preferred.

