Removing a background in Photoshop
Extracting a subject from a background is one of the most time-consuming tasks a designer faces. The most difficult part of this task is precisely masking out the edge, especially where hair or fur is involved. The new Truer Edge selection technology in Photoshop CS5 offers better edge detection and masking results in less time.
1 In your LessonOl folder, double-click the file selection.psd to open it. In the Layers panel, select the Original layer.
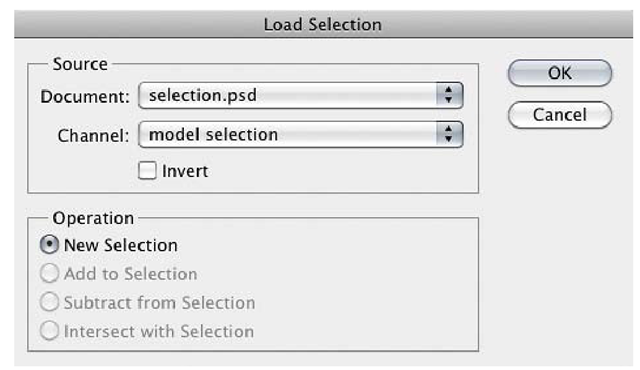
2 Choose Select > Load Selection, select model selection from the Channel menu, and then click OK.
3 Choose any selection tool (such as the Rectangular Marquee tool), and then click Refine Edge in the Options bar.
4 Click the View icon and choose On Black to make the changes easier to see.
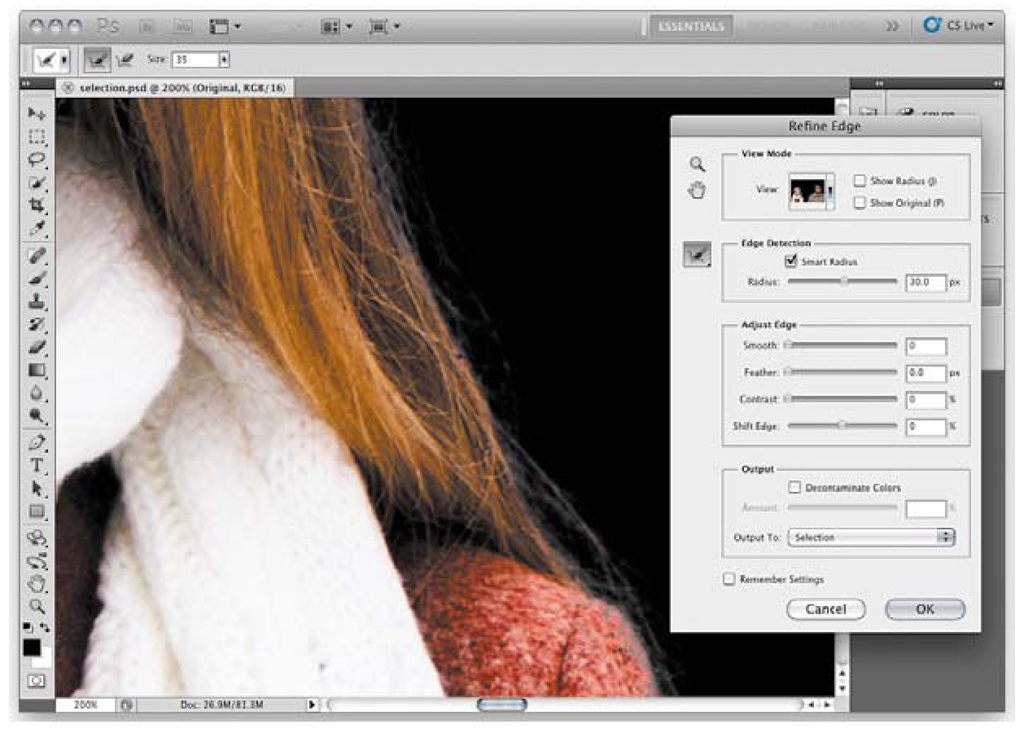
5 Select the Smart Radius check box and set the radius slider to about 3O px.
Watch how the selection edge changes, particularly around the hair. Notice how the selection automatically changes from the jacket to fine hair.
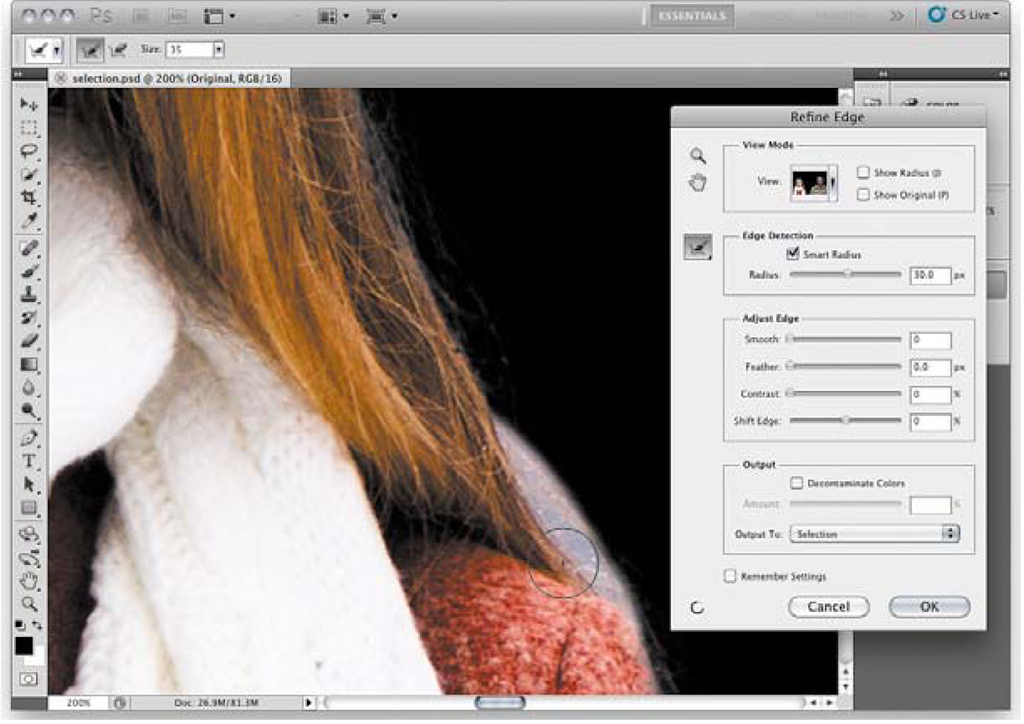
6 In the Refine Edge dialog box, select the Refine Radius tool ( -</). Drag along the hair edge near the woman’s shoulder to extend the radius outward to include more of her hair. If you want to reduce the radius, Alt/Option-drag the Refine Radius tool along the outside of the selection.
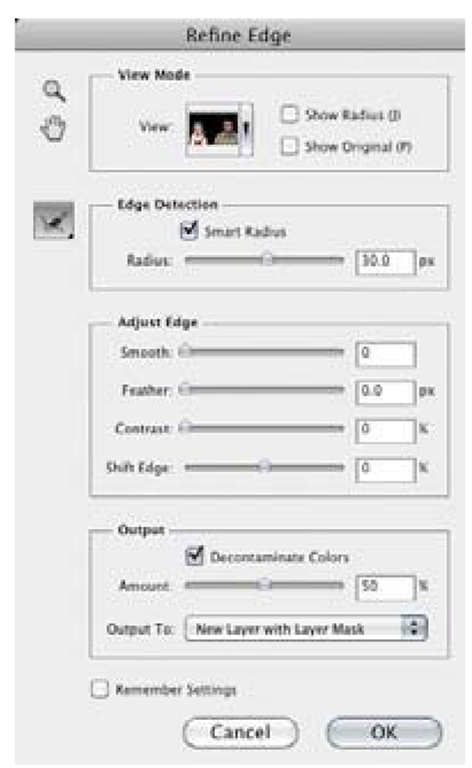
7 Select Decontaminate Colors to remove colors from the original background that you don’t want to show up against the new background.
8 Choose New Layer with Layer Mask from the Output To menu, and then click OK.
9 In the Layers panel, notice the new layer Original Copy and its mask. Click the eye icon for the Cityscape layer to display it, and notice how the subject is now composited with the cityscape seamlessly, including individual hairs.
10 Choose File > Save, name the document selection_done.psd, click Save.
Removing unwanted objects in Photoshop
Another traditionally time-consuming task is filling in areas where unwanted objects have been removed. This normally requires manually cloning and patching the empty area where the object used to be. In Photoshop CS5, Content-Aware Fill automatically matches lighting, tone, texture, and noise to make it look like the deleted area never existed.
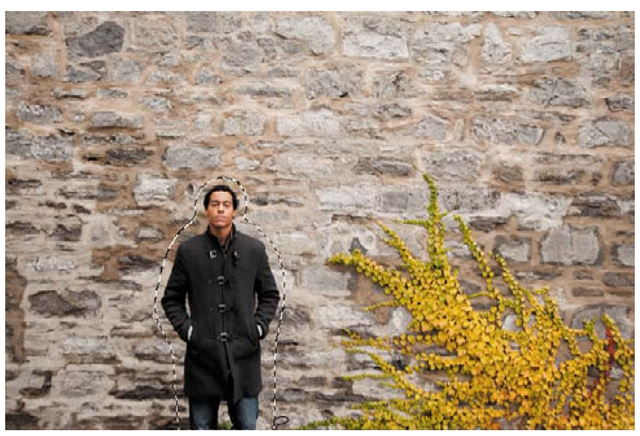
1 In your LessonOl folder, double-click the file content-aware.psd to open it. With the Lasso tool, make a rough selection just outside the man.
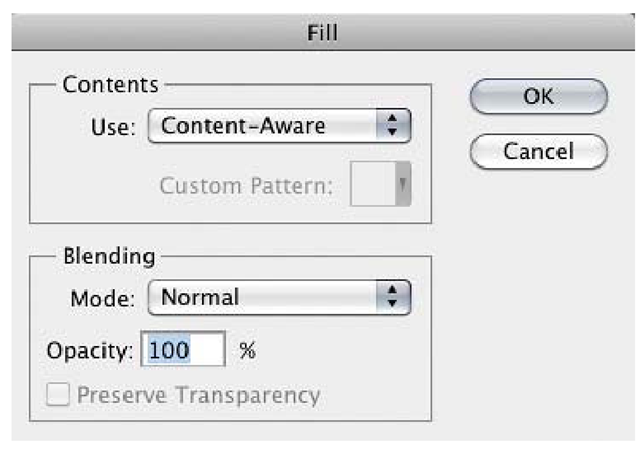
2 Press the Delete key. In the Fill dialog box, make sure Content-Aware is selected in the Use menu, and click OK.
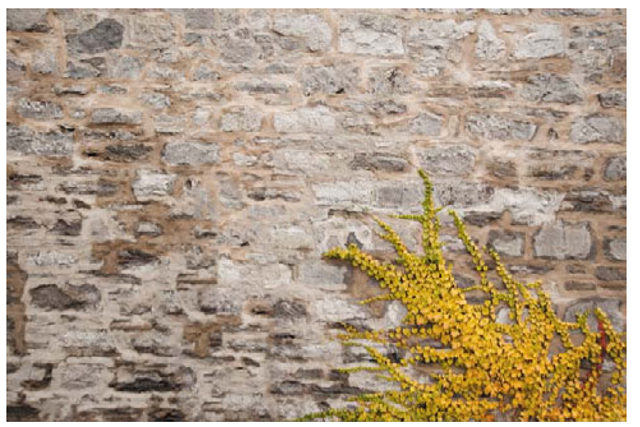
3 The man is deleted and filled in with the surrounding wall texture. Choose Select > Deselect to view the image without the selection.
4 Close the document and save your changes.
Another valuable use for Content-Aware Fill is in removing wires, graffiti, or other fine or thin objects. For this task it’s better to use the Spot Healing Brush in Content-Aware mode.
5 In your LessonOl folder, double-click the file content-aware_spot.psd to open it. Select the Spot Healing Brush, and in the Options bar, select the Content-Aware option.
6 Drag the Spot Healing Brush along the wire at the top of the image. When you release the mouse, observe how the wire has been removed seamlessly because the surrounding textures and window frames have been detected and matched.
7 If you like, try removing other fixtures in the image. When you’re done, close the document and save your changes.
Creating a 3D image in Photoshop
Photoshop CS5 Extended makes it easy to enhance your designs by creating 3D objects from 2D artwork using the new Adobe Repoussé feature—a fast, simple way to create 3D extrusions of any text layer, selection, path, or layer mask.
1 In your Lesson01 folder, double-click the file text_animation.psd to open it. Choose 3D from the workspace menu to switch to the 3D workspace.
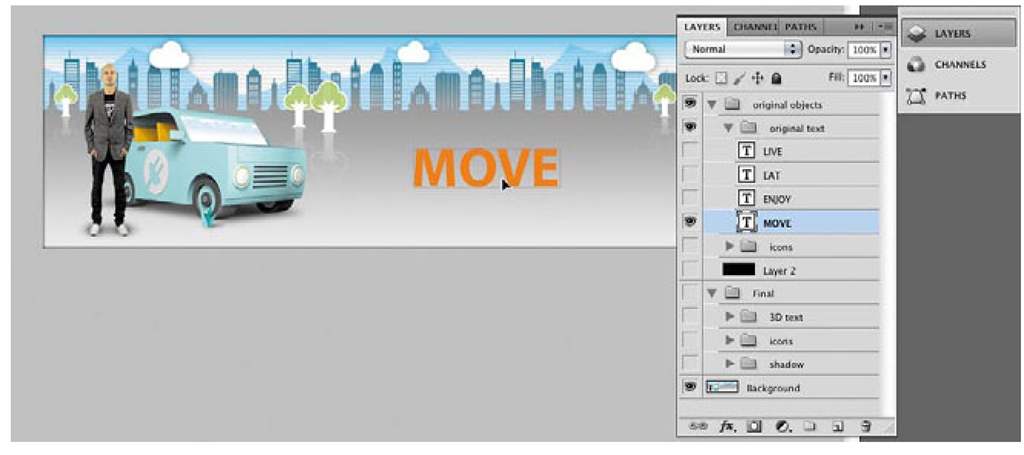
2 In the Layers panel, expand the original objects layer group and the original text layer group.
3 Alt/Option-click the eye icon for the MOVE layer to hide all other layers (including the other text layers) and then click the eye icon for the Background layer and the original objects layer group so that they are the only items visible.
4 In the Layers panel, select the Move layer. In the document window, use the Move tool to drag the Move layer to the center of the image.
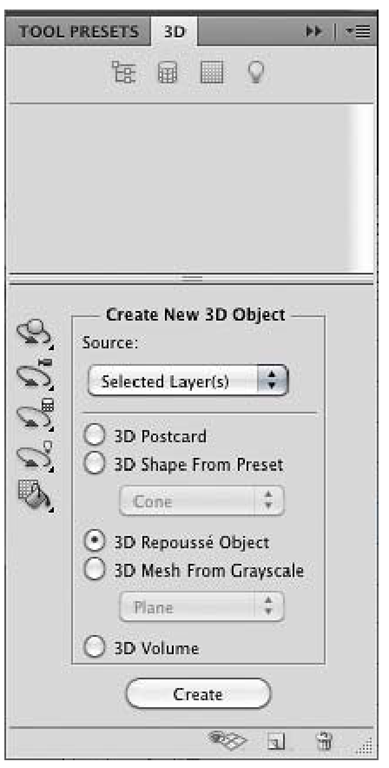
5 Choose Window > 3D. In the 3D panel, make sure that Selected Layer(s) is selected in the Source menu, select 3D Repoussé Object, and click Create. (If an alert appears warning about rasterization, click OK.)
6 Experiment by clicking on some of the Repoussé Shape Presets at the top of the dialog box, and observe how they change the Move layer in the document. When you’re done, select the first preset.
7 In the Extrude section, adjust the Depth value to around 3. Explore the other options in the Extrude, Inflate, and Bevel sections. If you aren’t sure what to do, you can use the settings in the following illustration.
While the Repoussé dialog box is open, you can drag inside the document window to rotate the object in 3D space. This is a good way to check your work.
8 When you like your 3D model, click OK.
If you want to edit the 3D model, choose 3D > Repoussé > Edit in Repoussé.
You’ve created a true 3D model. You can use it with the 3D tools in Photoshop, paint on it, and animate it. If you want to see an example of what’s possible with Repoussé 3D in Photoshop CS5 Extended, double-click the movie text_animation. mov in your Lesson01 folder.
In addition, you’ve learned many of the Adobe Creative Suite 5 Design Premium features that are important for preparing assets for projects. Throughout this topic you’ll see how assets you worked on in this lesson fit into larger workflows.

