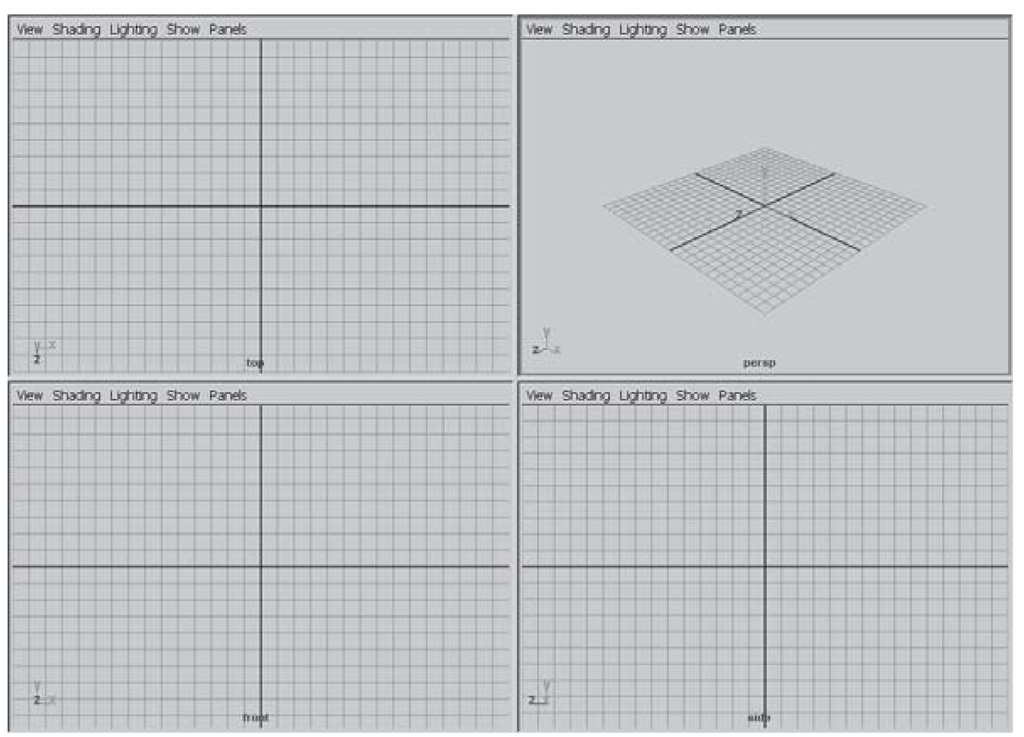
The Maya workspace presents the tools and user interface ( UT ) elements necessary to create all aspects of your animation (see Figure 1.16). In order to avoid being overwhelmed, some task-specific elements are only there when you need them, and others are ever-present. Let’s look at some of the most commonly used elements.
Figure 1.16: Maya’s interface
Menu bar: This is the familiar menu bar of almost any application. The first six menus remain the same no matter with which subset of the Maya interface you are working. The remaining items will vary based on context (see Figure 1.17).
Figure 1.17: Menu bar
Menu Sets: These allow you to select the specific contextual menu items for the mode of work you are in, i.e., Animation, Modeling, Rendering, and Dynamics (see Figure 1.18).
Figure 1.18: Menu sets
Panels: These are the perspective or orthographic viewports in which you do your work. These may be split into multiple views and can display editing windows and 3D scene data (see Figure 1.19).
Figure 1.19: Panels
Figure 1.20: Help line
Help Line: Look to this area for instructions and feedback on using the various tools in Maya (see Figure 1.20).
Figure 1.21: Time slider
Time Slider: This shows you the time, in frames, of your animation. Keyframes will appear here (see Figure 1.21).
Figure 1.22: Range slider
Range Slider: This is where you can specify the length of your animation or the subsection you are currently working on (see Figure 1.22).
Channel Box: This is an area that displays an object’s keyable values such as translation, rotation, scale, and visibility (see Figure 1.23).
Input
You will generally use the mouse and keyboard as your primary input devices for Maya. In this topic, we’ll cover a number of different combinations, shortcuts, and interface elements that allow easy access to Maya’s tools and functions.
The three-button mouse is the preferred weapon of choice for Maya. You select menus and buttons exactly the same way you normally do — move the cursor to the File menu, for example, and then click the left mouse button to expand the dropdown menu. Where things are a bit different in Maya is inside the 3D panels, time slider, and data fields. The left mouse button is used to select and alter things, the middle mouse button is used to change things on multiple axes, and the right mouse button is used to access contextual menus.
The standard abbreviations for the three buttons are: LMB = left mouse button, MMB = middle mouse button, and RMB = right mouse button.
Figure 1.23: Channel box
View navigation is accomplished with keyboard and mouse button combinations. In order to look at your models from all sides, pan around the screen, and get a closer look at an area you will hold down the ALT key on the keyboard while pressing a mouse button and moving the mouse. These are called Tumble, Track and Dolly moves, just as in traditional camera work. A visual representation can be seen in Figure 1.24.
Figure 1.24: Camera tools Transformation Tools
Transformation in Maya refers to the translation, rotation, and scale of an object in 3D space. (Translation is another word for movement or position.) Perhaps the three most frequently used tools are the Move, Rotate, and Scale Tools. For this reason, they have a prominent place in the user interface, and their hotkeys are in a home position on the keyboard (at least for right-handed mousers).
Additionally, some objects have special functions that can be accessed through the manipulator handle. These can control things such as the aim of a spotlight or the construction history of a surface.
Move Tool
In many cases, you’ll want to position an object in space. The tool that is used for such a translation is the Move Tool (see Figures 1.25 and 1.26). The Move Tool looks similar to the view axis, but with arrows at the end of each axis. Notice that the colors of the Move Tool handles correspond to the three axes. By LMB clicking and dragging along a handle, the object moves along that one axis.
Figure 1.25: Move tool icon
Figure 1.26: Move tool handle


