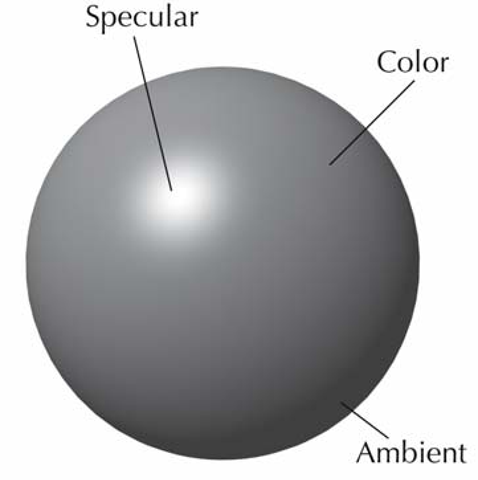
Shading defines the look of your model when it is rendered. We’ll begin with a com-1 ~V1 mon shading style, called Phong shading, and look at three of its attributes (see Fig ure 1.82): color, specular color, and ambient color. Later we will add textures, texture maps, transparency, glows, and other effects.
Figure 1.82: Basic shader components
Color is the main color of the material where light strikes it.
Specular is the bright highlight region of the surface material.
Ambient is the color of a section that receives no light. Normally black, but can be brightened for effects like self-illumination.
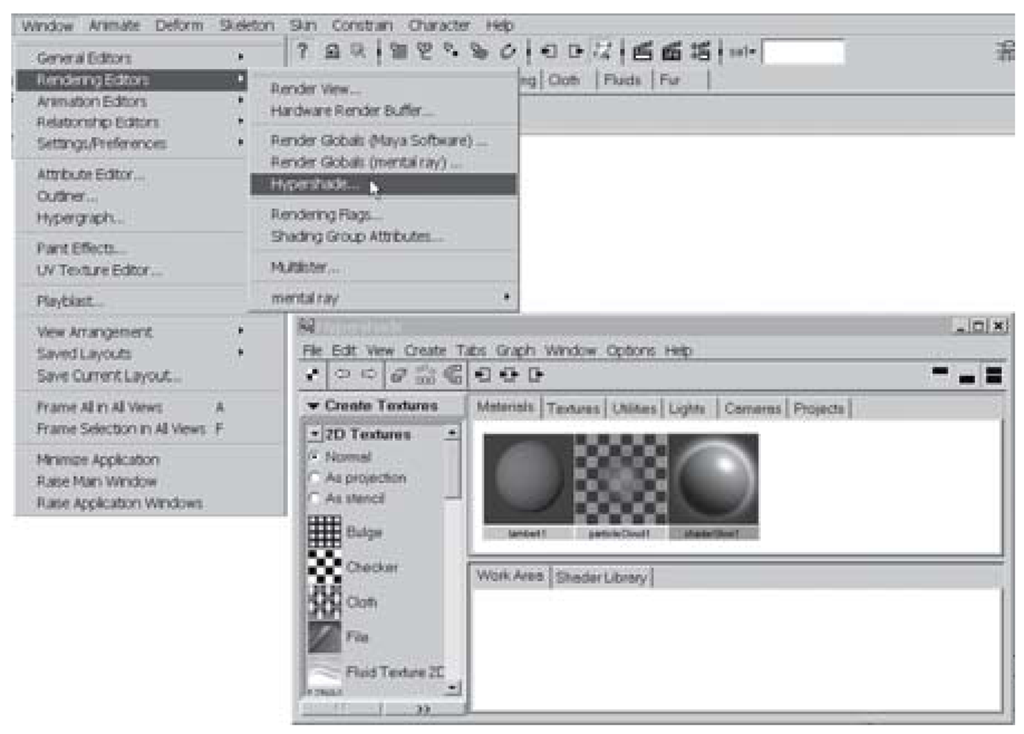
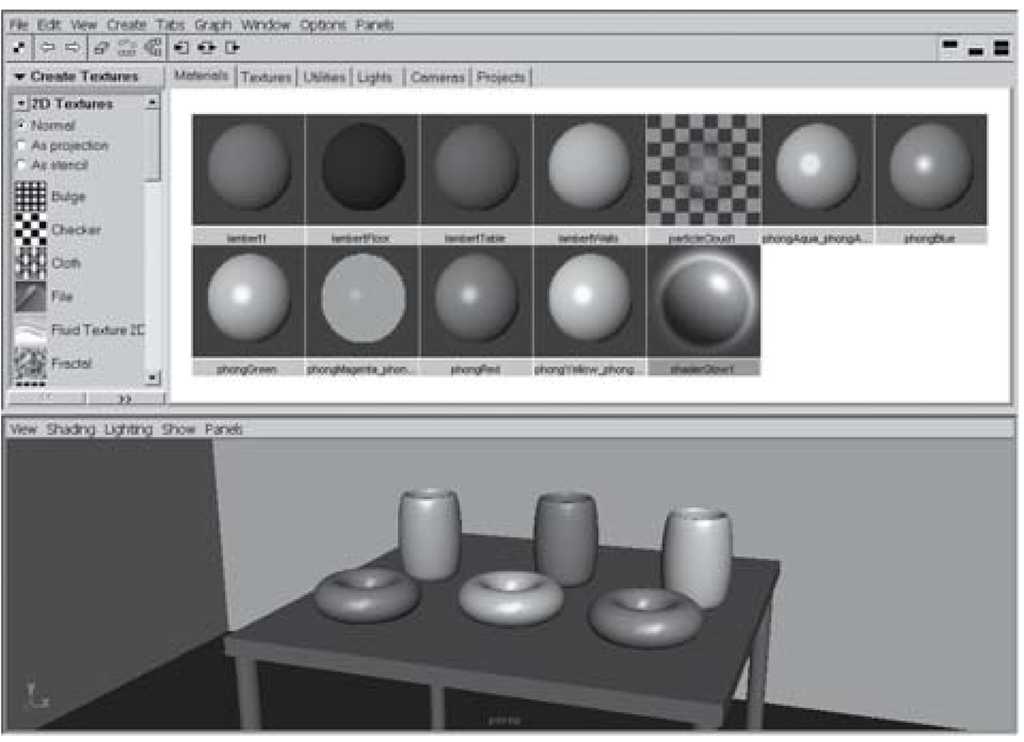
Figure 1.83: Hypershade window
Most of your shader creation will take place in the Hypershade. Go to Window > Rendering Editors > Hypershade. to open up a floating Hypershade window (see Figure 1.83).
Shading Exercise — Shading Donuts
1. Set your project to understanding_maya\Chapter01\shading_Donuts.
2. Open the phong_donuts_begin.ma scene.
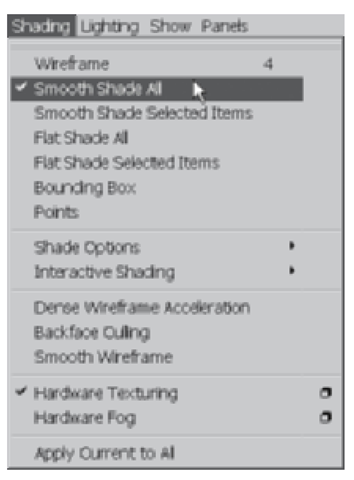
3. Highlight the Perspective view panel and choose the Smooth Shade All option (keyboard Hotkey 5) so you see the scene in color (see Figure 1.84).
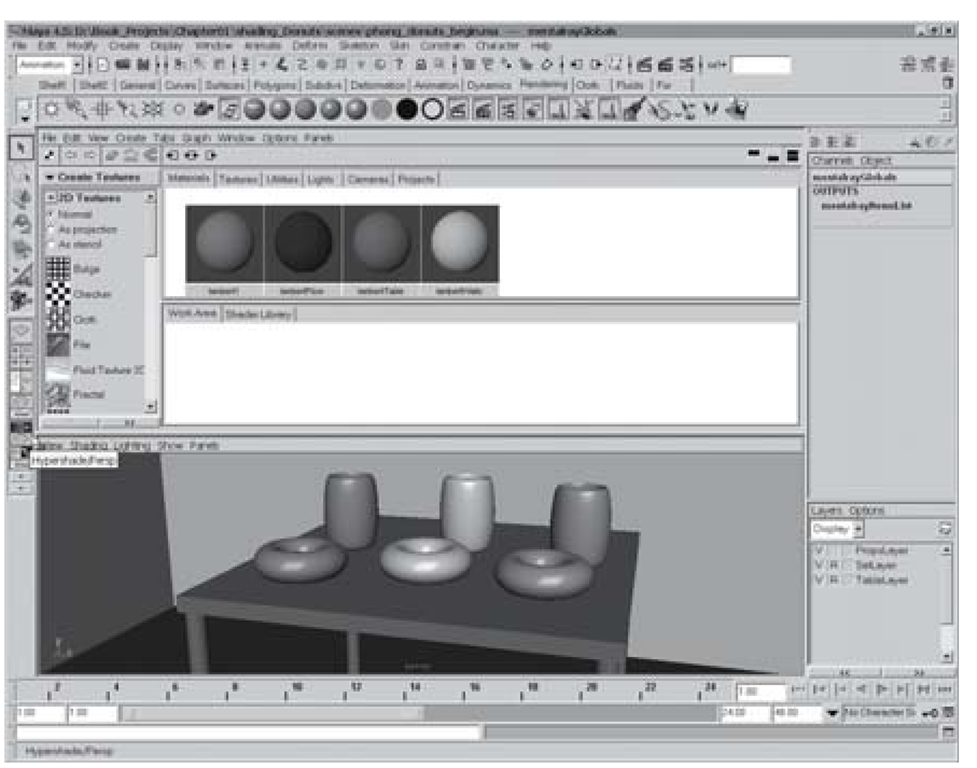
4. When you are working, it’s a good idea to select a view panel arrangement that matches the task. In this case, two stacked panes with the Hypershade and Perspective panels works well (see Figure 1.85). You can pick this arrangement by clicking on a panel menu’s Panels > Saved Layouts > Hypershade/Persp. Or, better yet, click on the Hypershade/ Persp button in the Quick Views section of the Tool Box.
Figure 1.84: Setting smooth shading
Figure 1.85: Hypershade/Perspective layout
5. In the Hypershade, look at the Materials tab area. Here you’ll see all of the Materials that are in the scene. Pay close attention to thephongRed,phongGreen, and phongBlue materials. These materials have been applied to the three doughnuts and cups on the table.
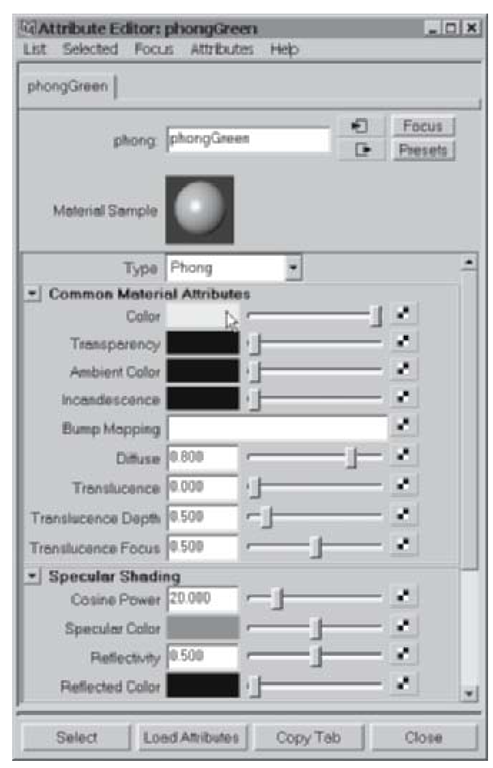
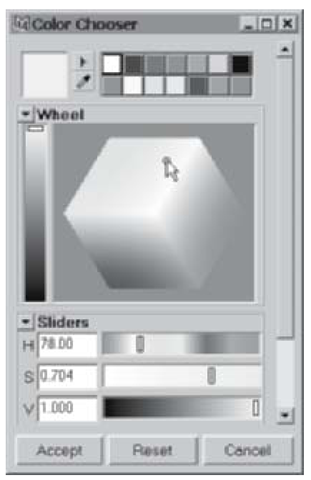
6. The relationship between materials and surfaces is a good example of Maya’s nodebased architecture. For example, the phongGreen material is connected to the MiddleCup object and the MiddleDonut object. If the connected attributes (in this case, the color green) change on the material node, we will see a change on the objects. Double-click on the phongGreen material to open the Attribute Editor. In the Common Material Attributes section, click on the green color swatch once to open the Color Chooser window (see Figures 1.86 and 1.87). Using the color wheel, select a new color. Notice how this color changes the material in the Hypershade as well as both objects in the Perspective window. It is important to remember that any changes you make to a material will affect all objects that have been assigned that material.
7. Close the Color Chooser window by clicking the Accept button. Close the Attribute Editor.
8. Next, assign the phongBlue material to the LeftDonut object. One easy way to do this is to MMB click-drag the phongBlue material sample onto the LeftDonut in the perspective panel. When you release the MMB, the LeftDonut will change from red to blue.
9. In the Hypershade menu, select Create > Materials > Phong to make a new material. Double-click the new material to open the Attribute Editor. In the “phong” field at the top, rename the material phongYellow.
Figure 1.86: Material settings
Figure 1.87: The Color Chooser
10. In the Common Material Attributes section, click on the grey color swatch to open the Color Chooser window. Pick a yellow color and click Accept.
11. Close the Attribute Editor and then MMB click-drag the phongYellow material onto the RightCup object.
12. Create another Phong material, this time naming it phongMagenta.
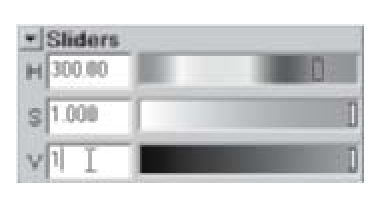
13. In the Color Chooser, change the color to magenta (300, 1, 1 in the HSV fields as in figure 1.88).
14. Change the Ambient Color to white by dragging the slider to the right, and then close the Attribute Editor.
15. Drop this material onto the MiddleCup object (see Figure 1.89).
16. Create one more Phong material, and name it phongAqua.
17. In the Color Chooser, change the color to an aqua-blue color (HSV 180, 0.5, 0.9).
18. Change the Specular Color to bright green (HSV 120, 1, 1).
19. Drop this material onto the LeftCup object.
20. Save the scene by clicking File > Save Scene As. and name it phong_donuts_end.ma.
Figure 1.88: HSV color fields
Figure 1.89: Middle cup material assignment
