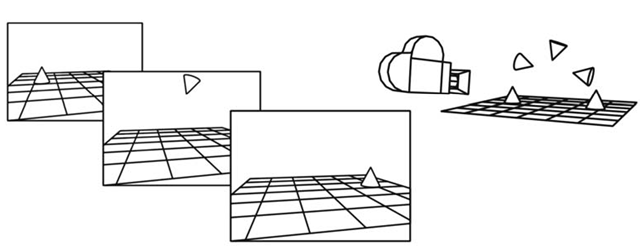
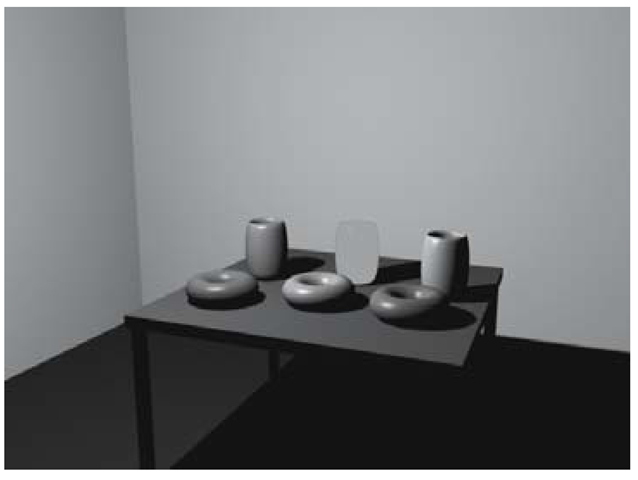
Your final step in creating a 3D animation will be to produce a sequence of production-quality frames that can be output to video, film, or a compressed video format such as an MPEG-2 QuickTime movie. When you instruct Maya to render your animation, it takes all of the data in the camera’s view and calculates a per-pixel bitmap image for each frame of the animation (see Figure 1.102).
Figure 1.102: Rendering a sequence of frames
Rendering Exercise — Rendering Donuts
1. Set your project to understanding_maya\Chapter01\rendering_donuts.
2. Open the scene render_donuts_begin.ma. This scene is like the lighting_donuts_begin.ma scene, except the globe has been removed and the perspective view camera has been locked down so it can’t be moved accidentally.
3. Make your perspective view full-sized, and press 5 and 7 to shade and light the view panel.
4. Advance to frame 26. We will do some test renders from this frame.
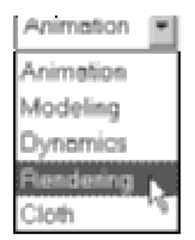
Figure 1.103: Rendering menu set
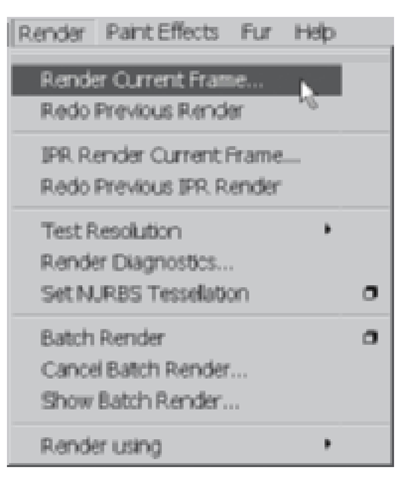
5. Switch to the Rendering Menu Set (see Figure 1.103). Click Render > Render Current Frame. (see Figure 1.104).
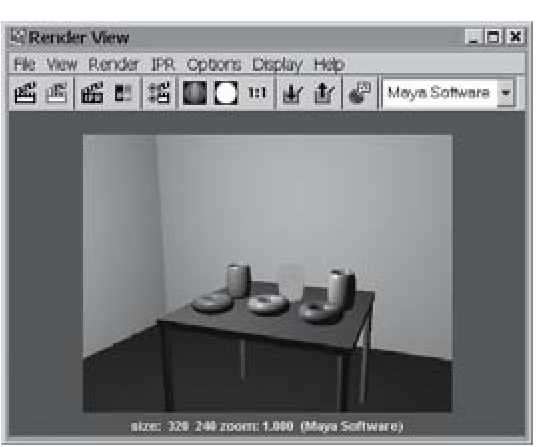
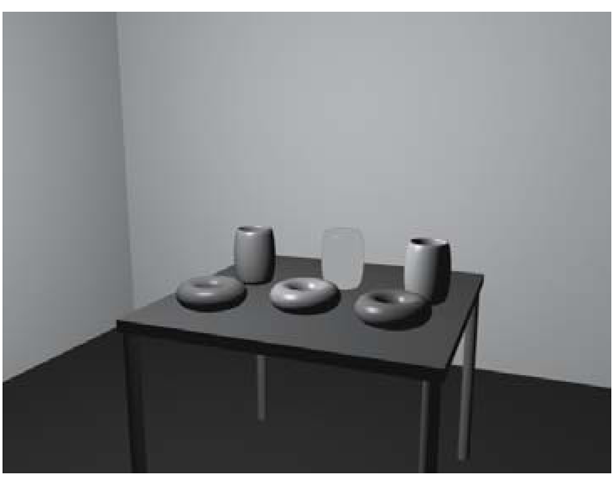
6. The Render View window opens up, and the current frame of your animation is rendered into it as in Figure 1.105. These default settings are small and of low quality. Let’s make things look better.
7. Close the Render View window.
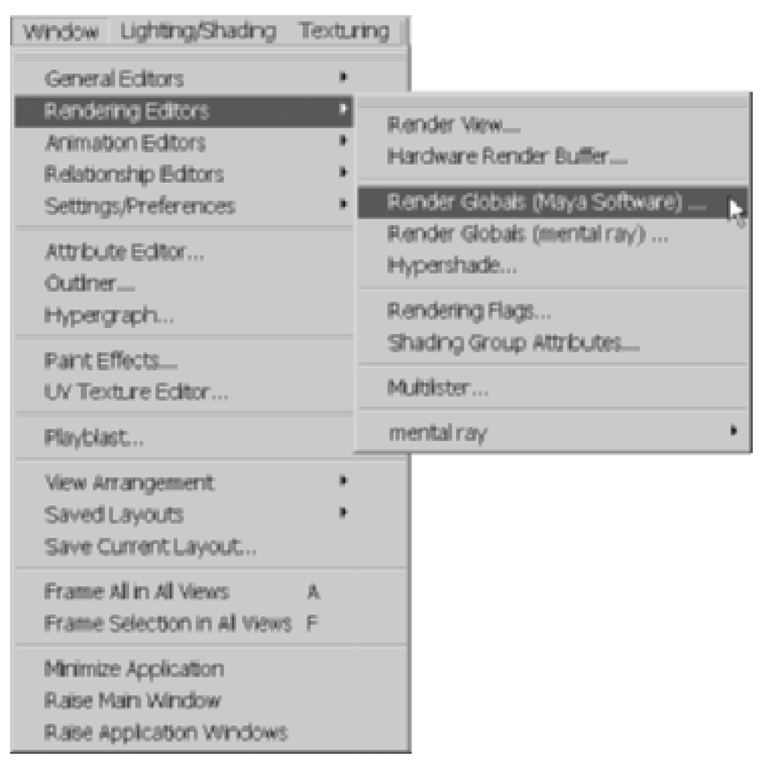
8. The resolution, quality, format, naming, and other settings for your renders are edited in the Render Globals window. Click on Window > Rendering Editors > Render Globals. (see Figure 1.106).
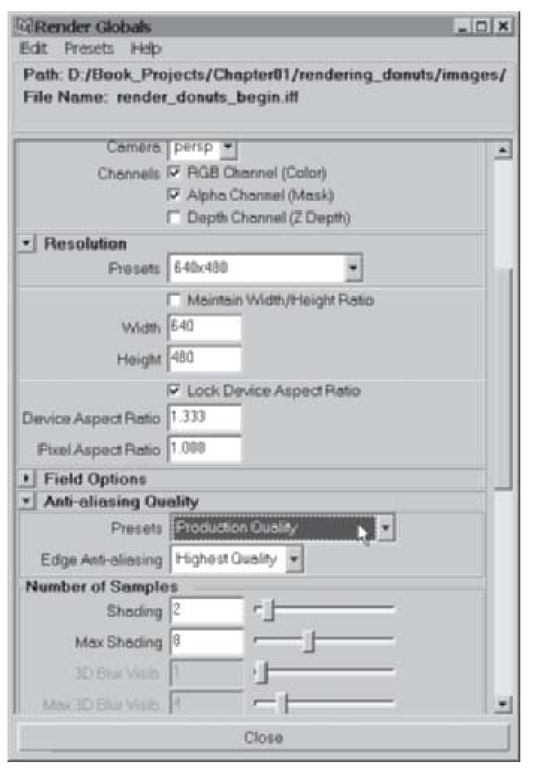
9. The resolution of a frame is described by its number of horizontal pixels and vertical pixels. Open the Resolution turn-down menu. Change the 320×240 preset to 640×480.
Figure 1.104: Render current frame
Figure 1.105: Render view
Figure 1.106: Opening Render Globals
Figure 1.107: The Render Globals
10. Open the Anti-aliasing Quality turn-down menu (see Figure 1.107). Select the Production Quality preset. (In Maya 5.0 and later, this is found in the “Maya Software” tab.)
11. Close the Render Globals window.
12. Re-render the current frame, this time by clicking the first small clapboard icon in the Status Line. Thise frame is of greater size and quality (see Figure 1.108).
13. Close the Render View window.
14. Now let’s add some shadows to the render. Shadows are not turned on by default in Maya, but they can be activated in each individual light. (There are many shadow settings beyond on/off; we’ll be looking more closely at shadow properties.
Figure 1.108: Anti-aliased render
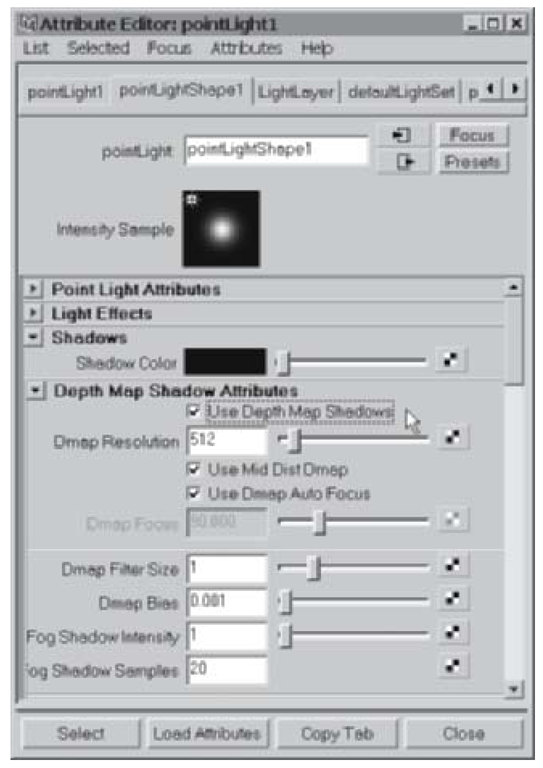
15. Select the pointLight1 and then open the Attribute Editor. Open the Shadows turndown menu. Within the Depth Map Shadow Attributes turn-down menu, click the Use Depth Map Shadows box (see Figure 1.109). We’ll accept all of the default settings of the depth map shadow. Close the Attribute Editor.
16. Re-render the current frame by clicking the first clapboard icon (see Figure 1.110). Notice how the shot looks more natural, and the objects are more grounded in the scene (see Figure 1.111). Without shadows, things often seem to float unnaturally.
Figure 1.109: Turn on shadowing
Figure 1.110: Render frame button
17. Close the Render View window.
18. Rewind the Time Slider. Test render the first frame. It’s always a good idea to test render a few frames at the beginning, middle, and end of an animation before you tell Maya to render the entire sequence. This way you can spot any problems of lighting or camera work before committing to a long batch render process.
19. After you are satisfied that there are no problems in the lighting at the beginning, middle, or end of the shot, it is time to set up a batch render. There is little practical difference between preparing individual frames the way we have been doing, and setting up a batch render.
You could, in theory, render an entire shot manually: move to frame 1; render a frame; save the image to disk; repeat. Now, that would get tedious pretty quickly, so we let the software do it for us. The batch render process renders each frame of animation sequentially and stores each frame onto your hard drive.
Figure 1.111: Shadow render
20. Open the Render Globals window. You can use the third clapboard icon in the status bar (see Figure 1.112).
Figure 1.112: Render globals button
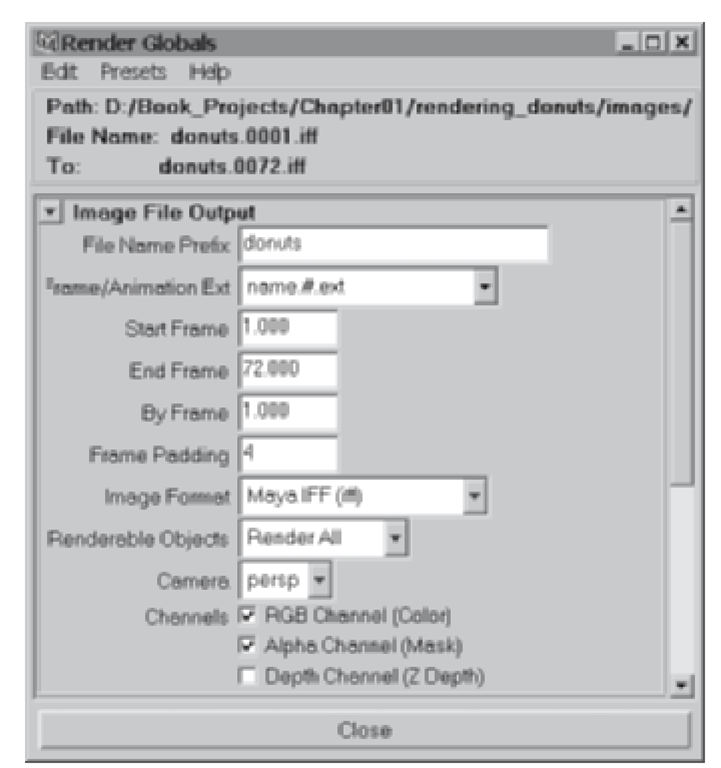
21. At the top of the Render Globals window (in Maya 5.0 and later, this is found in the “Common” tab) you can see the path where your finished frames will be stored. This should point toward the images directory of your current project. The file name allows you to preview what your naming convention will be for the frames.
22. In the Image File Output turn-down menu, change the file name to donuts.
23. Next, in the Frame/Animation Ext dropdown menu, choose name.#.ext. This indicates to Maya that you plan to render a sequence of frames.
24. The Start Frame 1 value is correct, but you need to change the End Frame value to 72, the number of your last frame.
25. A value of 1 in the By Frame option means that you will not be skipping frames, such as a stop-motion or cell-animation done on “two’s” or “three’s.”
26. Frame Padding should be set to 4. Watch the File Name: area when you make this change. Some operating systems and applications will incorrectly order the numbers 1 to 20 like this: 1, 10, 11, 12, 13, 14, 15, 16, 17, 18, 19, 2, 20, 3, 4, 5, 6, 7, 8, 9. Notice how terribly out of order this “alphabetizing” leaves us. By padding the frame four places we get this: 0001, 0002, 0003, 0004, 0005, 0006, 0007, 0008, 0009, 0010, 0011, 0012, 0013, 0014, 0015, 0016, 0017, 0018, 0019, 0020.
27. The Image Format can be left at Maya IFF (iff). Now, the File Name: area indicates that you will be rendering donuts.0001.iff through donuts.0072.iff.
28. To decrease the render time, change the Resolution preset to 320×240.
29. Once these settings are entered (see Figure 1.113), close the Render Globals window.
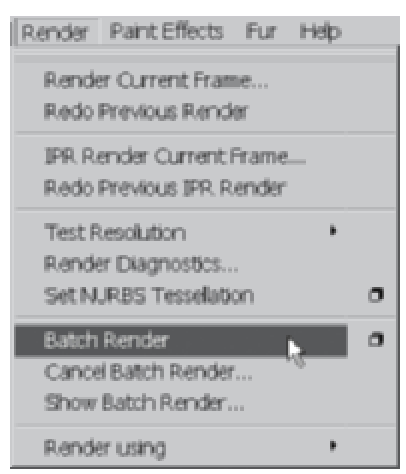
30. To begin the batch render, click Render > Batch Render (see Figure 1.114). You won’t see individual frames render into the Render View during a batch render (Maya’s busy rendering!) but the Command Feedback line will indicate the percentage of progress for each frame. As it finishes a frame, it gets stored in your project’s images directory.
31. Render times are dependent on the overall speed of your workstation; this is a simple scene, so the batch render should only take a few minutes to render. (Later, you’ll find it’s necessary to weight the benefits of “expensive” render tricks — such as raytraced reflections or large numbers of lights — against the increase in render time.) When it is complete, the Command Feedback line will read Result: Rendering Completed.
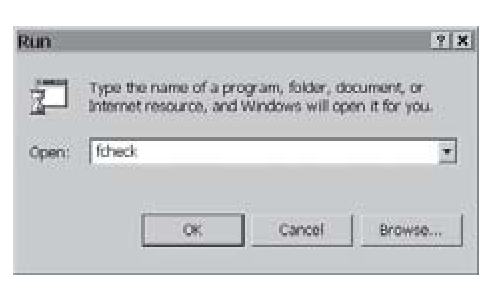
32. In order to view the sequence, launch FCheck, the Alias frame viewer. This can be launched from a system shell by typing “fcheck”, from the fcheck icon in your bin directory or from the Windows Start Menu > Run… command as in Figure 1.115.
33. In FCheck, click on File > Open Animation . Browse to the understanding_maya\Chapter01\rendering_donuts\images directory. Click on the donuts.0001.iff frame to highlight it, and click the Open button.
34. FCheck will load the sequence of frames into your system RAM, and then play it back. You should see the light and shadows arcing across the scene. In FCheck you can LMB click-drag the playback window in order to scrub back and forth through your animation. Release the LMB to resume play.
Figure 1.113: Render globals
Figure 1.114: Batch rendering
35. When you are done watching, close FCheck.
36. In Maya, save your scene as render_donuts_end.ma.
Figure 1.115: Launching fcheck
