Adding the Neck
I left the neck for last to show how it is possible to pull large forms directly out of a highly subdivided mesh. When adding the neck to the head, you can pull the geometry directly from the faces at the base of the head. We will add new forms directly to the existing sculpt by using the geometry that is there.
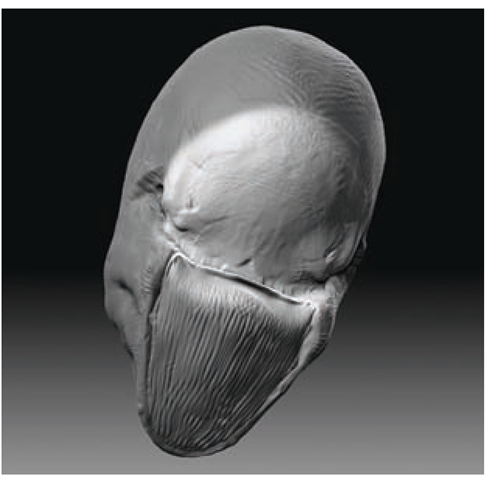
1. Mask out the underside of the head and invert the mask. Use the Move brush to pull the faces down (Figure 2.78). Be sure to mask up to the digastric and include the mastoid process and occipital region (the back of the skull). Once the area where the neck will connect to the head is masked out, invert this mask by Ctrl-clicking it. This will mask the rest of the head, leaving unmasked the area we painted in.
Figure 2.78 Masking under the head to create a space from which to pull the neck
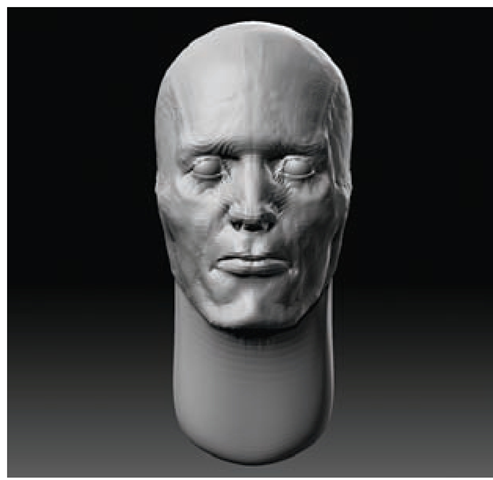
2. Using the Move brush in combination with the Alt key to pull along the normal direction, start to tug the unmasked faces out from the base of the skull, as shown in Figure 2.79.
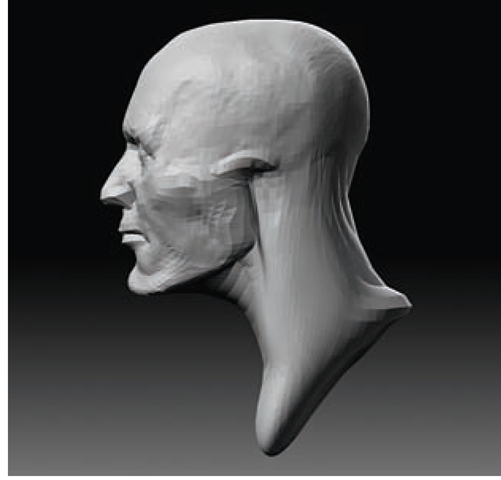
3. From the side, pull the faces down and back from the head (see Figure 2.80). The head pictured here is at subdivision level 4 so it is easier to grab large groups of faces and move them together. These changes will telegraph through all subdivision levels because of the ZBrush multiresolution editing approach discussed earlier in this topic.
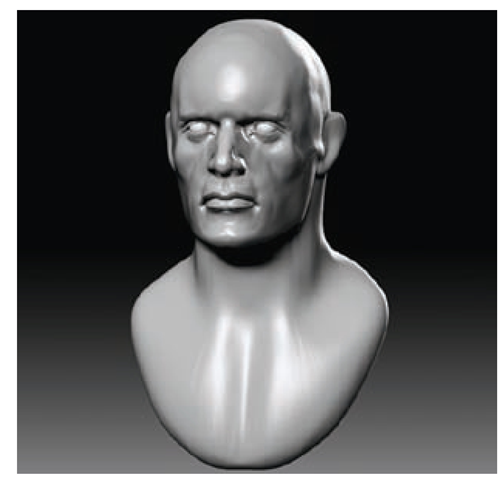
4. Using the Move brush, shape the chest and part of the shoulders. We will crop this like a classical bust, so you don’t need too much of the body intact. Try to match the head and shoulders, as shown in Figure 2.81.
Figure 2.79 Pulling the neck out with the Move brush
Figure 2.80 Pulling the neck down with the Move brush
Figure 2.81 Adding the shoulders
Sculpting the Neck Muscles
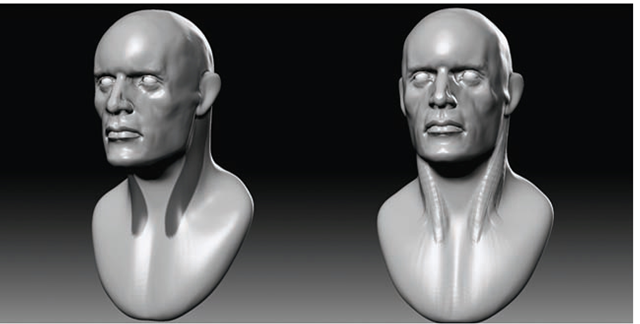
Now that the overall shape and gesture of the neck has been established, step back up to a higher subdivision level so we can again use the Clay brushes. We will now add the anatomical forms of the clavicles, or collarbones, as well as the main neck muscles, called the sternomastoids (Figure 2.82).
Figure 2.82 The sternomastoids and clavicles
1. Hold down Ctrl to make a mark with the Masking brush on the neck to represent the start and end of the sternomastoid muscles. The ster-nomastoid originates at the pit of the neck, and its insertion point is behind the ear at the mastoid process. By making a mark for the insertion and origin, we can easily draw the direction and flow of the muscle as it turns around the cylinder shape of the neck. When the shape is masked in, Ctrl-click the background to invert the mask (Figure 2.83).
2. Using the Claytubes brush, mass in the muscle form. Try to keep it thicker at the top than the bottom. When it reaches the pit of the neck, the sternomastoid splits into two distinct heads.
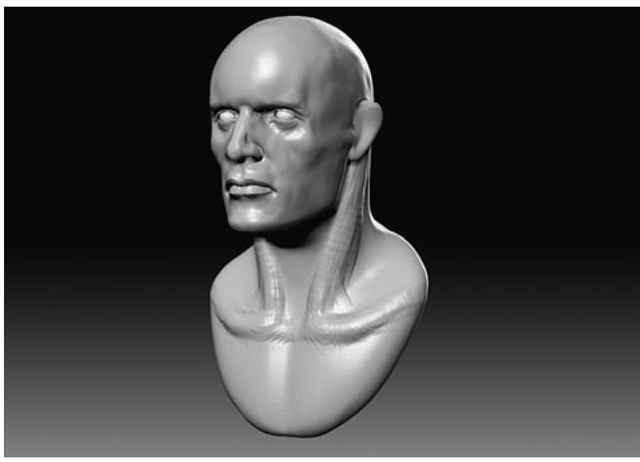
3. Using the Claytubes brush, sketch in the sweep of the clavicles (Figure 2.84).
4. Using the Rake, stroke across the forms we have just created. The intention here is to start to tie the shapes together with the neck. Notice the use of ZAdd rakes in the recess on either side of the sternomastoid. This softens the transition between the muscle and the rest of the neck (Figure 2.85).
Figure 2.83 Adding the sternomastoid muscle
Muscle Origins and Insertions
Many anatomy topics will refer to a muscle’s point of origin and insertion. The origin of a muscle can be determined by the direction in which it pulls or the end at which the muscle has the least range of motion. For example, the origin of the sternomastoid is the pit of the neck; the muscle moves the least here. The insertion is at the mastoid process. Here the muscle moves with the head in all directions. You can also remember this by the fact that the muscle pulls down toward the pit of the neck when in flexion.
Figure 2.84 Adding the collarbones
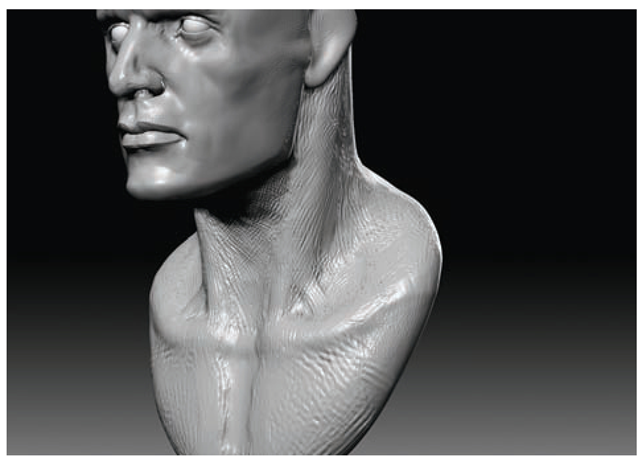
5. The two heads of the sternomastoid are suggested at the pit of the neck in Figure 2.86. With a combination of raking and smoothing, you can gradually build up the form. By smoothing as you work, you can make the shapes flow into one another in a graceful and subtle manner.
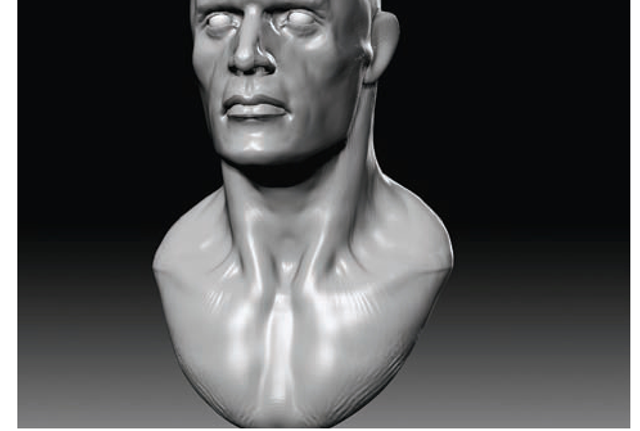
6. Using the Move tool, adjust the shape of the shoulders. Then use the Claytubes brush to fill in the recessed areas a bit so the shadows are not as deep.
7. The goal is to change the character of the shadows so they are less pronounced, thus making the appearance of the neck anatomy less overt. We want to make the muscle appear to be under a layer of skin, not inflated out from its surface.
We will now move on to the ears, the final step in sculpting our head from a sphere.
Figure 2.85 Raking across the neck
Figure 2.86 Refining the sternomastoid
![tmpa699-143_thumb[2][2][2][2][2] tmpa699-143_thumb[2][2][2][2][2]](http://what-when-how.com/wp-content/uploads/2012/06/tmpa699143_thumb22222_thumb.png)
