Sculpting the Muscles
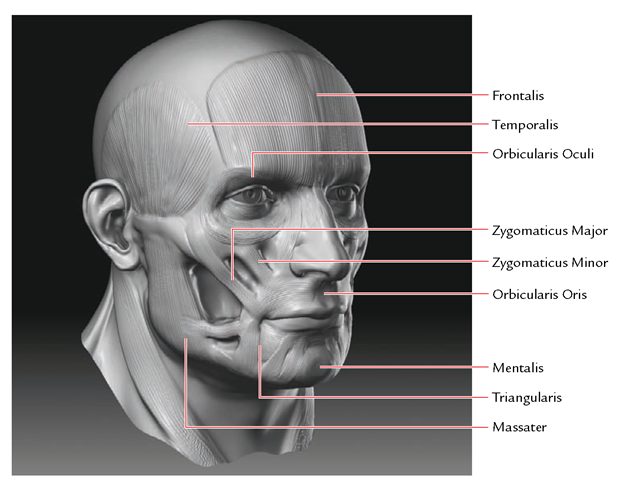
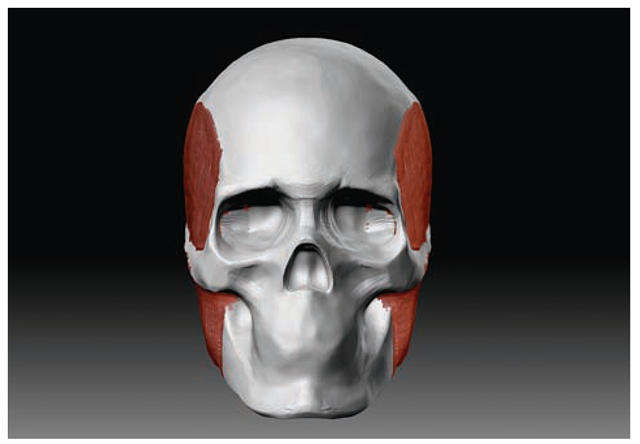
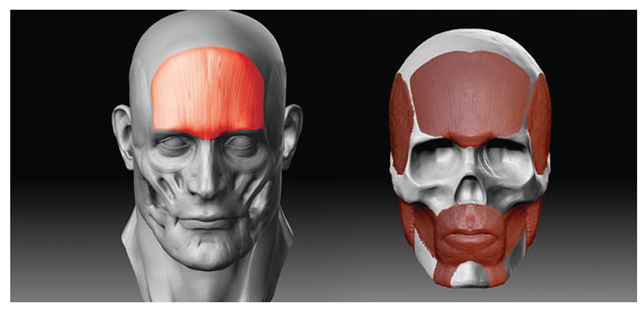
In this section we will add the muscles to the skull. We’ll take a simplified look at the muscles of the face, focusing on those major muscle groups directly influencing the surface forms. The muscles we’ll add are shown in Figure 2.46.
Figure 2.46 The major muscles of the face
For the muscles let’s change to the Red Wax material to help you see the placement of each muscle as it is sculpted. To paint on a second material while preserving the first, fill the ZTool with a base material; otherwise, when you select the Red Wax material the whole ZTool will change to display the new material.
Although we’re using multiple materials for clarity in this topic, filling objects with a material is also useful for keeping subtools the same color. When a subtool is inactive, it changes to a darker shade compared to the active one. If you fill a subtool with a material, this overrides the default behavior and all subtools display with their full material settings. To fill a model with a material, follow these steps:
1. From the Material menu, select the White Cavity material. At the top of the screen in your brush controls, make sure that MRGB, RGB, ZAdd, and ZSub are off. Only M should be active. With the White Cavity material selected in the material swatch, choose Color from the main menu and click the FillObject button. This will fill the skull with the White Cavity material.
2. Change to Red Wax in the Material Browser, and the material on the skull remains unchanged.
3. Set the Rake brush to M and ZAdd. Now when you rake the surface of the model, the brush will add form as well as change material.
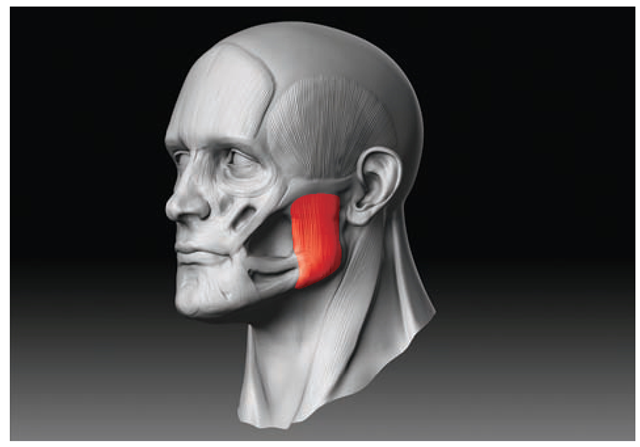
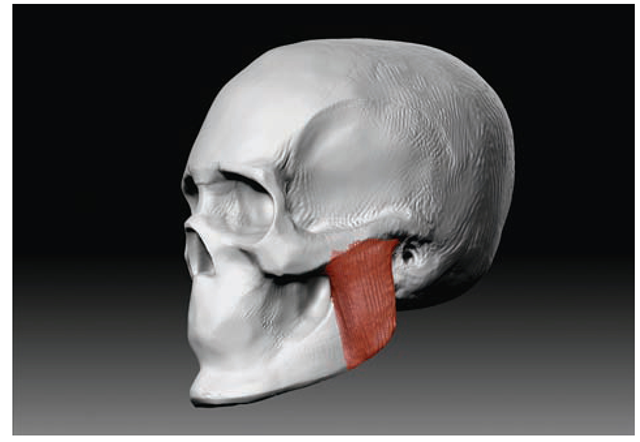
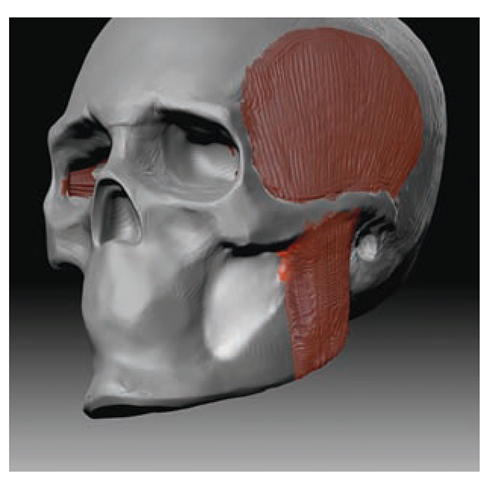
Begin by opening the Skull ZTool from the first lesson. Add the masseter muscle (the chewing muscle that fills out the space between the lower jaw and the cheekbone; see Figure 2.47). Its form can be simplified into the shape shown in Figure 2.48.
Figure 2.47 The masseter muscle fills out the side of the jaw from the cheekbone to the lower jaw.
Figure 2.48 Sculpting the masseter muscle
4. Use the Clay brush to mass out the width between the zygomatic bone and the mandible. Make sure the Claytubes brush is set to ZAdd, and use M Taper to move this shape down to the lower jaw.
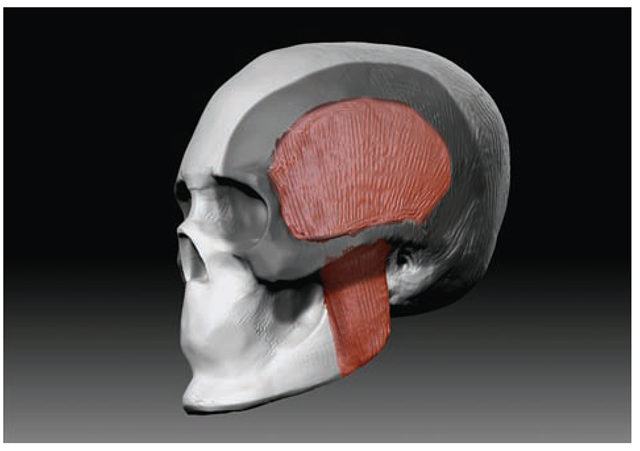
5. Now add the temporalis. The temporalis muscle fills out the hollow at the sides of the head (Figure 2.49). This large muscle actually feeds under the hollow of the zygomatic bone and has a hand in moving the jaw. Mask out the zygomatic bone and the temporal ridge by using the Rake with ZAdd on.
From the front view, notice how when these muscle forms are added you can see the front profile of a human head begin to take shape (Figure 2.50).
6. Step down a subdivision level and smooth out the hollow under the cheekbone; we’ll use this area to add the buccinator muscle later. Masking out the surrounding areas can help isolate and pull those deep faces back to the surface (Figure 2.51).
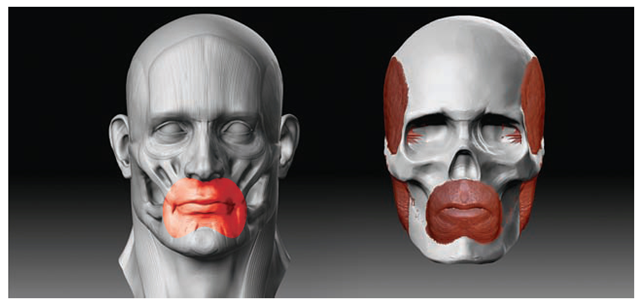
7. Mask out a shape similar to a clown mouth for the orbicularis oris muscle. The orbicularis oris is a circular muscle that surrounds the mouth and lips. Invert the mask and rake in a circular motion (Figure 2.52).
Figure 2.49 Adding the temporalis
Figure 2.50 These muscles from the front view already begin to give a recognizable shape to the head.
Figure 2.51 Pulling out the cheek hollows to sculpt the buccinator
Figure 2.52 Sculpting the mouth muscle called orbicularis oris
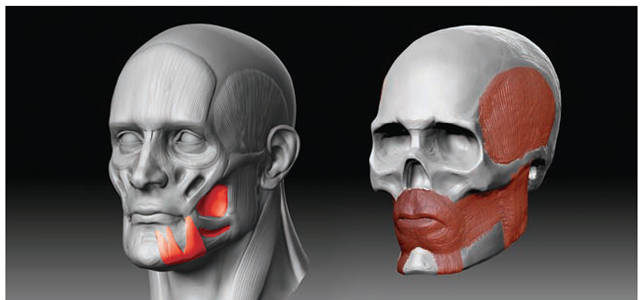
8. Add two triangles of muscle on either side of the chin. These are called the triangularis muscles. These muscles pull the corners of the lips down in a frowning expression. Add a dot in the center of the chin to represent the mentalis muscle. These shapes combined with the bottom of the orbicularis oris create the subtle W-shaped form changes seen in the chin.
9. Add the buccinator. The buccinator emerges from beneath the jaw and the masseter to insert at the corners of the mouth. This muscle serves to pull the corners of the mouth back. The step down between the masseter and the buccinator creates an important plane change at the cheek, which is often visible in very muscular individuals. Strong neck and shoulder muscles often result in a strong masseter. Lower body fat ratios also tend to reveal this muscle more in the face, giving it a chiseled look (Figure 2.53).
10. The forehead is covered by a thin pair of muscles called the frontalis. These muscles have the main function of raising the brows. Be careful not to lose the shape of the frontal eminence of the structure of the skull. Notice that the frontalis has a small “tail” that inserts into the medial of the eye socket (Figure 2.54).
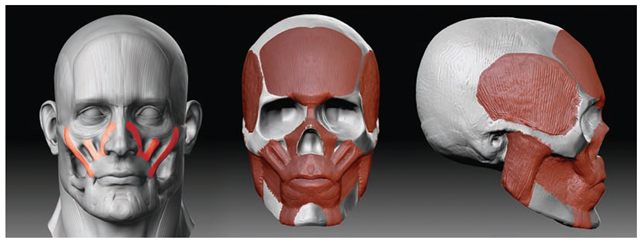
11. The zygomaticus major and minor connect the cheekbones to the corner of the mouth. They create the plane change from the face to the cheeks. These muscles help in creating the smiling expression.
Figure 2.53 Sculpting the buccinator
12. Using the Clay brush, add the two-pronged shape here. Notice how it connects to the corners of the mouth. When we add skin, the combined effect of the zygomatic major and minor, buccinator, and triangularis creates an important form on the skin since they all pull that one area (Figure 2.55).
13. Mask out the recesses of the eye sockets. Stepping down subdivision levels (so the effect of the brush is stronger) smooths the faces to pull them closer to the surface (Figure 2.56).
Figure 2.54 Sculpting the frontalis
Figure 2.55 The levator labii muscles appear as two triangles coming down either side of the nose. Zygomaticus muscles connect the cheekbones to the corners of the mouth.
