To begin, you will sculpt a generalized human skull from a ZBrush primitive sphere. This exercise describes a high-resolution sculpting method. The sculpting process begins at a higher subdivision level, and the form will be built using the Clay tubes and Rake brushes.
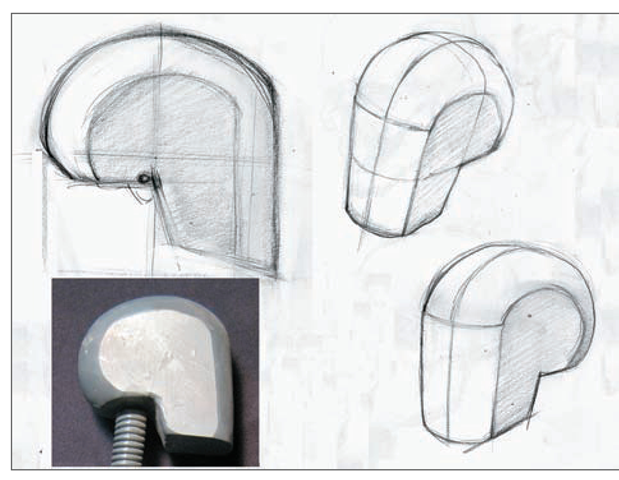
The initial shape you want to strive for is shown in Figure 2.26. Notice the rounded facial plane and the overall simplification of the head into a single basic shape. By working toward this first step and building all the secondary forms on it, you can maintain a sense of structural integrity throughout the sculpting process.
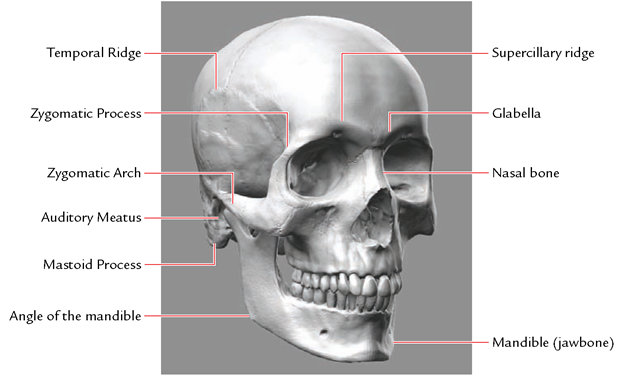
During this exercise several bony landmarks will be of interest. These are points that we want to find in the sculpture and ensure are in correct spatial relationship to one another. Failure to find these points or keep them consistent makes it easy to drift off proportions and make a head that appears strange. Figure 2.27 shows several major landmarks labeled on a skull.
Figure 2.26 When roughing in the head, strive for a basic form similar to those shown here.
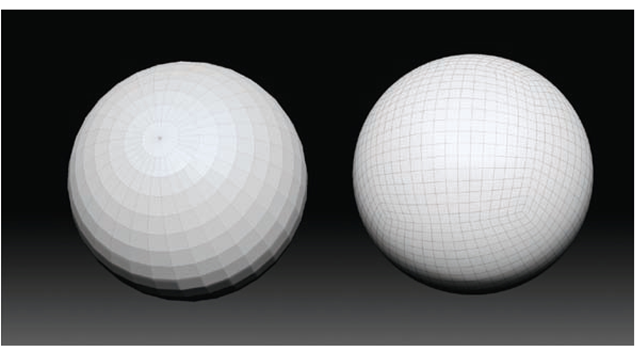
1. Create a sphere by selecting the PolySphere ZTool. The benefit of using this tool is that the model has no poles. (Be sure not to select ZSphere or Sphere 3D tools.) Figure 2.28 shows the difference between the PolySphere and the Sphere 3D tool.
Figure 2.27 Skull with bony landmarks labeled
Figure 2.28 The Sphere 3D tool on the left compared to the PolySphere tool on the right. Note the lack of triangles on the polysphere.
Poles are the points at the top and bottom of the sphere where all the faces in a series of triangles meet. Often this will be the place where you will get a pinch or strange tweaking in the mesh while you sculpt.
2. Draw the tool on the canvas and enter Edit mode with the T key.
3. From the Brush menu select the Move brush. Turn up ZIntensity to 90 so the move effect is stronger. Begin to create an egg shape from the sphere. Make sure X Symmetry is turned by choosing Transform + Activate Symmetry.
4. Rotate to a side view, hold down the Shift key while you click, and rotate to snap to a side orthographic view. From the side, rough in the plane of the face and the rear of the cranial mass.
5. Move to a top view and make sure the head tapers slightly toward the face.
6. Ctrl-drag from a point off the model to drag a mask marquee over one half of the head from a side view. This helps you determine the halfway point and ensure the masses are the same on either side.
Measuring with the Transpose Line
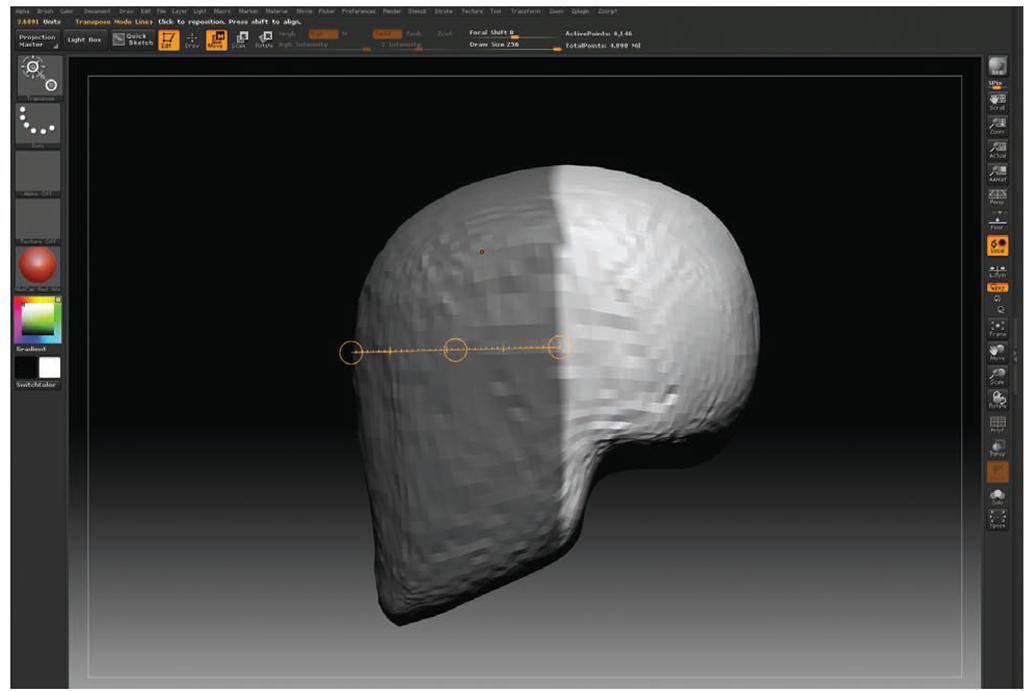
You may also use the Transpose line as a measuring tool. Enter Transpose Move mode by pressing the W key and draw a line from the midline to the front of the facial plane. Move the line to the back half to compare measures (Figure 2.29). When you use the Transpose line as a measuring tool, note the total length is displayed in the upper-left corner of the screen next to Units. Based on your measurements, find the midline and correct the masses at the back of the head.
Figure 2.29 Masking one half of the side view to help compare the measurements between the two halves
To create a mask marquee, hold down the Ctrl key and drag from a point off the model. A dark marquee will appear. Anything inside this box when you release Ctrl will be masked. If you have an alpha selected, the mask will be shaped like the alpha unless you release Ctrl. If you press Ctrl+Alt, the mask will invert and you will be unmasking what is within the marquee.
Roughing in the Shape of the Skull
At this stage we have roughed in the form of the head, taking into account its most basic shape from front, top, and side views. These changes were made at a lower subdivision level since it is easier to make large form changes when the model has fewer faces. In the next series of steps, we’ll subdivide the model and start adding secondary masses with the Rake and Clay brushes.
1. Subdivide the mesh so there are enough faces that the Clay brushes will be effective. Usually 500,000 or more faces will suffice. Press Ctrl+D to divide the mesh three times, or choose Tool + Geometry + Divide.
2. Now switch to the Rake tool. Using the Rake set to ZAdd, begin to mass out the side planes of the head. Work around to the lower-back portion of the skull. Then move to the front and crosshatch across to create the plane that will ultimately become the face. There should be a slight curvature to this plane.
3. Once these surfaces are indicated, switch to ZSub by pressing the Alt key and start carving back and defining the edges between the planes with more clarity. Throughout this process we are alternating between ZAdd and ZSub with the Alt key (Figure 2.30).
Figure 2.30 Refining planes with rakes
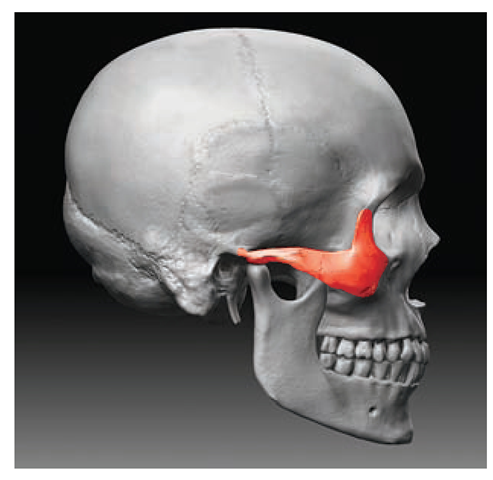
4. Using the Rake, place the zygomatic bone, also known as the cheekbone (Figure 2.31). This is a major bony landmark on the face. Be sure it angles back and up on the side of the head. This bone will point to the center of the ear.
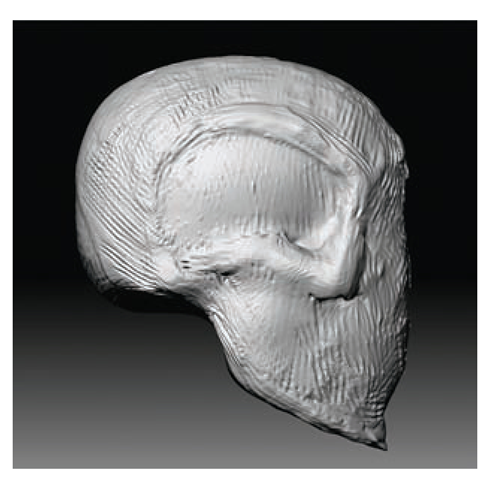
5. From the side, continue the curve up the side of the skull suggesting the temporal ridge. Switch to ZSub and start to hollow out the temple of the skull (Figure 2.32).
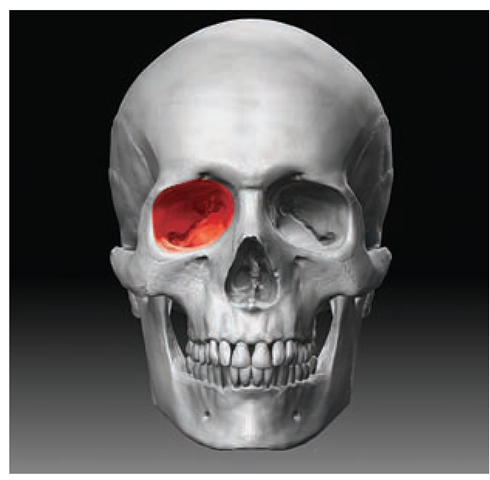
6. Note that the skull tends to look sad because of the slight downward angle to the eye sockets (Figure 2.33). Switch to the Standard brush and with ZSub active begin to carve out the hollows of the eye sockets, keeping this ovoid shape in mind.
Figure 2.31 The angle and placement of the zygomatic bone
Figure 2.32 Reinforcing the cheekbones and temporal ridge
Figure 2.33 The eye socket
