After your wireless router is up and running, you are ready to install the wireless network adapters. Unless you were fortunate enough to have wireless functionality built into your computer, you’re going to have to plug something into your computer so that you can get on the wireless network. That something is a wireless adapter, and they come in all shapes and sizes. In this topic, you find out how to install different kinds of network adapters.
Installing a USB Adapter
USB adapters can be used in both laptops and desktops. Some USB adapters are sleek, little numbers that are designed to be unobtrusive in a laptop, and some are larger but flatter and are designed to be hidden on a desk. They’re easy to install in either case, which is why we’re looking at them first.
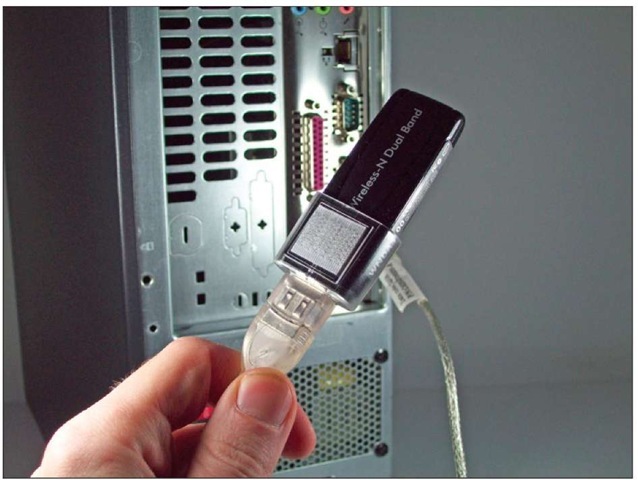
The USB adapter I’ve been working with is from NETGEAR and is of the laptop variety. However, it includes a USB extension cable and a simple bracket designed to be Velcroed to the wall, so it’ll work equally well on a desktop. Have a look at Figure 5-1 to see what I mean.
A spare USB port is, of course, a prerequisite for a USB adapter. If you have USB ports but none are free, consider an inexpensive USB hub that splits one port into four (or more). If your computer doesn’t have USB, the only way to get a port would be to add a PCI expansion card.
USB devices are hot swappable, meaning you can insert and remove them without powering down your computer. Be careful about the removal part, though; if you’re storing anything on the USB device, it might get lost unless shut down properly!
Figure 5-1:
A laptop USB dongle that’s attached to a desktop.
Installing the drivers first
As magical as it might seem, your computer needs to be told how to do everything through software. You’re probably familiar with installing application software such as a word processor, spreadsheet, or games. Another class of software is called drivers, which are smaller pieces of code that tell Windows how to work with hardware. Chances are the piece of equipment you just bought came out after Microsoft released your version of the operating system, so Windows probably doesn’t know how to deal with your new card without the right drivers.
In some cases the hardware is generic enough that Windows will work fine using its default set of drivers. If the hardware I’m installing includes its own drivers, I always use those. Vendor-supplied drivers are going to have the latest fixes and are usually faster than a generic version. After all, if the vendor made the hardware, I trust its drivers.
When installing the vendor’s drivers, you usually get the opportunity to install the vendor’s wireless management software, which is much better than the software built into Windows. It’s a win-win situation.
1. Load the CD that came with the adapter into your computer.
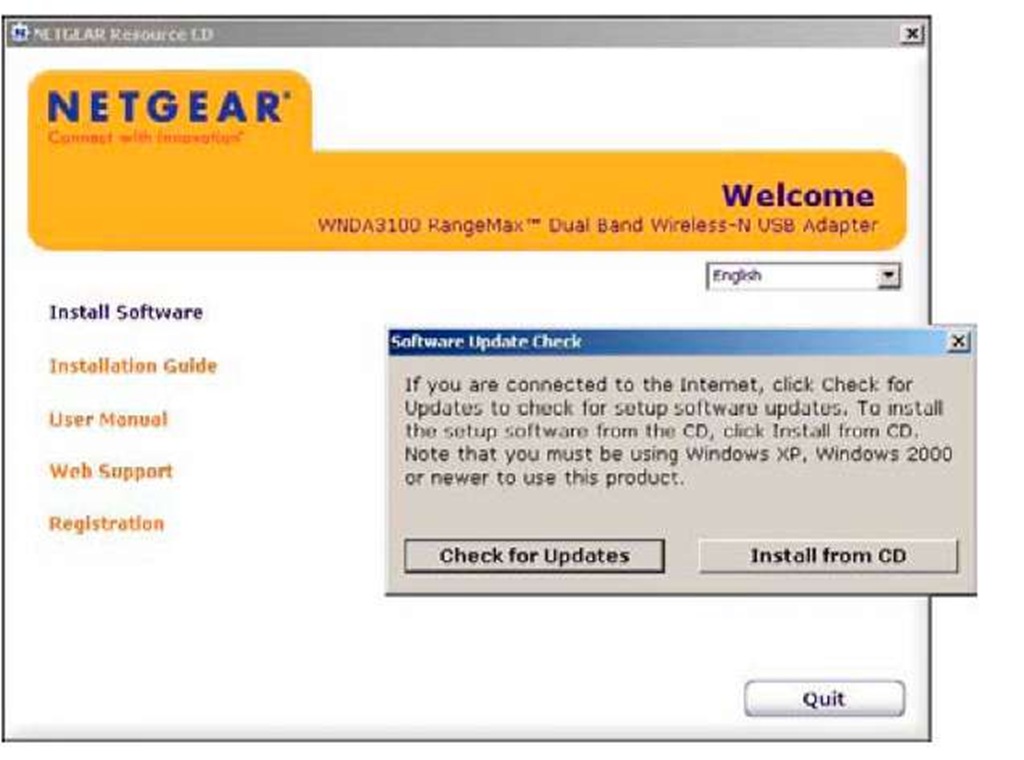
After you load the CD, the setup wizard starts. (See Figure 5-2.)
Figure 5-2:
Starting the USB wireless wizard.
2. Select the Install from CD option.
The wizard is helpfully offering to check for a newer version of the drivers. Because this computer doesn’t have any Internet connectivity (yet), the check would fail.
3. Accept the license agreement and default installation path.
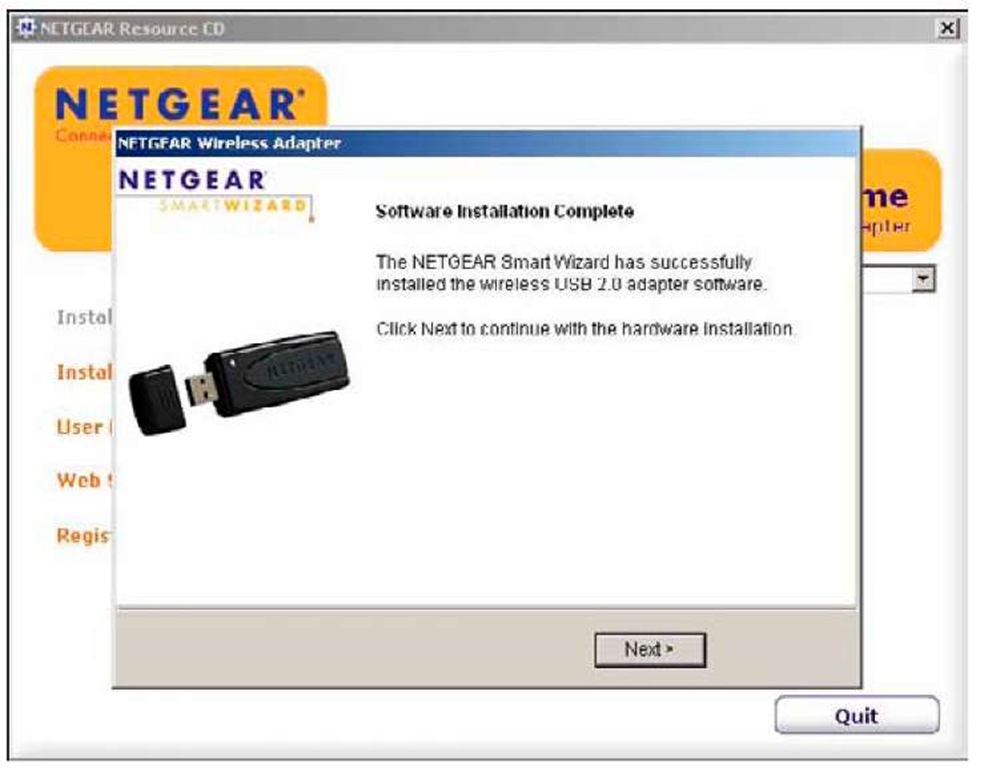
The wizard reports that the software is installed, as shown in Figure 5-3.
Figure 5-3:
The driver software has completed installation.
4. Click Next to confirm that the software has been installed, and proceed to the next step.
You are asked to plug in your USB wireless adapter. If you got ahead of the game and did this earlier, don’t worry, things can still work!
5. Plug your USB wireless adapter in now. If you need help, see the next section, "Plug in the adapter."
6. Click Next.
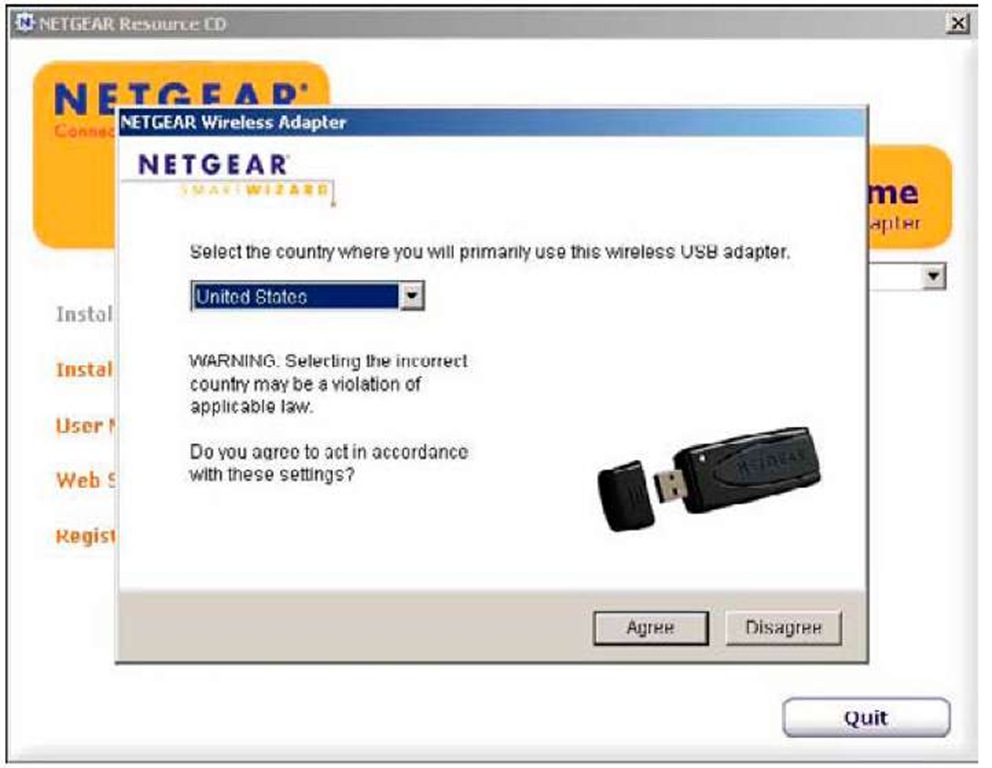
A legal message appears, as shown in Figure 5-4.
Figure 5-4:
You’re not going to use that in Japan, are you?
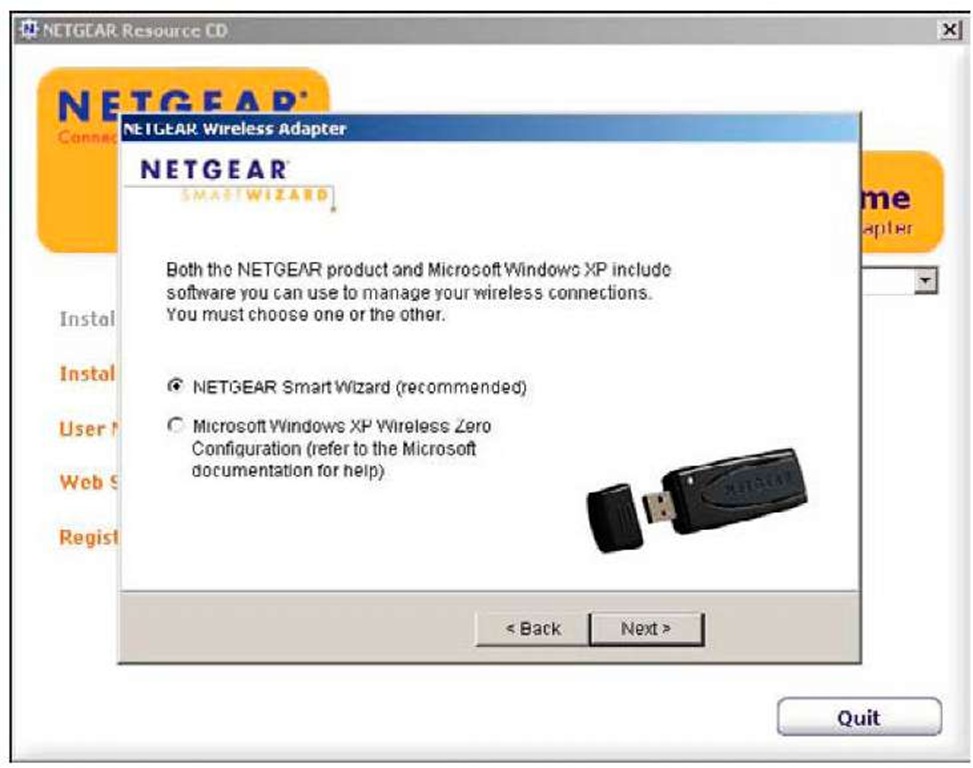
7. After you agree not to engage in any radio warfare, you’re asked if you want to use the built-in Windows configuration (Figure 5-5) or to install the vendor’s package (NETGEAR Smart Wizard in this case). I always install the vendor’s, so select that option and click Next.
Understanding legal restrictions
Despite the various 802.11 standards being agreed upon internationally, some federal governments have slightly different limits on which frequencies can be used. As a result you get some oddities where some of the higher 2.4 GHz frequencies are legal in Japan, but not the United States, so they get a couple of extra channels than us.
If you’re prompted with a legal message like the above, it’s best just to fill in the proper country and rely on the software you just installed to know which frequencies can be used.
Figure 5-5:
Choose the vendor’s management software.
At this point your wireless card is installed and ready to go. If you continue along with the wizard, you’ll be able to get online right away.
Plug in the adapter
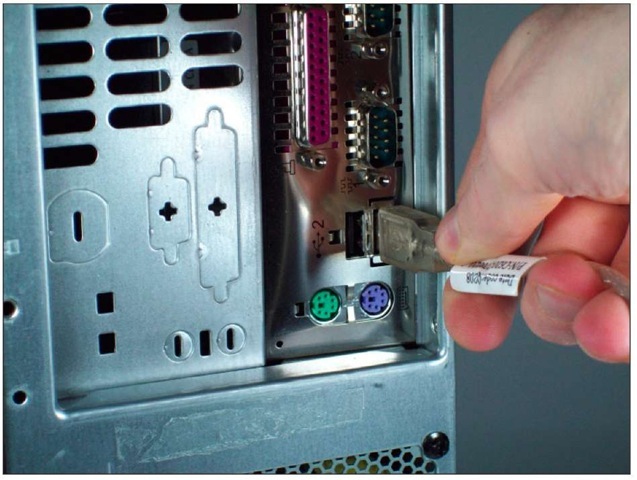
Identify the USB port on the back of your computer and plug in the USB adapter (or the cable, if you’re using the cable.) It should take only slight pressure, so if it’s not going in right, try flipping the adapter over. If you think pliers might solve your problem, you’re probably wrong.
Figure 5-6 shows me plugging in the cable to a USB port on my desktop.
Your computer will probably emit a satisfying beep indicating the adapter was inserted correctly, and then you’re off to the races. The next topic tells you how to log in to your wireless network.
Using USB
USB is a pretty nice technology. You can pull the adapter from one computer and move it to another if you want, or only have it plugged in when you need to use wireless (like any peripheral, a USB wireless adapter uses power even when you’re not using it).
Keep in mind that if you move the adapter from one computer to another, you need to install the drivers on both computers, but only once. The configuration is stored on the computer, not the adapter, so you’ll have to set up the wireless networks separately.
Figure 5-6:
Plug in the USB cable.
Finally, be careful! Although the adapter is pretty resilient, after you plug it into the computer it’s not too happy being pulled at or bent. If there’s a downside to USB, it’s that it sticks out of the side of your computer. People who worry about bashing their adapter might be wise to use the desktop adapter and stick it to their monitor; the worst that happens is the cable breaks.
