DARKENING THE EDGES
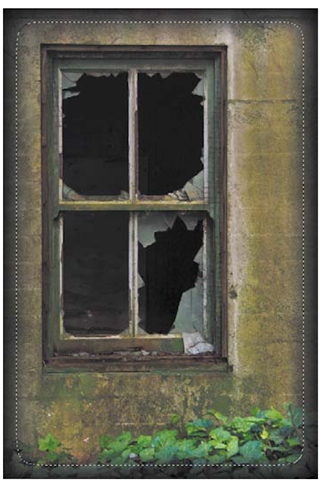
This next image really needs some help. It is kind of boring, partly because of the composition and partly because it lacks any real color vibrance.
1. In the Organizer, select Elements Image 4.NEF and open it in Camera Raw.
2. Press the L key to rotate the image counterclockwise.
3. Press the C key to activate the Crop tool and change the composition to something more appealing.
4. In the Camera Calibration panel, select the Camera Landscape profile.
5. In the Detail panel, set Amount to 90 and Masking to 48.
6. Change the White Balance setting to Cloudy and then adjust the Temperature to 6000.
7. Change Fill Light to 15, Blacks to 27, Brightness to +65, and Clarity to +40 (Figure 9.15). Open the image in the Editor.
8. Click the Create a New Layer icon and then press Alt-Backspace (Option-Delete) to fill it with black.
9. Press the M key for the Rectangular Marquee tool and then draw a selection inside the image edge, about a quarter-inch from the edge (Figure 9.16).
10. Choose Select > Feather, set the feather radius to 50, and press Enter. Press Delete to reveal the image below.
11. Press Control-D (Command-D) to remove the selection, and change the blend mode to Multiply.
FIGURE 9.16
Delete the selected portion of the black layer to add a nice edge effect.
THE PRE-DAWN LANDSCAPE FIX
This last file is from one of my favorite photo shoots. I drove for over an hour in the pitch black to arrive with my friends at the Monument Valley visitor’s center, where we were greeted by some fantastic-looking light. Even though I took care to set my camera correctly, there are a lot of little things that need fixing in this image.
1. In the Organizer, select Elements Image 7.NEF, and open it in Camera Raw.
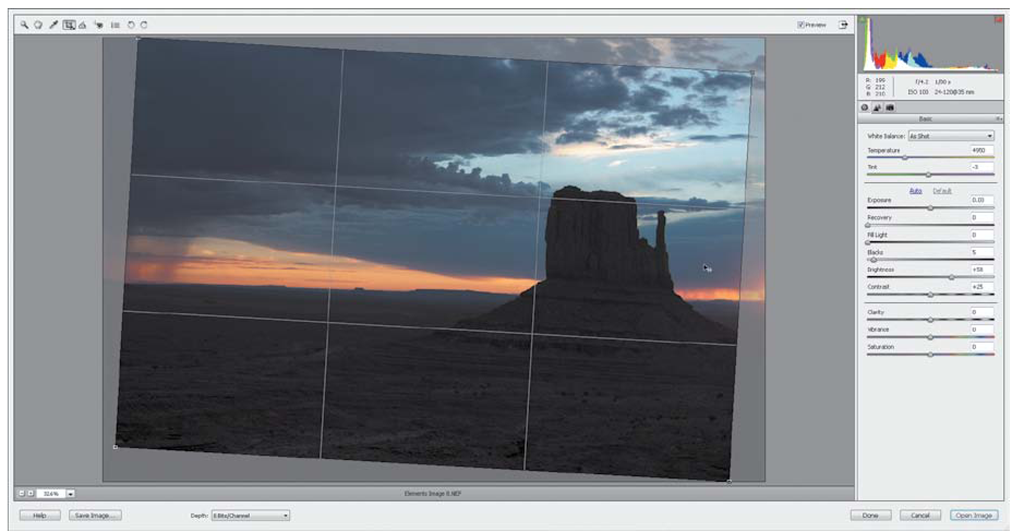
2. When Camera Raw opens, use the Straighten tool to draw a line along the horizon (Figure 9.17).
FIGURE 9.17
Adjusting for the horizon line with the Straighten tool.
3. In the Camera Calibration panel, select the Camera Landscape profile.
4. In the Basic panel, adjust the White Balance setting to Daylight.
5. Even though the image is dark, some areas of the sky are very bright, so reduce Exposure to -.45 and set the Recovery slider to 50.
6. To open up the shadows, move the Fill Light slider to 55, set Blacks to 15, and take the Brightness setting to +70.
7. To add some pop to the photo, set Clarity to +26 and Vibrance to +10.
8. Now that the details of the image are more visible, go to the Detail panel and set Amount to 85 and Masking to 55. Open the image.
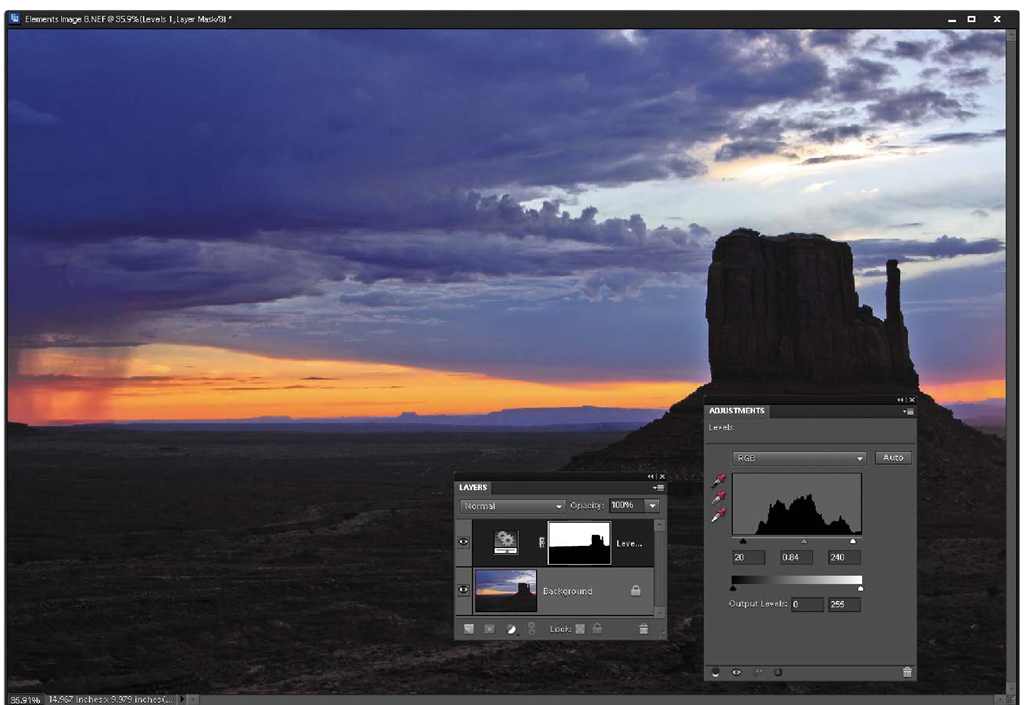
9. To give the sky more contrast, select it with the Quick Selection tool, click the New Adjustment Layer icon, and select Levels (Figure 9.18).
10. In the Adjustments panel, set the black point to 20, the gray point to 0.84, and the white point to 240.
FIGURE 9.18
Add a Levels adjustment layer after selecting the sky to automatically mask out the ground.
Conclusion
There is nothing over the top or magical about these edits. They are just basic processes that, when applied correctly, can have a dramatic effect on an image. The most important part of image processing is being able to look at a photo and know what it needs to look better. This doesn’t happen overnight. It takes time and practice to get really good at image editing, but the more you work at it the better you will become. And with all the skills and techniques that you learned in the last few topics, you should be well on your way to producing stunning images.


