Building the application
The source code for a simple version of the project is now complete. If you haven’t already, make sure your recipes.xml file is in your FlashDevelop project directory. To build from within FlashDevelop, there are a couple things you need to set up first.
First, you need to tell FlashDevelop where to find your Flex 3 SDK. Select the Tools > Program Settings menu option. From there, select the AS3Context option from the left. A dialog box will appear with various options about ActionScript 3 development. Make sure to set your Flex SDK location. Click the Close button when you’re done.
If you had any ActionScript 3 libraries you planned on using in your project, you could select Tools > Global Classpaths and then specify them in the dialog box that is displayed. You don’t have any other libraries for this project, so close the dialog box when you’re done.
Next, right-click your project from the panel on the right, and select Properties. Select the Compiler Options tab, scroll to the bottom, and turn Use NetworkServices to false. This option controls the security sandbox when running SWFs locally on your computer. Ifyou want to access local files (such as recipes.xml), you must turn this off. This setting has no effect when running remotely over the Internet. After you’ve completed this, close the dialog box.
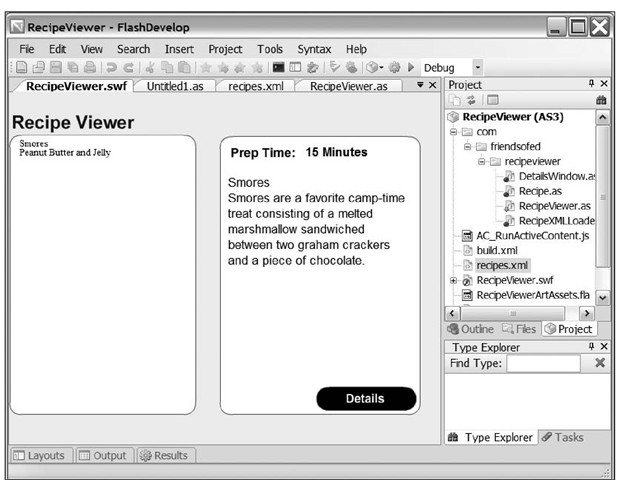
You should be now be able to press F5 in FlashDevelop or select the Project > Test Movie menu option to launch your new application. If everything goes correctly, you should see the application running in FlashDevelop, as shown in Figure 4-5.
Figure 4-5. The resulting Recipe Viewer application running from inside FlashDevelop
The last thing to do is make the Details button active. You want to have a new window pop up when the button is clicked with a list of ingredients and directions to make the recipe. To accomplish this, create a DetailsWindow class with the following code. This will embed a second graphical asset from the SWF file with two components on it, a text field (details_txt) and a button (close_btn).
Then modify your onDetailsClick event handler to create a message to display and to show your newly created window class with that message:
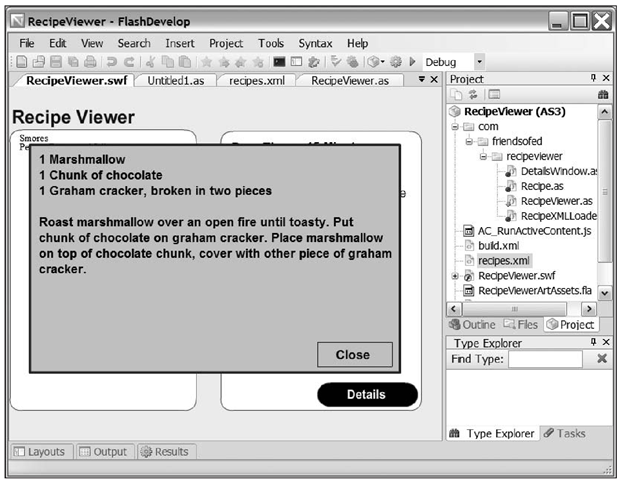
Once this is done, you can build your application, choose a recipe from the left, and click the Details button to view the instructions to make the recipe, as shown in Figure 4-6. If this had been a real application, you would probably want to make sure the elements behind the “window” weren’t active while the window was open.
Now that you’ve seen how to use FlashDevelop to build a simple application, you’ll learn how to use Ant to help streamline the release process.
Figure 4-6. The final Recipe Viewer application running in FlashDevelop
Building with Ant
Building the application through FlashDevelop is an easy way to quickly test things, but creating an Ant script to share with others or to integrate into larger build systems can be a great benefit.
The only change you need to make to that is to include the new com.friendsofed.recipeviewer package structure that you set up earlier in the topic. The full build script is listed here with the changed line in bold:
You can use this Ant target to build the application in a predictable, repeatable way at any time. This is useful when multiple developers are all working on the same project to assure that there is a version of the project that everyone can compile. Having a repeatable build method is also crucial to maintaining a certain degree of release quality.
Creating a Flex application with FlashDevelop
FlashDevelop gives the Windows-based open source Flash developer an excellent development platform for Flex-based applications. In this section, you will make a similarly functioning Recipe Viewer application as the Flash version earlier in this topic, but this time you’ll use a Flex style of development.
If you are on OS X or Linux, you can follow along in this topic. Just replace FlashDevelop with a text editor of your choice. Although you won’t get the contextual help or be able to run the application from your editor, you can edit the code, create the Ant script, and build the application.
The user interface for a Flex-based application is usually laid out in MXML files. That MXML can be skinned by a designer through several different methods, but this is outside the scope of this topic. To learn more about skinning Flex applications, consult the Flex SDK documentation.
Creating the project
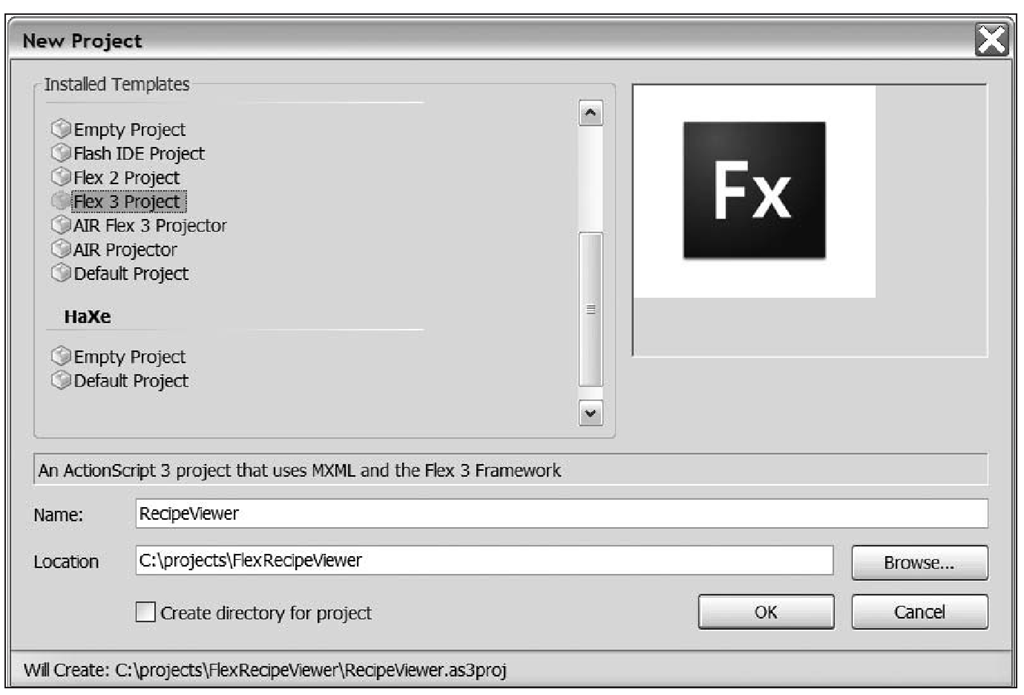
To begin, create a new project by selecting the Project > New Project menu option. A dialog box like Figure 4-7 will appear. Select the Flex 3 Project option, type a new name for the project, and select an empty destination directory for where you want to save it.
Figure 4-7. The FlashDevelop New Project dialog box
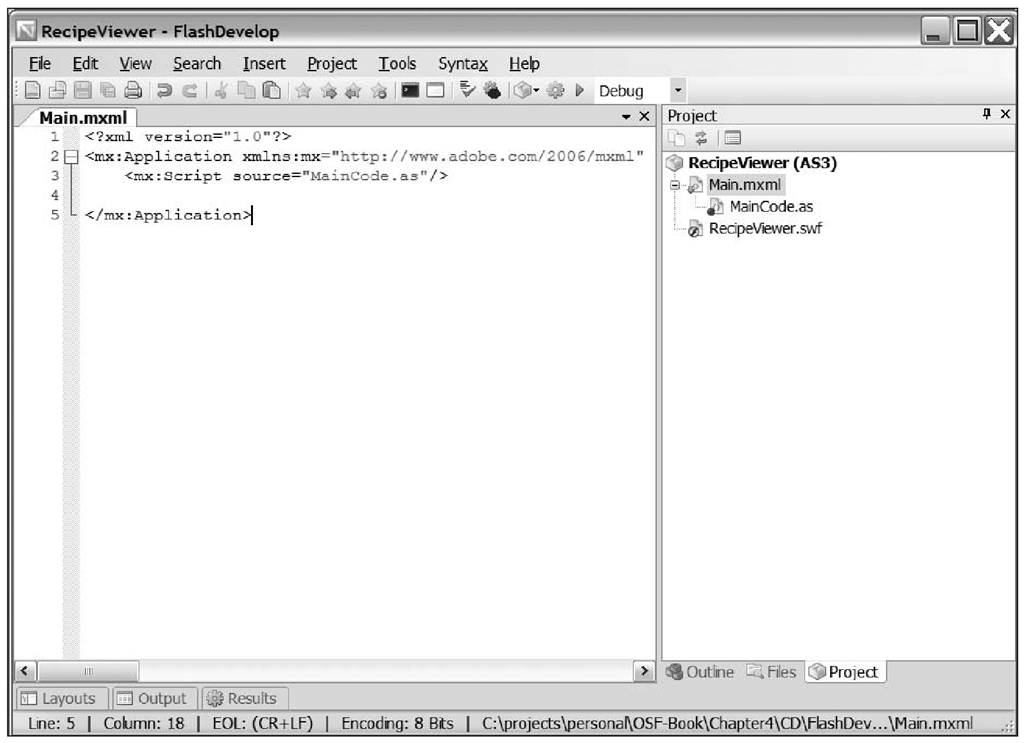
When you’ve completed that, click the OK button. FlashDevelop will create your project with a Main.mxml file and a Main.as class to hold your code. Upon opening Main.mxml, your environment should resemble Figure 4-8.
Figure 4-8. The FlashDevelop workspace after creating the Recipe Viewer application
Entering the code
To see some Flex-style development and to quickly move through this part of the topic, you will use some basic MXML to lay out the interface. The interface will consist of a window with a ViewStack on it. On the ViewStack will be two Canvas objects that represent the two main UI states of the application. Within each of those will be the various Labels, TextAreas, and Buttons that make up the interface. In Main.mxml, enter the following code to define that interface:
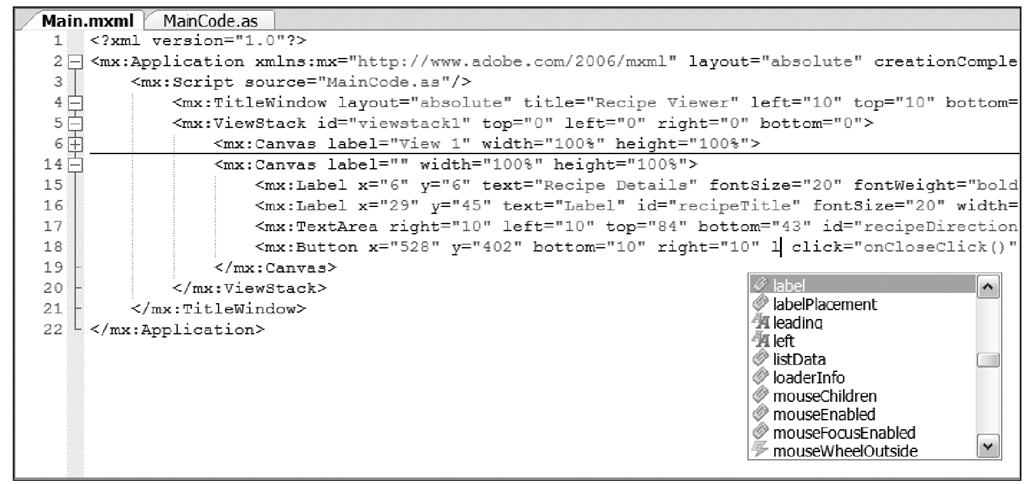
Similarly to editing ActionScript files, while typing the MXML code FlashDevelop gives you features such as code folding and completion. Folding is accomplished by the same sort of [+/-] control in the left margin, and code completion is accomplished by pressing Ctrl+spacebar on the keyboard. Figure 4-9 shows both these features while editing MXML.
Figure 4-9. As in ActionScript files, FlashDevelop has both code folding and code completion in MXML; notice that the <mx:Canvas> tag at line 6 is folded.
The Flex SDK gives a great capability called data binding that will allow you to create this version of the Recipe Viewer application much more quickly than the ActionScript 3 version earlier in this topic. To take advantage of this, create an HTTPService object just below your <script> tag in your .mxml file like so:
Next, set the List control’s dataProvider and labelField properties to bind it to the HTTPService object:
Setting the dataProvider property to recipeXml.lastResult. .recipe uses E4X notation to parse the XML and find all the recipe tags. Now, when the HTTPService object loads the XML, the List control will automatically search for all the recipe nodes and use the XML name tag as the label to display.
Once that is done, you can bind the Label and TextArea controls to the List control using the following similar syntax:
Now, when the currently selected item in the List control changes, all of those labels will automatically update to the correct data through binding.
In the previous code, several methods are referenced as event handlers, such as the onXmlLoad method:
If you open the MainCode.as file, you can now enter the code for those methods. When the application is fully created, you will want to activate the HTTPService object and load the results. This is done on the onCreationComple method.
Once the XML has been loaded, you need to set the first item as selected and fire off the onListChange method:
You may have already noticed, but you did not set the recipe direction’s TextArea through binding. This is because it should incorporate both the ingredients and the directions. The onListChange method will do exactly this:
The last thing to do is switch between the two different UI views. You had set up two buttons with two click handlers to accomplish this. All they need to do is switch the ViewStack between the two Canvas objects.
This simple MXML-based application performs all of the vital features as the ActionScript version, such as displaying a list of recipes and allowing the user to select one, but in a significantly less amount of code. In the following sections, you’ll look at how to build and manage it.
![tmpeeee-78_thumb[2] tmpeeee-78_thumb[2]](http://what-when-how.com/wp-content/uploads/2012/06/tmpeeee78_thumb2_thumb.png)
![tmpeeee-79_thumb[2] tmpeeee-79_thumb[2]](http://what-when-how.com/wp-content/uploads/2012/06/tmpeeee79_thumb2_thumb.png)
![tmpeeee-80_thumb[2] tmpeeee-80_thumb[2]](http://what-when-how.com/wp-content/uploads/2012/06/tmpeeee80_thumb2_thumb.png)
![tmpeeee-82_thumb[2] tmpeeee-82_thumb[2]](http://what-when-how.com/wp-content/uploads/2012/06/tmpeeee82_thumb2_thumb.png)
![tmpeeee-85_thumb[2] tmpeeee-85_thumb[2]](http://what-when-how.com/wp-content/uploads/2012/06/tmpeeee85_thumb2_thumb.png)
![tmpeeee-86_thumb[2] tmpeeee-86_thumb[2]](http://what-when-how.com/wp-content/uploads/2012/06/tmpeeee86_thumb2_thumb.png)
![tmpeeee-89_thumb[2] tmpeeee-89_thumb[2]](http://what-when-how.com/wp-content/uploads/2012/06/tmpeeee89_thumb2_thumb.png)
![tmpeeee-90_thumb[2] tmpeeee-90_thumb[2]](http://what-when-how.com/wp-content/uploads/2012/06/tmpeeee90_thumb2_thumb.png)
![tmpeeee-92_thumb[2] tmpeeee-92_thumb[2]](http://what-when-how.com/wp-content/uploads/2012/06/tmpeeee92_thumb2_thumb.png)
![tmpeeee-93_thumb[2] tmpeeee-93_thumb[2]](http://what-when-how.com/wp-content/uploads/2012/06/tmpeeee93_thumb2_thumb.png)
![tmpeeee-94_thumb[2] tmpeeee-94_thumb[2]](http://what-when-how.com/wp-content/uploads/2012/06/tmpeeee94_thumb2_thumb.png)
![tmpeeee-95_thumb[2] tmpeeee-95_thumb[2]](http://what-when-how.com/wp-content/uploads/2012/06/tmpeeee95_thumb2_thumb.png)
