Configuring the logger connection
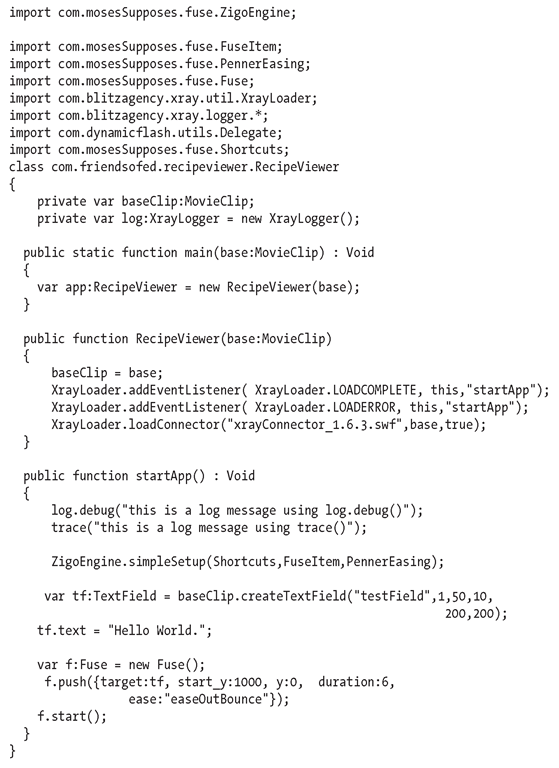
If you’ve configured the execute connection, you already have some of the logger connection functionality enabled. You can create a log variable of type XrayLogger in your class:
Then you can use the debug(), warn(), and so on, methods to display debug information. The other mechanism of logging requires you to change an MTASC compile option. To set that up, follow these steps:
1. In Eclipse, right-click your project, and select Properties.
2. Select the AS2 Builder option on the left.
3. Select the RecipeViewer builder from the grid, and click the Edit button.
4. In the Trace Function field, enter com.blitzagency.xray.util.MtascUtility.trace.
5. Click the OK button to accept your change.
You can now use the two methods of logging in your code. To test them, add a log.debug() line and a trace() line to your startApp() method:
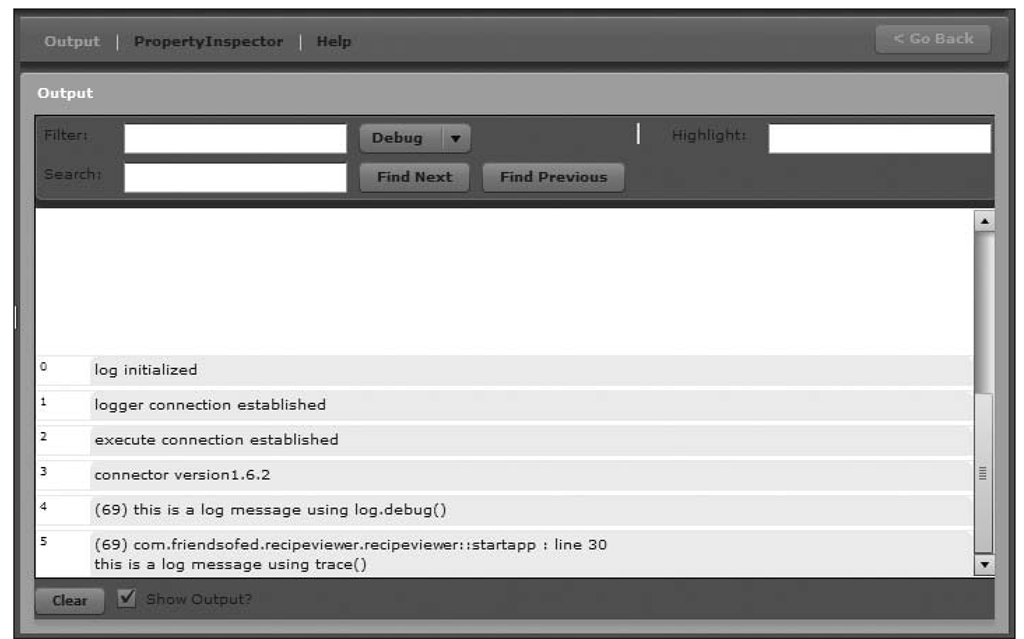
Once you’ve done that, you can begin watching log output in the Xray interface. The next section of this topic explains how to get that working. After that, run your application. You should see some debugging information appear in the Output panel, as shown in Figure 3-15. Notice that your trace() call added a method name and line, whereas the log.debug() call didn’t. This is because MTASC adds that extra information for trace().
Figure 3-15. The Xray output panel showing some log output while running the example application
Using the AS3 XrayLogger class
The previous example had you installing the connectors for an ActionScript 2-based project. There is a similar API available for ActionScript 3-based projects. The only significant difference is there is no trace redirect support on the Flex 3 SDK compiler. This means you must use the XrayLog class from Xray to get logging output to the Xray window.
To do that, create a new XrayLog variable and then call the debug, warn, or error methods of that new object to invoke the different logging levels. A modified version of the previous “Hello World” example to use XrayLog follows:
Installing the Xray interface
You can download the Xray Interface from the Xray website (http://osflash.org/xray). The Xray interface is packaged in two different formats:
■ Web-based Flex2 Interface (requires Flash Player 9): This is the simplest option to quickly get up and running since there is nothing to install. To use it, just click the link and allow the interface to open in your browser. You must have the Flash Player 9 plug-in already installed. This option is useful for quick tests, but if you’re using Xray often, it’s likely more convenient to install a copy of the interface locally on your computer.
■ SWF only: Oddly enough, the SWF-only package contains just the SWF that makes up the Xray interface. You can run it either in the stand-alone Flash Player or in a web browser.
Installing a web server
Installing a web server to test your Flash application locally on your development machine can save time and aggravation later when it comes time to deploy to your website for real. Properly setting up a web server with all the necessary libraries, add-ins, and configuration options can be a lengthy process. The people at Apache Friends have put together a project called XAMPP that makes installing a development web server easy. Apache Friends has versions available for Windows, Mac OS X, and Linux. Simplyvisit the website (http://www.apachefriends.org/en/xampp.html) and download the installer for your operating system. From there it’s a simple installation wizard to get your web environment up and running. When running the installer, make sure to install the Apache web server, any Apache modules you might want (like PHP), and the MySQL database server.
Once you’ve installed XAMPP, you can launch the XAMPP Control Panel (see Figure 3-16) to start the services you’ve installed. Once you start the Apache web server, you should be able to point your browser at http://localhost/ to view pages served from it.
Figure 3-16. The XAMPP Control Panel is used to start and stop your development web server.
XAMPP is a great way to quickly get a development environment up and running. However, it is not suitable for production websites. Installing and setting up a public-facing web server with scalability and security in mind are beyond the scope of this topic.
MAMP (Macintosh, Apache, MySQL, PHP) is another popular choice for a development environment on Mac OSX. You can find out more about it at http://www.mamp.info.
Installing Ant
To install Ant, download the binary distribution from the Ant website (http://ant.apache.org), and extract the files in the archive to a location on your computer. Then, add the bin directory from that archive to your system search path. At this point, issuing the command ant in a terminal or command shell will run Ant, and it should complain about a missing build.xml file.
Ant, like Eclipse and FlashDevelop, has many different libraries that can be plugged into it to perform different functions.
The functionality to compile ActionScript 2-based Flash applications using MTASC is achieved through the as2ant library that can be downloaded from the as2lib website (http://www.as2lib.org).
To install as2ant, download the archive from the website, and extract it to a temporary location on your hard drive. Then copy the as2ant.jar file to the lib directory inside your Ant installation.
If you will be doing ActionScript 3 development, you can get the Flex Ant tasks from the Adobe Labs project at http://labs.adobe.com/wiki/index.php/Flex_Ant_Tasks. Download the ZIP file linked on that page, and copy it either to your project directory or to a directory you can share across projects.
You now have a working stand-alone version of Ant.
If you’re developing using Eclipse, you should be aware that it also ships with a stripped-down version of Ant. To avoid problems that may arise from installation differences between the two, you should configure Eclipse to use your stand-alone version of Ant. To do this, select the Window > Preferences menu option. Then select the Ant > Runtime option on the left. Finally, click the Ant Home button, and select the directory you installed Ant to from the resulting dialog box.
Using FlashDevelop to create an ActionScript 3 build script
Now that you have Ant installed, you need to create a build script that defines the actions that Ant should perform to complete a build of your application. From the FlashDevelop menu, select the File > New > XML Document option. A new file will open in the editor. Save this file with a name of build.xml. Once you’ve done that, you can begin writing your build script by entering the following code into the file.
The project tag is the starting point for an Ant-based project:
The taskdef tag tells Antwhere to find the Flextasksyou have downloaded. The file flexTasks.tasks contains definitions of the available tasks, and the classpath attribute should point to the JAR file you downloaded.
The following line creates a new property called FLEX_HOME and assigns a value to it that points to the Flex SDK. Make sure to enter the directory to the SDK on your machine.
Ant projects are broken up into a series of targets. Each target generally performs a different action such as compiling a piece of an application or copying files to an output destination. This target tag will be the only one for now, and it will hold the commands to compile the RecipeViewer application. Notice the project tag before it specifies a default target. That default target will be run when Ant is executed without any arguments.
The mxmlc tag invokes the mxmlc compiler that ships with the Flex SDK. This compiler is capable of compiling ActionScript 3 or MXML files. You also specify that the compiler should use the Xray library; if you had other libraries that you use, you could add them as additional include tags. After the mxmlc tag, you must close the target and project tags to create well-formed XML.
Once you’ve written your build script, you can open a command prompt, change into your project directory, and issue the command ant. Ifeverythingworks correctly, you should see the following output and have a new RecipeViewer.swf file:
If you double-click the RecipeViewer.swf file in your Windows Explorer or OS X Finder, the Flash movie should launch in your default viewer, and the words “Hello World” should be displayed.
Using Eclipse to create an ActionScript 2 build script
Let’s create a build script that will build the ActionScript 2 sample application and then copy the resulting SWF to your testing web server:
1. Selectyour project in the Eclipse Navigator panel.
2. Create a build.xml file in your project directory. Select the File > New > Other menu option.
Then select XML, and click the OK button. In the next dialog box, select Create XML from scratch. Finally, enter the name build.xml, and click the Finish button.
3. Enter the following code into that file.
The project tag is the starting point for an Ant project:
The taskdef tag tells Ant about any custom tasks you want to use. This line registers the mtasc task with the org.as2lib.ant.Mtasc class you recently installed:
Property tags are used to keep the configuration of a project in a central location. Here, you set up the location of several directories that will be required later in the Ant script. To use a property, you use a ${property name} notation, as you will see.
Ant partitions units of work into targets. Here, you create a target called build that will compile the application:
Before you compile, you use the mkdir task to assure that the builds directory exists. To do the actual compiling, you use the mtasc Ant task. The mtasc property points to the location of the compiler. version represents the Flash Player version to compile for. The main property tells MTASC that it should look for the static main() method that you created when it starts the application. The classpath property lets MTASC know where to look for source files. The swf property tells MTASC where to place its finished file. And lastly, the trace property tells MTASC to use Xray for the logging mechanism.
The buildAndCopy target is meant to build your application and then copy it to your webserver directory. By adding the depends="build" attribute, Ant understands that it must complete the build target before running this one. This target then simply makes sure the deployment location exists and copies the files from the builds directory there.
Once you have made the script, open a terminal or command shell, and change to your projects directory. Issue the command ant buildAndCopy, and your application will be compiled and copied to the webserver directory. The output should look something like this:
The important line to look for is BUILD SUCCESSFUL. Ifyour web server is running, you should now be able to view your application by pointing a web browser at http://localhost/recipe_viewer/ RecipeViewer.swf.
Displaying the Eclipse Ant view
There is an easier way to run your build script than going to the command line and executing Ant. Eclipse has a special view just for this purpose.
1. In Eclipse, select the Window > Show View > Other menu option. A dialog box listing all the available Eclipse views will appear.
2. Select the Ant view, and click the OK button. A new panel called Ant will be displayed underneath your code editor.
3. Dragyour build.xml file from the Navigator to the Ant panel. When you are done, it should like Figure 3-17.
Figure 3-17. The Eclipse Ant panel displaying the build script
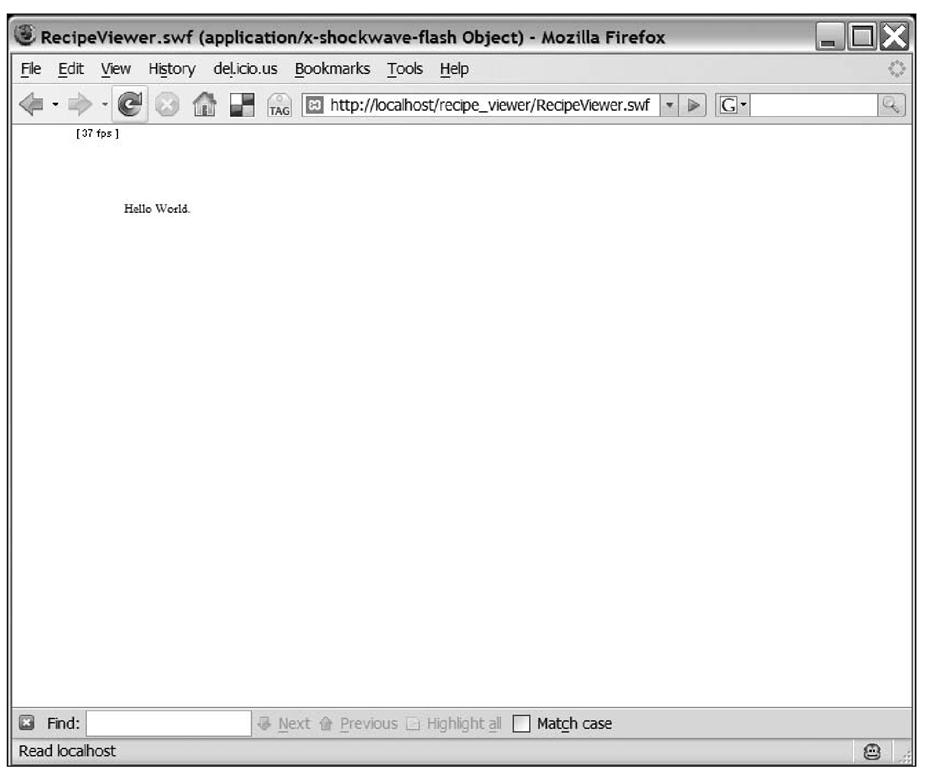
You’ve successfully installed an open source Flash development workflow! Just double-click the buildAndCopy target to execute it and then open a web browser to http://localhost/ recipe_viewer/RecipeViewer.swf to see the completed application (see Figure 3-18).
Figure 3-18. The completed sample application running in a browser served from a local web server
In this topic, you set up both an ActionScript 2 and an ActionScript 3 project using two different sets of tools and workflows. You also saw how to use some other tools such as Xray and Ant. In the next topic, you’ll build on this knowledge to create more involved applications. You’ll also explore how to use the open source tools to more efficiently develop Flash-based applications.
![tmpeeee-35_thumb[2][2][2] tmpeeee-35_thumb[2][2][2]](http://what-when-how.com/wp-content/uploads/2012/06/tmpeeee35_thumb222_thumb.png)


![tmpeeee-38_thumb[2][2][2] tmpeeee-38_thumb[2][2][2]](http://what-when-how.com/wp-content/uploads/2012/06/tmpeeee38_thumb222_thumb.png)
![tmpeeee-39_thumb[2][2][2] tmpeeee-39_thumb[2][2][2]](http://what-when-how.com/wp-content/uploads/2012/06/tmpeeee39_thumb222_thumb.png)

![tmpeeee-44_thumb[2][2][2] tmpeeee-44_thumb[2][2][2]](http://what-when-how.com/wp-content/uploads/2012/06/tmpeeee44_thumb222_thumb.png)
![tmpeeee-45_thumb[2][2][2] tmpeeee-45_thumb[2][2][2]](http://what-when-how.com/wp-content/uploads/2012/06/tmpeeee45_thumb222_thumb.png)
![tmpeeee-46_thumb[2][2][2] tmpeeee-46_thumb[2][2][2]](http://what-when-how.com/wp-content/uploads/2012/06/tmpeeee46_thumb222_thumb.png)
![tmpeeee-47_thumb[2][2][2] tmpeeee-47_thumb[2][2][2]](http://what-when-how.com/wp-content/uploads/2012/06/tmpeeee47_thumb222_thumb.png)
![tmpeeee-49_thumb[2][2][2] tmpeeee-49_thumb[2][2][2]](http://what-when-how.com/wp-content/uploads/2012/06/tmpeeee49_thumb222_thumb.png)
![tmpeeee-50_thumb[2][2][2] tmpeeee-50_thumb[2][2][2]](http://what-when-how.com/wp-content/uploads/2012/06/tmpeeee50_thumb222_thumb.png)
![tmpeeee-51_thumb[2][2][2] tmpeeee-51_thumb[2][2][2]](http://what-when-how.com/wp-content/uploads/2012/06/tmpeeee51_thumb222_thumb.png)
![tmpeeee-52_thumb[2][2][2] tmpeeee-52_thumb[2][2][2]](http://what-when-how.com/wp-content/uploads/2012/06/tmpeeee52_thumb222_thumb.png)


