Contrast
When filming a piece of time-lapse photography, it is helpful to show contrast within the frame. This use of contrast makes any compositional frame interesting, but it is critical for time-lapse work. Since time-lapse photography speeds actions up, the overall frame becomes highly active. If no stationary elements are in the frame to help set off the action, then the action becomes a blur of activity and your audience loses focus. This kind of contrast can be easily achieved by careful compositional design. If you are shooting people outdoors in a city, then it is important to place some stationary buildings within the frame. The people, cars, and shadows from the moving sun or artificial light move around the solid immobile building and the eye of the viewer can focus on the activity and rest on the stationary elements. It is important to know how the shadows and key source of light shift or whether you might get a light flare. All this adds to the active frame, so making sure there are some stationary elements helps as a stable visual reference in a highly active frame.
In any moving image, the active element in the image usually draws our eye. If we view a still frame and suddenly an eye blinks or plane jets across the composition, then that is what we look at. Time-lapse film is no different, but the opposite can be true in time-lapse filming and pixilation. When a frame is loaded with activity, the eye tends to be drawn to the less active object or area. This contrast can be used to direct the viewer and highlight a particular action that you want to feature in any shot.
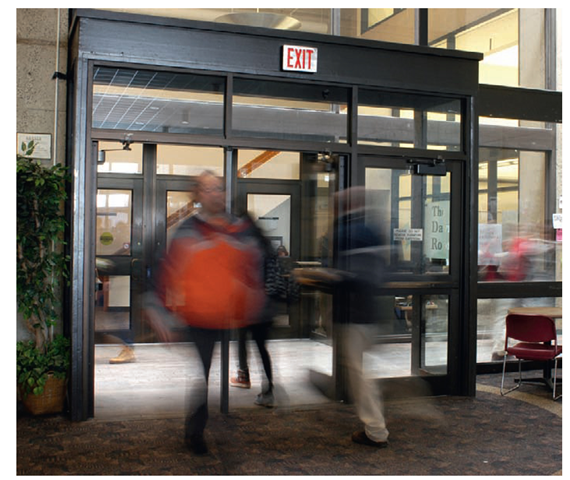
Fig 4.5 Shot of streaking people walking through doorframe.
Shutter Speeds
One follow-up to the subject of contrast can be found in the simple adjustment of the shutter speed in your camera. We already made a point of the critical element of having manual shutter, iris, and focus control in your stop-motion camera work. You are the one in control not the camera. Since the majority of stop-motion camera work takes place from a tripod, any shutter speed is possible to use. Any handheld camera work requires a fast shutter speed (a quarter second or faster) to avoid soft focus or movement during the exposure. If the camera is moving while the shutter is open, then the frame will smear or elicit a soft focus effect. Stop motion by hand is a rare event, even for an artist like Blu, who is constantly changing the angle of his camera frame to frame. He shoots from a tripod so the camera is steady during the exposure and the focus is clear.
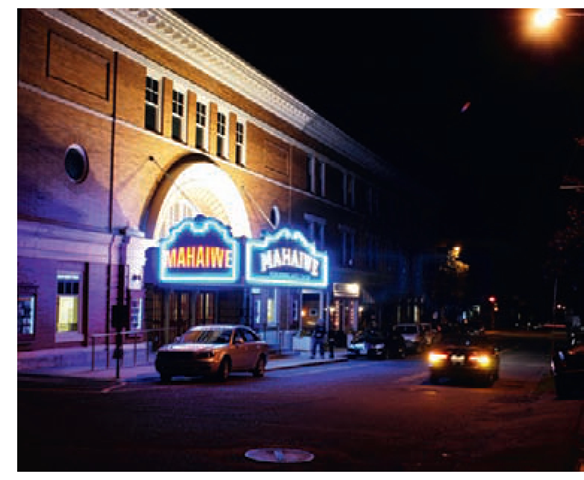
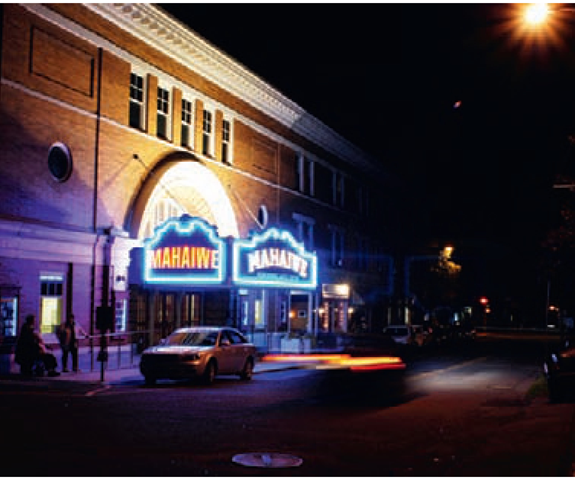
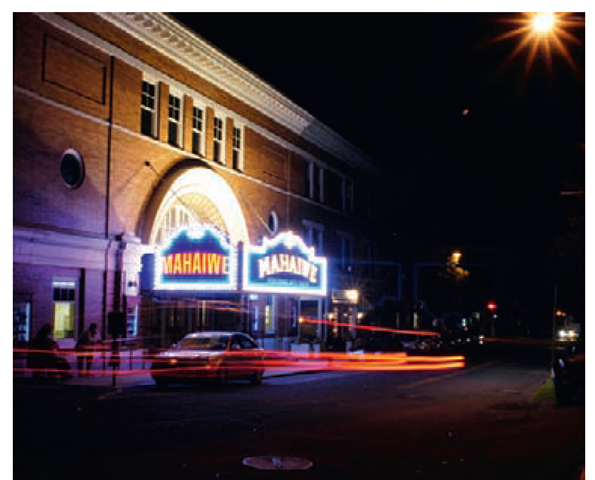
FIG 4.6 Night city scene with a shutter speed of V second.
FIG 4.7 Night scene with a shutter speed of 1 second.
FIG 4.8 Night scene with a shutter speed of 5 seconds.
Since we are on a tripod, the shutter speed can be quite long because the camera is stable. Any movement in front of a long shutter exposure smears across the frame and anything that does not move remains sharp and in focus. This is the same principle used in light painting. So, if you want to heighten the contrast in your time-lapse photography, then shoot at longer shutter speeds on a tripod. The moving images streak and the stable images remain focused, giving the contrast you need. The longer the shutter speed, the longer is the streak effect. This has the effect of smoothing out the action in contrast to the more staccato appearance of most stop-motion images, which are sharp and unblurred frame to frame. You have to close your iris down for the longer shutter speed in daylight or use a neutral density filter or the Big Stopper filter by Lee Filters to darken the image. You have to open up the iris for night events to maintain a good overall exposure in the dark.
Time-Lapse Rates and Formulas
Determining the rate of the interval for a particular event may take some experimentation. This is why it is important to know how long an event occurs like the rising of the moon. How long do you let time lapse before you shoot another frame? The moon may take many hours to rise and if you want to highlight the dramatic rise of the moon then speeding up that progression is more effective. That means that you want to allow more time to lapse between frames giving the moon a chance to rise between shots. If you are shooting people then you may not want to have too much time between shots. People move relatively fast (certainly in comparison to the moon). It may take a person 5 seconds to walk across a large room, so if you shoot a frame every 2 seconds, then you get only two frames for that action. That is not enough to get a sense of the movement or direction of the action. You may want to consider shooting a frame every half second, so you end up with ten frames for that action. This way you can see the action and direction in what will play out as less than a half second of screen time. Since the moon is so slow you may consider a longer lapse, more in the 15 to 30 second range, so the change can be perceived in a dramatic playback. It is important to consider what the main focus of your time-lapse film is and set the interval accordingly. If you want to watch the sun rise at a good steady rate, then your interval will be longer but you will have clouds that streak by at a fast pace. If the clouds are your main focus, then the interval will be faster and the sun will not rise that fast in the sky.
If there are restrictions on the length of the playback and you need to squeeze a time-lapse event into that length, then there is a formula to help figure out the interval between shots.
If, through observation, you have determined that the event you want to make a time-lapse film of is 3 hours long and you have to compress that 3-hour period into a 15-second piece of film, then you can work out the interval of the shutter exposure through simple math.
So, to shoot a 3-hour time-lapse event with a playback frame rate of 30 frames per second in 15 seconds of playback time, you must shoot a frame every 24 seconds.
Time-Lapse Photography and Pixilation
We noted earlier that it is difficult to be the person behind and in front of the camera simultaneously when creating a pixilated film. One way to accomplish this approach is to use time-lapse photography while animating yourself or other people in front of the camera. This is not an easy task and takes a lot of concentration, but here is an exercise that allows you to try this out for yourself:
This exercise tests your knowledge of the animation principles of easing, momentum, and secondary motion. Contrast is another element we discussed, and it is integral to the success of this exercise. First, you must put your camera on a tripod and place it in an area where there is a high level of human activity, like a busy downtown street or a university campus. Be aware that anytime you shoot pictures in public, you must obey any posted notices that would prevent you from photographing people. You will find these notices in subways, airports, hospitals, and other such places. If your camera does not have an intervalometer built into it, then you must bring a laptop computer with a capture software program that has the time-lapse option or, if you are using a dslr camera, consider buying and using a remote cable connection that has an intervalometer built into it. Set your time-lapse interval to 3 seconds and make sure that the sound option is on, so you can hear a "click" every time a picture is taken. Make sure that the total amount of frames to take is above 1000 on your computer, or, if you do not have a computer, that you have enough frames on your flash card. Set up a place for you to be in the frame that is stable and supported, like a chair or at a table or against a wall. You are going to move increment by increment every 3 seconds (as the camera shoots). You will hold your position for extended periods and this can be physically challenging, therefore, having some support helps. This requires moving extremely slowly or actually posing bit by bit every 3 seconds, including your eases and normal animation principles. Shoot for about an hour then stop. When you play back your film, you will appear to be moving in a normal pace as the world frantically zips by you. The contrast draws our eye to your slower action, and you have had a chance to practice some animation as the actual animated subject.
Motion Control
We touched on the moving camera in the last topic, where I mentioned that a whole new world of motion control is now available. Again, because of the lightweight quality of digital SLR cameras, the heavy expensive machines of the past have become dinosaurs. Artists and designers like Chris Church are sharing their information about off-the-shelf hardware and common-use software, available to anyone who has the time, patience, and curiosity to explore. Chris has an "open-source" site called openmoco.org, where contributors and viewers can share experiences, resources, software, and reviews to help build their own systems. Aluminum rails are bought off the shelf or can be custom made to "specs," and astronomical mounts can be placed on the rails for pan or tilt capability. All of this is run by Arduino circuit boards. According to Arduino’s site, "Arduino is an open-source electronics prototyping platform based on flexible, easy-to-use hardware and software. It’s intended for artists, designers, hobbyists, and anyone interested in creating interactive objects or environments."
Now you may think "this is beyond my capability," but you might be surprised and find some already fabricated hardware and software setups.
FIG 4.9 Three views of motion control rigs.
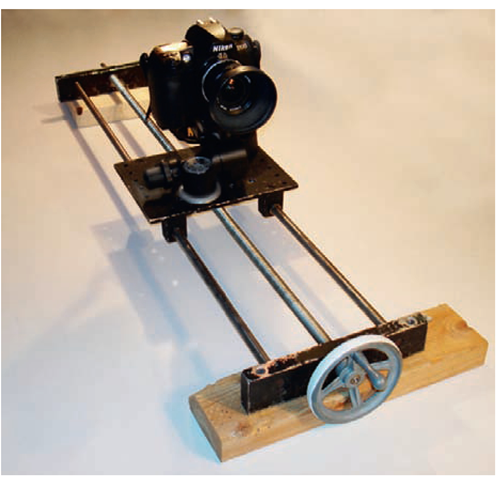
Camera motion is not absolutely critical to making a successful time-lapse film, but it certainly is what the experts are using for greater depth perception; and it adds a whole other quality and control to the output. You can create your own camera rigs with guides, rails (wood or metal), and geared heads mounted on the track. This all must be controlled by hand, but it takes some very exacting, demanding concentration and work to add this element. Camera movement should not be used just for the sake of movement. Take advantage of the changing perspective that a camera move might offer. A camera move might reveal new and important visual information. Constant use of camera movement starts to become tedious, and the lack of contrast in shots can diminish your film. Use these techniques sparingly and create an interesting dynamic in your filmmaking.
FIG 4.10 Manfrotto gear head mounted on a track that is operated by hand.
The final word on time-lapse filming in this topic should be given to Lowe who is a time-lapse master and creator of Timescapes.org. A time-lapse forum on his site has an incredibly in-depth conversation about the state of time-lapse photography today. Lowe is in the middle of producing a feature film utilizing time-lapse photography, and many of his shots can be viewed and shared on his site.
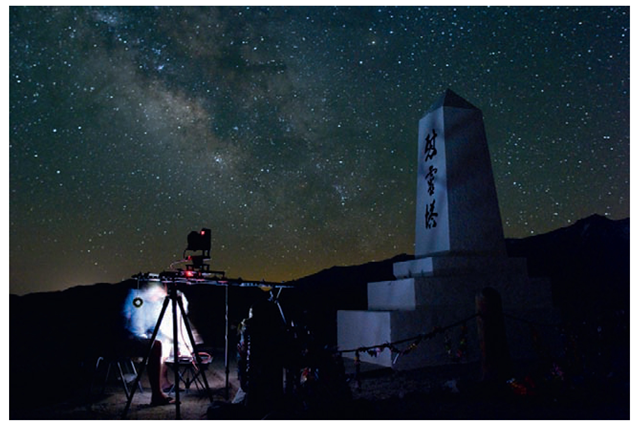
FIG 4.11 Lowe shooting a compound motion control camera move with time-lapse at Manzanar.
"I have no background in photography or filmmaking at all. I’m just totally self-taught, by trial and error. Back when I started, I had nowhere I could ask questions, no one to seek advice from. I felt like I was re-inventing the wheel with every small step of progress. This was the main impetus for me to start the Timescapes.org time-lapse discussion forum. Today, we have over 1800 members sharing advice and techniques related to time-lapse. This is a great resource for beginners, because it allows them to skip all the painful trial and error to a large degree!"
![tmp8331-63_thumb[2] tmp8331-63_thumb[2]](http://what-when-how.com/wp-content/uploads/2012/06/tmp833163_thumb2_thumb.png)

