Cameras and Lenses
We have already established that, at the moment of this writing, digital single-lens reflex still cameras are the standard for shooting alternative stop-motion techniques. Their light weight and small size offer convenience and quality in the shooting environment. They are relatively affordable, with prices that range from $400 to $9000 with the average price around $1500 for a high-quality "pro-sumer" camera. Although Canon and Nikon are leaders in this area, many of the other brands, like Olympus, Pentax, Leica, Ricoh, and Sony, offer equally effective products. Some features are better on some cameras than others. The critical feature we touched on already is that the camera must have manual shutter, iris, focus, and white balance options. These options should be available by switching a control on the camera and not by having to constantly hold down a particular control to achieve the effect. Another important feature that is not absolutely critical but a great option for these cameras is the "live-view" mode. This allows you to hook up your dslr to a computer with stop-motion software and see a live image from the camera. The ability to compare live and previously captured frames through live view make this option a real plus. Advanced stop-motion capture programs like Dragon and Stop Motion Pro pick up live view if your camera has this feature, which is included in most new cameras. This makes your life much easier. The only other options are to hook up a small digital camera to your viewfinder or set up a digital camera that is operated at a parallax point of view or alongside your dslr.
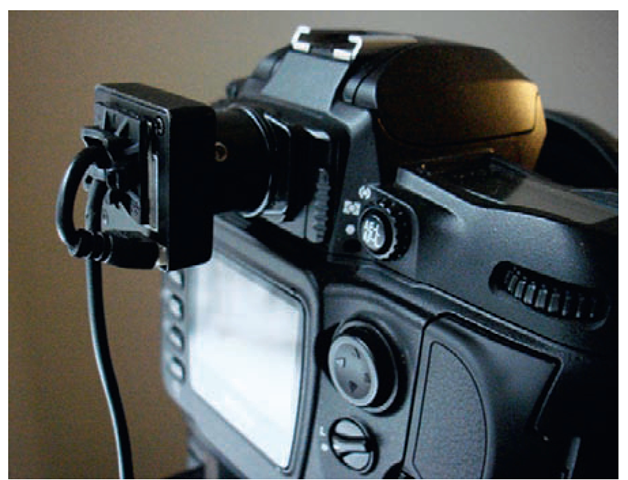
FIG 5.1 A shot of a video tap camera looking through the viewfinder of the dslr.
The reason manual controls are critical is because the images that move in front of the camera vary in color and light reflectance, depending on how dominant they are in the frame. An automatic camera is programmed to constantly adjust and average for the best exposure for each individual frame. This is very convenient for still photography, where each photograph exists on its own when it is viewed. In animation, we often look at hundreds of images together; and if the automatic exposures are changing from one frame to the next, as the imagery changes in front of the camera, then there are wild fluctuations in the exposure as a movie plays. This is highly distracting. Controlling the exposure, white balance, focus, and image stabilizer and locking them in with a manual setting helps to eliminate this fluctuation.
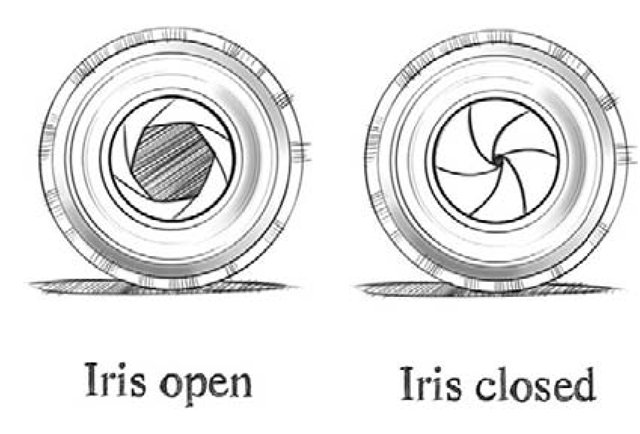
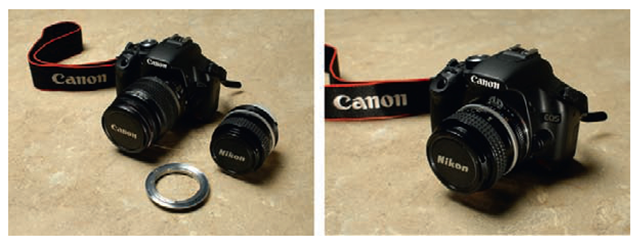
There is another reason why exposure fluctuation occurs: Most digital still cameras have automated lenses that often come with the camera. When an iris is set on a camera, in manual or automatic mode, the iris shuts down to that f-stop when the shutter exposes then opens back up so the viewer can see through the viewfinder. The open iris allows more light in for better viewing. If an animator is shooting hundreds of frames, there can be a slight variation in the iris aperture when it shuts down and opens up over those numerous frames, and that can account for the slightly varying exposures. There are a couple of solutions to this issue. One is to use manual lenses that lack the capability to open and close for viewing every frame. They stay in their set position all the time. Another solution, which I do not recommend, is filing down the pin in the lens that triggers this action in an automatic lens. Some camera operators use tape to hold down the pin on the back of the lens that engages these automatic functions. These are not elegant solutions but are practiced in the field. One advantage to using a Canon camera with Nikon lenses is that the adaptor that allows the Nikon lens to work with the Canon camera depresses that control pin, eliminating any unwanted functions. Finally, postproduction solutions can help reduce this fluttering. We get into this last option later in the topic.
FIG 5.2 Drawing of an open and a semi-closed iris.
There is always a preference for "prime" lenses, which are single focal range lenses. They have less glass in the lens, theoretically making for sharper images with less distortion. Zoom lenses, which often come with new cameras, are quite well made these days. Their image quality is excellent. They also have a larger set of options for focal range for the price of the matching prime lenses. Having a set of prime lenses, including 18 mm, 24 mm, 35 mm, 55 mm, 85 mm, and 105 mm/macro, gives you everything you need for making a successful film, but if you cannot afford them, a zoom that ranges from 18 mm to 135 mm should work quite well. If you buy a certain brand of lens and decide to use another brand of camera, there are lens adapters so you can mix and match. Many professionals, these days, use Canon cameras and Nikon lenses, but other combinations work as well. Canon, Nikon, and Carl Zeiss are considered excellent brands for lenses, but as usual, there are many more.
Fig 5.3 a lens adapter (Nikon lens/Canon camera).
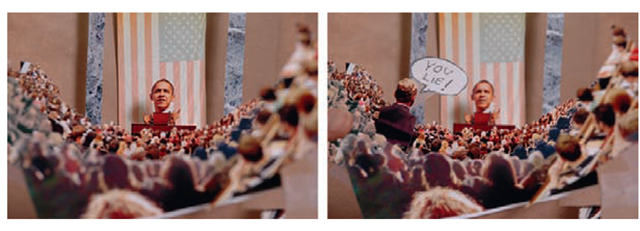
One technique that the manual lens allows the cinematographer to practice is the "rack focus" This is a classic live-action effect that allows the filmmaker to direct the eye of the viewer from one object or person to another object or person when they are separated by depth in the frame.
A foreground element can be in sharp focus and a background element in soft focus. The story suddenly requires the background element to be seen so the camera lens can be shifted to move the focus and attention from the front to the back of the compositional frame. This is usually executed by using gentle ease-in and accelerated turns of the focus ring on the lens including an ease-out over a short number of frames (i.e., 10 to 20 frames). The move can be done by hand with a measuring device on the lens (like a piece of tape with marked increments) or achieved through a motion control setup.
Depth of field is an important element to consider when shooting with a dslr camera. The basic principle is that the lower the number on the f-stop (e.g., f-1.4, f-2.8), the more narrow the depth of field or range of the focus. The audience automatically looks at focused objects in a composition, because people seek information that they can understand. That is why the rack focus or shifting focus is so effective in directing the viewer. The narrow focus also allows the focused object in the frame to stand out in contrast to its soft-focused surroundings. If you have a relatively busy background over which you have no control, then you might consider opening up the iris to create a shallow depth of field to help your subject stand out from the background. The danger with this is that, if your subject is moving in the "z axis" or toward and away from the camera, then that subject may fall out of focus in the action. It is also worth noting that every lens has a different range of focus. The wider the lens is, like 14 mm to 35 mm, the deeper the range of focus or depth of field. Longer lens and macro (or close-up) lenses have a much narrower depth of field. So, a 24 mm lens at f-8 has a broader depth of field than a 85 mm lens at f-8. Using this knowledge can increase your sense of composition, narrative, and atmospheric quality and is one more tool to give your film a sense of style and purpose. If you view any of the films of the Brothers Quay, like the 1986 Street of Crocodiles, you will see a mastery of this use of depth of field.
Fig 5.4 The "rack focus" effect on cutouts
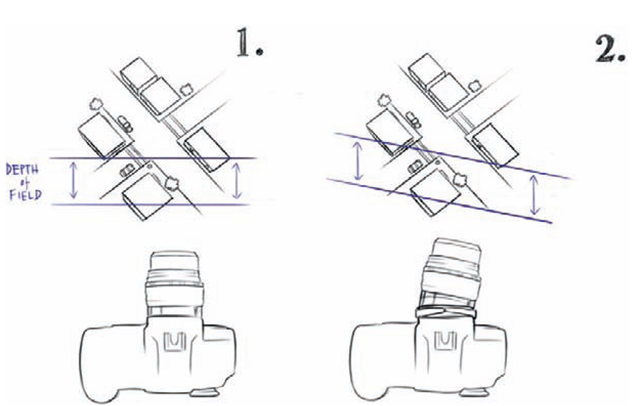
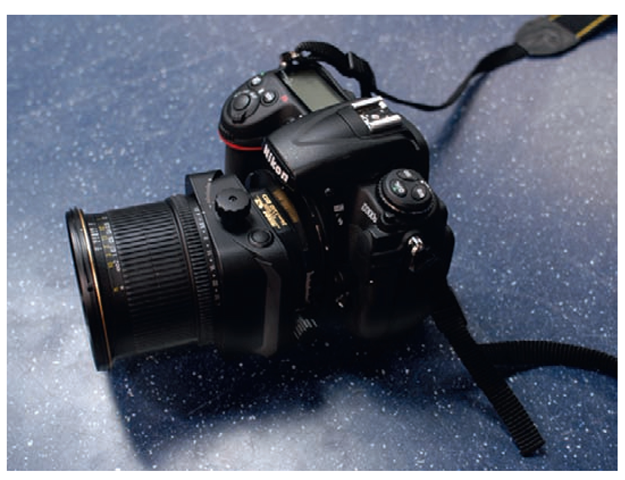
Another type of lens I want to mention is the "tilt-shift" lens. The tilt-shift lens, made by most of these companies, is highly sophisticated in design and, as a result, is very expensive. This concept has been around for a while in copy-camera equipment or with bellows cameras. Basically, the lenses can be tilted so the glass of the lens is not parallel to the film or image sensor plane. This changes the plane of focus, which can be highly effective, especially with a shallow depth of field.
FIG 5.5 A diagram of the camera lens with a normal parallel depth of field and a camera lens with a diagonal depth of field that corresponds to the angle of the titled lens.
FIG 5.6 Examples of the tilt focus effect photographed
This effect has had a comeback recently and can be seen in still photography as well as pixilation or time-lapse photography. Since there is this tilt of the lens and focal plane, the effect almost mimics the effect of a macro lens used on very small subjects and with a shallow depth of field. Life-scale images, like people, buildings, cars, or anything you shoot with this effect looks like a miniature. This is especially true if the camera is placed above the subject, further enhancing the illusion of being a miniature.
The shift in tilt-shift refers to moving the lens plane up and down or side to side, and that movement is parallel to the image plane. This allows tall or wide objects to be photographed without tilting the camera and lens (which normally forces diverging perspective lines in the object). Architects often use this technique to get straight and undistorted photographs of buildings. This effect is not used as much as the tilt effect, which also can be simulated in postproduction with more control.
FIG 5.7 A shot of a camera with the tilt adjusted in a tilt-shift lens setup.
The technology of digital cameras and devices is continuing to expand. Recently, Aardman Animations had a team of creative people use a Nokia N8 cell phone that can shoot high-definition video and stills through its Carl Zeiss lens. The team attached a custom cell scope with an adjustable depth of field, which is basically a microscope, to the Nokia N8, and they animated tiny natural objects and models the size of a pencil lead created through 3-D printing.
FIG 5.8 The making of Dot for The World’s Smallest Character Animation, Aardman Animations and Nokia
