Creating the Detail slide Layout Manually
Now create a custom layout for the Detail slides. Because the Key Point and Explanation slide layouts are first and second, respectively, in visual prominence in Slide Sorter view, you don’t need to create a split-screen layout here on the Detail slide layout to make these slides stand out. To create a custom layout to apply to all your Detail slides, follow these steps:
1. On the View tab, click Slide Master.
2. In the Overview pane, position the cursor directly below the Explanation layout you just created, and then right-click and choose Insert Layout.
3. Right-click the custom layout you created, choose Rename Layout, and in the Rename Layout dialog box, type Detail and then click Rename.
4. On the Slide Master tab, in the Master Layout group, clear the Footers check box. Leave the layout as it is, except insert a Content placeholder, and drag the placeholder to fill the slide below the headline; then delete the text from the Content placeholder. Change the text in the title area to read Click to edit Detail headline.
FIGURE E-7 Designing a custom layout for the Detail slides.
To create a navigation bar in the Detail slide layout, insert a rectangle shape, and drag and size it to fit across the bottom of the slide, as shown in Figure E-7. Placing the bar will not interfere with the simple visual reading of the slides, and its gray color will not call attention to it. Add the same bar to the Explanation slide layout you created earlier so that the bar visually links the Explanation and Detail slide layouts.
Adding an optional Navigation Bar Manually
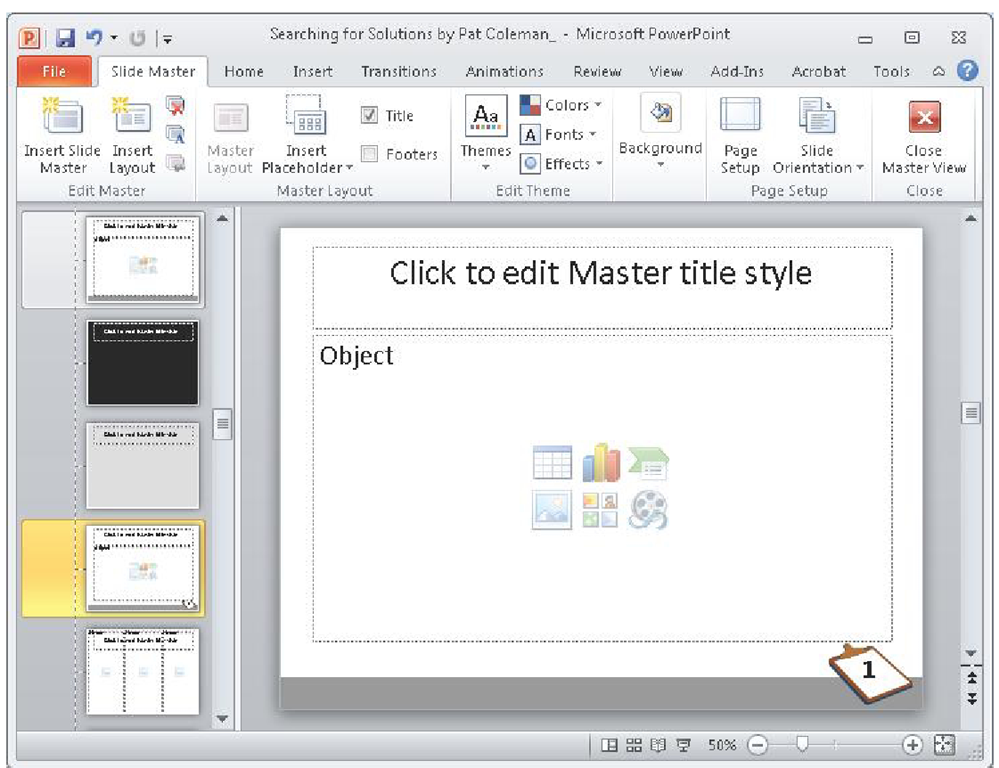
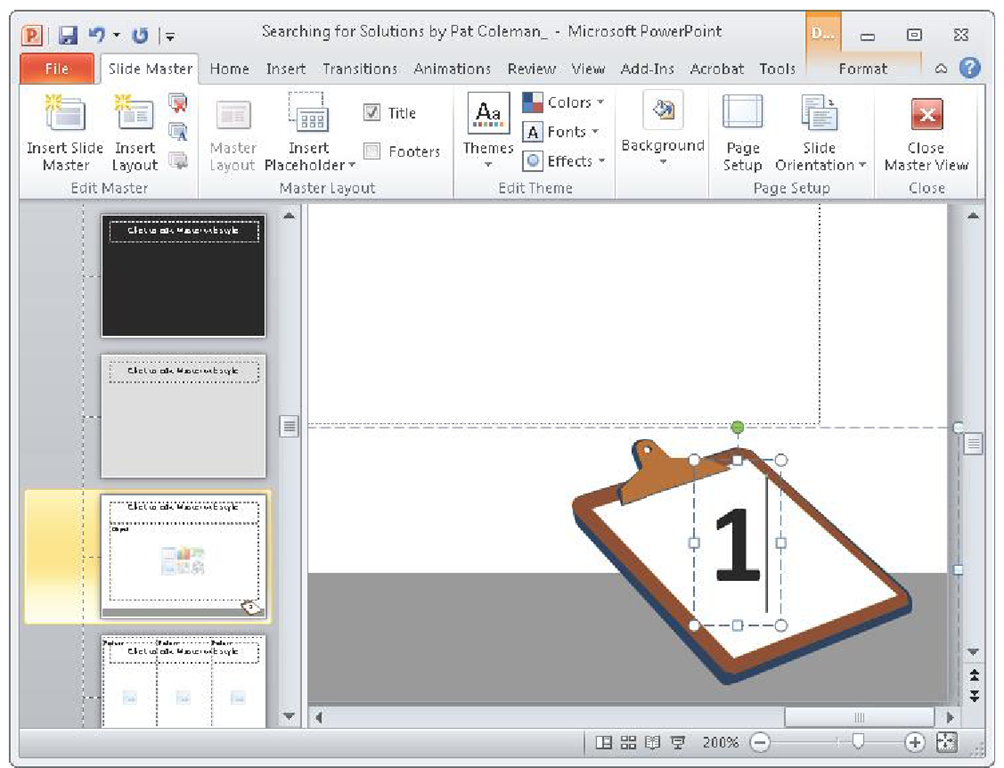
If you want to use an additional element to help viewers navigate the presentation, add a small icon in the lower-right corner. The magnification of the lower-right corner of the Detail slide layout, shown in Figure E-8, shows a simple clipboard that offers a subtle visual cue to guide your audience through this section of the presentation. Its small size ensures that it doesn’t interfere with the overall composition of the slide. To add a bit more navigational assistance, add the number 1 to the clipboard to indicate the first section of this part of the presentation. If you do that, you will need to duplicate this Detail custom layout twice, rename the new layouts, and then add a 2 and a 3 to the duplicate layouts to apply to the other corresponding sections. If you’re tempted to add your corporate logo here to the navigation bar, don’t—it only adds extraneous information to the screen that neither illustrates the point of the slide headlines nor cues the audience about the presentation’s organization.
FIGURE E-8 A zoomed-in view of a navigational element in the lower-right corner of the Detail slide layout.
If you do create your own custom layouts and navigational elements manually, each time you do so, you will be building material to add to a BBP library to use in future presentations.
Adding Automated Animation
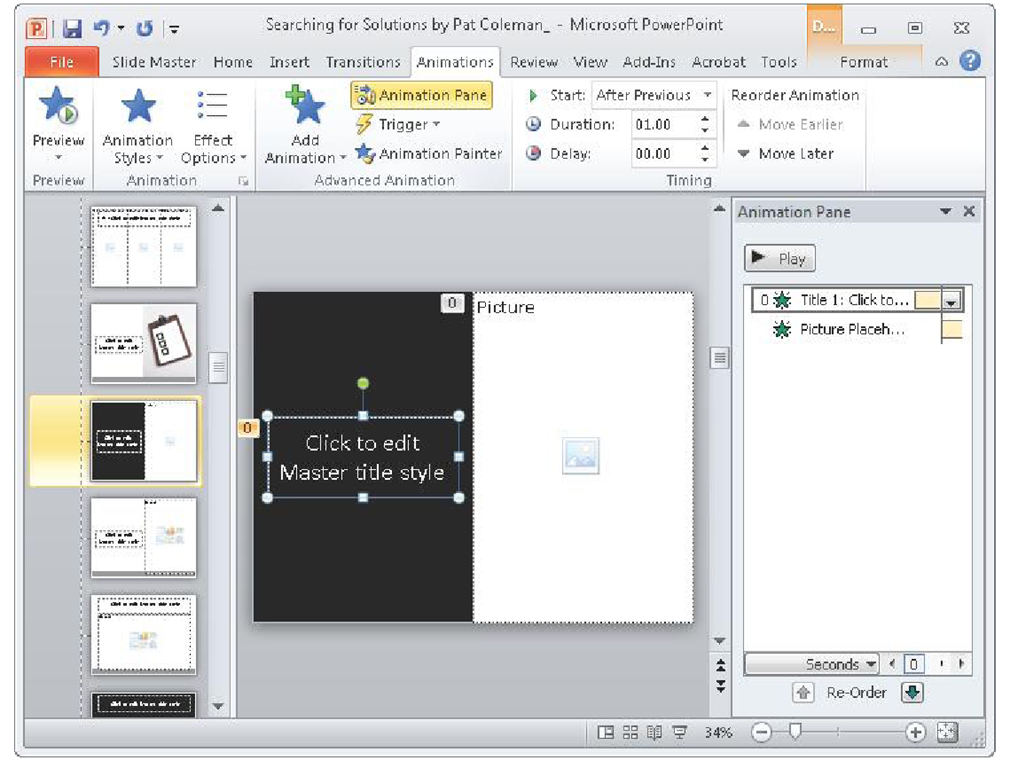
Remember to introduce information on the screen in the same order you want your audience’s working memory to process it—first the headline you want the audience to quickly read, and second the graphical element you want the audience to see immediately afterward. Do this efficiently when you set up the custom layout with placeholders. For example, in the earlier Key Point slide layout, select the Title placeholder and the Picture placeholder, and then on the Animations tab, click Custom Animation. In the Custom Animation panel, select Add Effect, point to Entrance, and then click Fade. In the Start drop-down list, select After Previous, and in the Speed drop-down list, select Fast, as shown in Figure E-9. On the Slide Master tab, click Close Master View.
FIGURE E-9 Adding animation to the headline and placeholder in the Key Point slide layout.
Now every slide that uses the Key Point slide custom layout with a photo placeholder will automatically fade in the headline first and the picture immediately afterward— the sequence in which you want the audience’s working memory to process the new information. Introducing the headline and graphic in this way adds a consistent and subtle movement to the screen without drawing attention away from your message. For the animation to work on your slides, insert graphics using placeholders as described earlier—if you add graphics to the slides manually, add animation to each one manually.
Tip
Although they are not essential, create custom layouts for your Title and Act I slides. Alternatively, skip this step and later use the PowerPoint default Title Slide layout for your Title slide and the default Title Only layout for your Act I slides.
Adjusting the notes Master layout
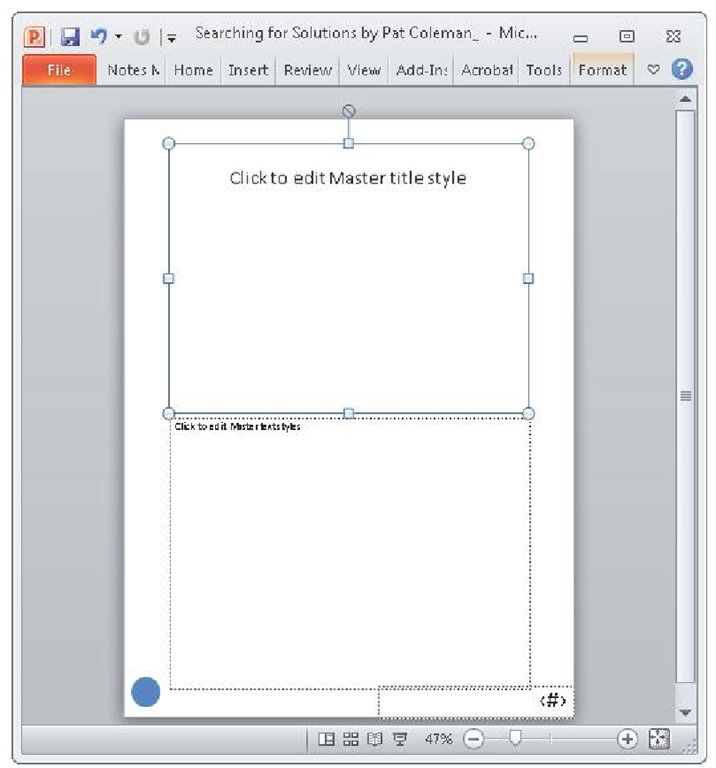
When you finish making changes to your custom layouts, on the View tab, in the Presentation Views group, click Notes Master. Here add any more graphical elements that you want to appear later when you print notes pages of your presentation as a handout. For example, add the logo of your company to appear in your printed handouts by inserting it in the lower-left corner of the Notes Master layout, as shown in Figure E-10, or include a page number in the lower-right corner.
FIGURE E-10 Designing the Notes Master.
Including your company logo on the Notes Master so that it appears on printed handouts will not distract from the visual-verbal balance that you established with the slide area, selected in Figure E-10, and the notes area below.
When you finish making any changes here, on the Notes Master tab, click Close Master View.


