1.17.
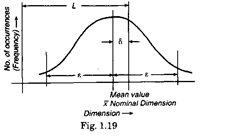
Say it is required to measure a dimension L. With highly accurate machine, we take several measurements and obtain a distribution (normal centred around mean; strictly speaking, it
is distribution which can be approximated with a
normal distribution when the sample size or number of
measurements is about 30 or greater). The difference 6
between mean value and nominal dimension is called
bias. Smaller the bias, the higher is the accuracy.
Precision is measured as to how small is the dispersion
6 from the mean value.
When a bias exists, conditions are adjusted to
compensate for 5 to make x agree with L. Since compen-
sation is done using sample mean 3c and not the popula-

tion mean \x, there will be a slight error, and the corrected sample mean will still differ from L. The
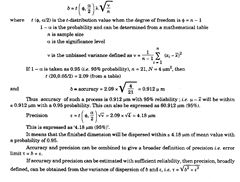
probabilistic range over which the difference 5 = L – x will be dispersed can then be used as a
quantitative measure of accuracy and given as follows

