Working with Objects and Layers
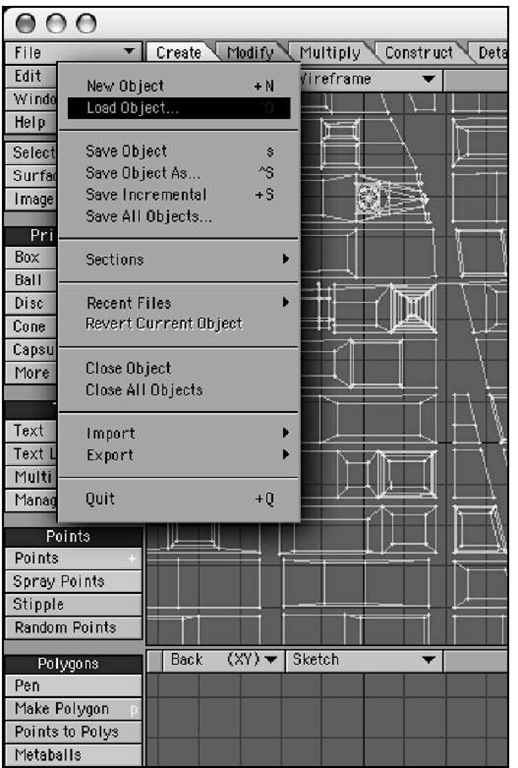
Now, take a look at how LightWave works with objects. From there, you’ll learn about points, edges, polygons, selection, and deselection, while making a few simple objects along the way. LightWave objects are unique to the program, and have the file extension .lwo. You can load existing objects from LightWave’s content directory simply by pressing Ctrl+o for open (that’s the letter o). But also take a look at the File dropdown menu at the top left of the Modeler interface. Click it, and you’ll see all your common load and save functions, plus a few extras. Figure 1.8 shows the panel.
If you use Photoshop, you are probably familiar with the concept of layers and how they are used if, say, you’re building a billboard ad: You might put a color gradient in the background layer, add text in a new layer, a picture in another, and so on. Why do you do all this in layers? So that each layer’s contents can have its own set of parameters, such as size, position, effect settings, and so on. If all the components lived on the same layer, you’d have a tough time applying effects to any individual element. LightWave Modeler works in much the same way. Each item that you need to control individually, for purposes of modeling or animation, should be in its own layer.
Figure 1.8 Using the File drop-down menu in Modeler, you can load, save, and perform similar operations.
This means that if your car model has four wheels (and I hope it does), and you want each wheel to be able to roll separately, each wheel must live on its own layer. If a wheel were placed in the same layer as the rest of the car, you’d have to animate the entire layer to make the wheel turn. You will also learn later in the t how layers are used to perform various modeling actions. For now, take a look at the top right of the Modeler interface, and you’ll find a set of 10 buttons (Figure 1.9), each representing a layer within a model.
Figure 1.9 At the top right of the Modeler interface are the layer buttons.
Note
An object can have multiple layers.You can work with multiple layers at one time if you like (just hold the Shift key to select multiple layers). By the same token,you can also have multiple objects loaded at once.
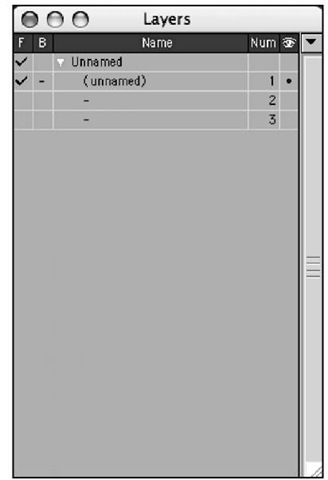
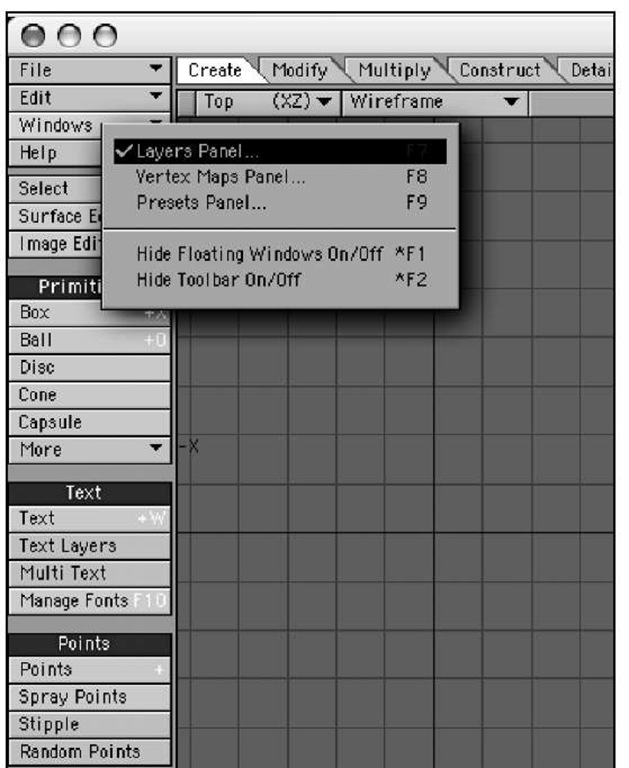
At first glance, if you start clicking on the layer buttons, they look like they do nothing. However, they are crucial to properly setting up and building certain types of models. And don’t think that because there are 10 buttons you’re limited to 10 layers. Layers are infinite in LightWave. Press F7 and the Layers panel opens (Figure 1.10). You can also open this panel from the Windows drop-down menu in Modeler, as shown in Figure 1.11.
Figure 1.10 Pressing F7 opens the Layers panel, which gives you access to Modeler layers. Here you see a blank Layers panel, because no objects are loaded.
Figure 1.11 Use the Windows drop-down menu to access the Layers panel if you don’t like the F7 key.
Note
If you are working on a Mac laptop and nothing happens when you press a function key such as F1 or F9,you need to open System Preferences and tell your computer to allow software applications to use the function keys, rather than the system. If you’re on a desktop Mac, select Keyboard & Mouse in System Preferences, and under Keyboard Shortcuts, uncheck the function keys, such as F9, that you wish to use in LightWave. F9 on a desktop Mac defaults to Expose’s All Windows command. F9 in LightWave is Render Current Frame. Note that you can change the shortcut for render in LightWave, but the tutorials in this topic will use the default settings.
To demonstrate how LightWave Modeler works with existing 3D models, you’ll work with simple models that ship with your LightWave software. These will be located in the Objects folder. This folder is typically located in yourdrive://NewTek/Applications (Mac) or Program Files\LightWave 3D\Content\Objects (Windows).
Note
One more plea: Before you do anything else, learn about the Content Directory! It will save you from lots of headaches.This is the number one problem reported by new LightWavers.
Loading Objects and Naming Layers
The procedure for loading single-layer and multiple-layer objects is the same. Layer information is stored within each LightWave object file, and it’s not something you need to worry about. LightWave object files retain data about changes you apply to them, such as colors and textures.
Note
The sample content included with LightWave v9 comes on a DVD that’s separate from the program installer CD. Look for it in your LightWave software case, and install these files as instructed.You’ll use them in this topic.
Exercise 1.1 Loading Objects and Naming Layers
1. Press Ctrl+o (PC), Cmd+o (Mac) or choose Load Object from the File dropdown menu and load the Anime_Zombie object from the Objects folder, which is within the Content folder, in your LightWave version 9 install folder. Once it loads, press a to maximize the object within the window. You’ll use this keyboard shortcut quite a bit throughout this topic.
Note
When working with keyboard equivalents, it’s best to always keep your Caps Lock off. Many basic LightWave functions are assigned to lowercase keyboard shortcuts, while more complex functions are set to capital letters.These complex functions can create problems if you use them accidentally. For example, pressing q as lower case allows you to set a surface name. Pressing q with Caps Lock on will quit the program!
2. Figure 1.12 shows the object-selection pull-down and the layer buttons as they appear after the model is loaded into LightWave Modeler. You’ll see that the first layer button is depressed by default, and it contains a small dot.
Figure 1.12 Modeler’s object-selection pull-down shows the name of the loaded object,Anime_Zombie,and the layer buttons indicate that just one layer is associated with this object.
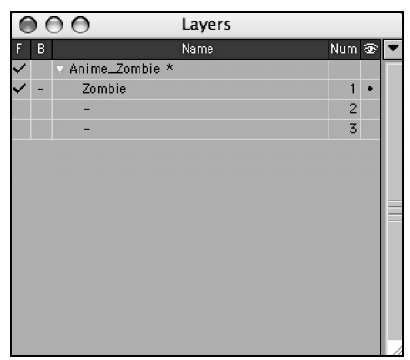
These dots inform you that there is geometry in that layer, such as points, edges, or polygons. Open the Layers panel (F7) and look at what the listings show. You’ll see the name of the object, and if you click the small white triangle to expand the object’s layers, you’ll see a listing that reads "unnamed." Unnamed refers to the geometry in the layer, which you’ve yet to name.
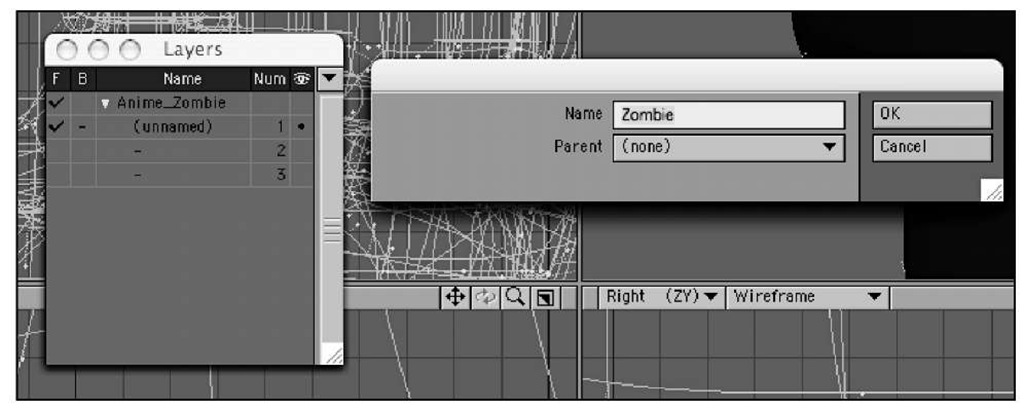
3. Double-click the last "unnamed" listing, and you’ll see a panel pop up that reads Layer Settings. If you had multiple layers—that is, objects in other layers—selecting any one of these layers instantly would change your view to that selection.
4. In the Layer Settings panel, enter Zombie as the Name. If you had another layer with geometry, you could also tell one layer to be "parented" to another. Parenting means that the selected object becomes a child and "belongs" to the parent. Whenever you move, rotate, or scale a parent object in LightWave Layout, objects in its child layers will follow. You’d use this for wheels on a car, letters in a logo, and more. Figure 1.13 shows the operation.
Note
Just to the left of the 10 layer buttons at the top left of Modeler is a number with a left- and right-arrow button.When you open a model, you’ll see the number 1. This means you’re working with the first set of 10 layers. You can click the right arrow to get to another set of 10, and the number changes to 2. Click again, and you’re in the third tier of layer buttons, and so on. However, this is cumbersome, and the Layers panel is often a better way to go. Open the panel and put it aside while you work. Unlimited layers, baby!
Figure 1.13 By double-clicking a chosen layer in the Layers panel, you can rename it and parent it to other layers.
When you loaded the Zombie object, you saw that the layer 1 button was selected. If you wanted to add parts to the model, or perhaps build a set of some sort, you would do so in another layer. To accomplish this, you select another layer by clicking on it. And as you did earlier, simply double-click the layer listing in the Layers panel to name that layer.
So, what’s the point of all this, you ask? Even though this is a simple object, all of your 3D objects will be handled in this way. The purpose of naming each layer is so that when animating later, you’re not guessing which layer is which. Given that, naming your object layers is not necessary, but it’s an efficient way to work and organize. When you save your object, its layers and their names are saved with it. What’s great about this is that you can send just this one single object to a coworker or client, and all of its parts (such as the wheels), as well as the parenting hierarchy, are contained within.
Note
You can load multiple objects into Modeler at the same time. However, unless you specifically cut and paste those objects together in some fashion, you can view only one object at a time. Figure 1.12 shows the layer buttons at the top right of the interface, and to the left of the layer buttons is the Current Object selection list. Any objects loaded into Modeler can be selected from this drop-down list. It’s important to note that each loaded object retains its own layers. Choosing to load multiple objects will not load them into individual layers within the same model.
Foreground and Background Layers
There are a few more things to note about the Layers panel. Looking at Figure 1.14, you can see some additional labels in the Layers panel. The F at the top left of the panel stands for Foreground, while the B stands for Background.
As you get into more complex projects, you’ll use these commands in the Layers panel to place objects in both the foreground and the background. To try this out, follow these steps:
Figure 1.14 Additional controls are available in the Layers panel.
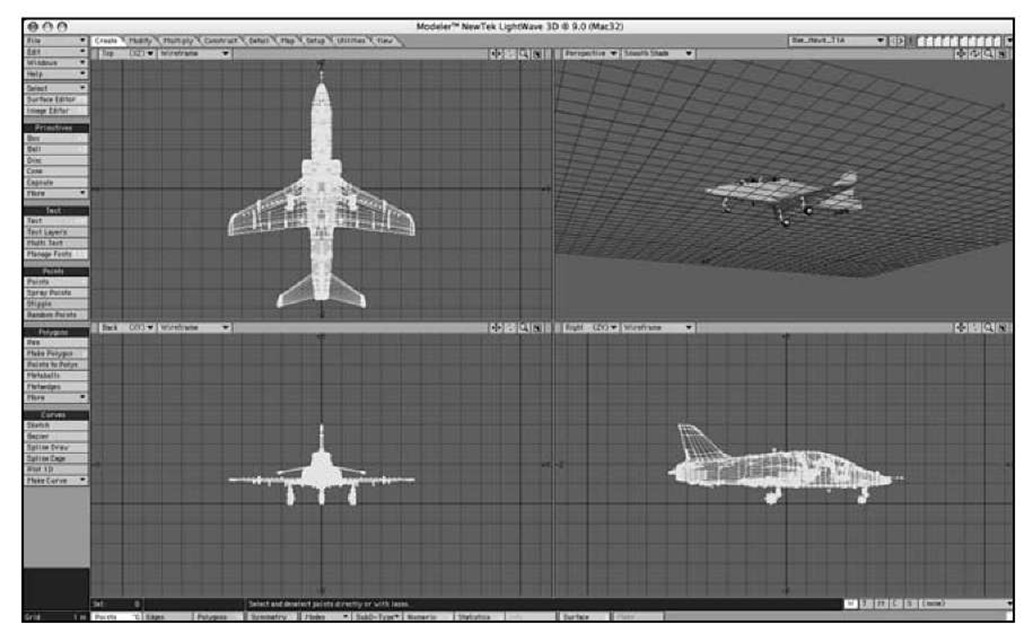
1. Load the Bae_Hawk_T1A object from your LightWave installation folder. This object has many layers, and when first loaded, all are seen in the foreground, as in Figure 1.15.
Figure 1.15 Selecting a layer in the Layers panel brings that layer to the foreground.
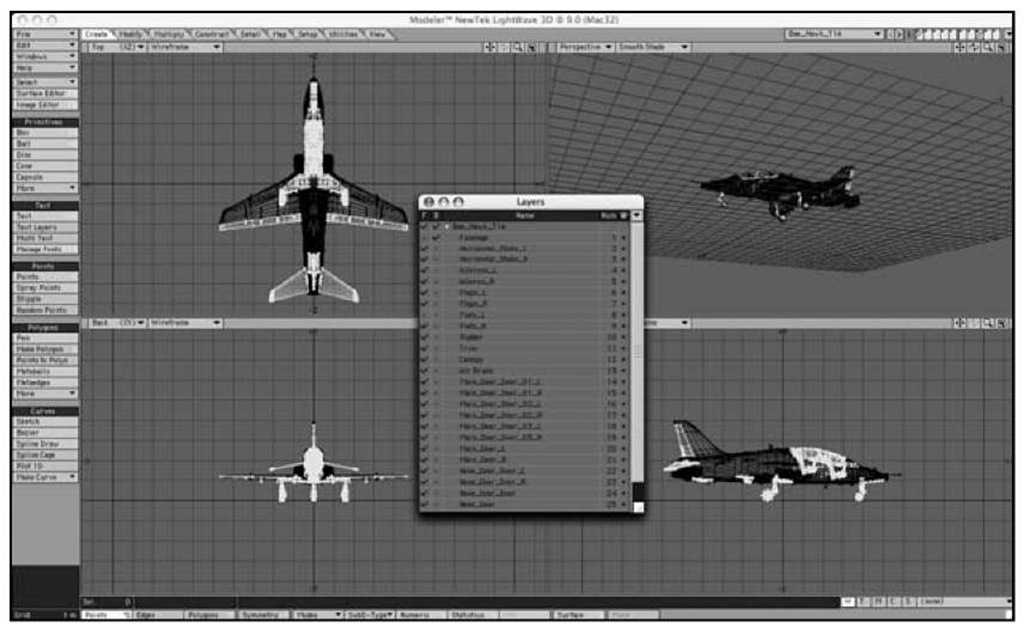
2. Press F7 to open the Layers panel. Don’t click any individual layer itself, but click the check box beneath the B column (B for background) next to the Fuselage layer. If you only see the name of the model, click the white expansion triangle to the left of its name to reveal all the layer names, as in Figure 1.16.
Figure 1.16 By selecting a layer under the B column in the Layers panel, you can put layers in the background for reference.
Take a close look at the top right of the Modeler interface, and you’ll still see the body fuselage of the plane, but in a dark outline. You’ll see the wheels and other parts still in a foreground layer. You’ve now defined foreground and background layers. The reason for this is threefold—objects in background layers are used for reference, as separate animation elements, or as modeling tools.
You can hold the Shift key and select multiple background layers as well. On the right side of the Layers panel, you’ll see numbers. These are the layer numbers for each layer, and unlike Photoshop layers, their order does not affect the appearance of the model.
Note
Layer order becomes important when you use foreground and background layers as modeling tools.This topic will be covered later in the topic.
Layer Visibility
To the right side of the Layers panel, at the top, is a small eyeball icon. Beneath that, next to each layer is a little dot. Let’s say you’ve placed an object in a background layer and used it as a reference to build a new object. If you save your LightWave object and load it into Layout, all layers will be visible. However, if you click that little dot in the Layers panel in Modeler, when the object is loaded into Layout, the layer will not be visible. Load it back into Modeler, and it will be there. This is great when you use objects as modeling tools.
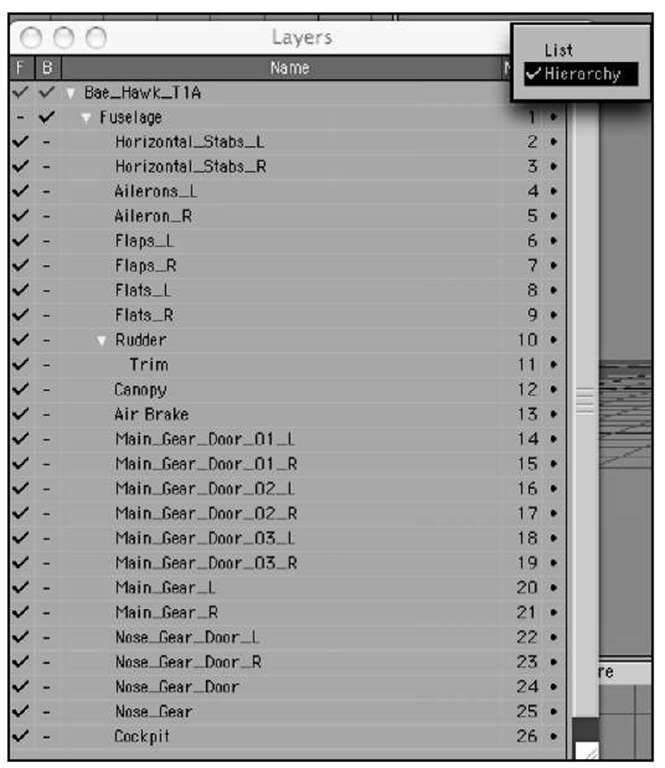
Finally, there’s one more area you should be aware of in the Layers panel, and that’s the Hierarchy view option. It’s easy to miss, but at the very right top corner of the Layers panel, there’s a small drop-down arrow. Select it and you see the option for List or Hierarchy. So far, you’ve been seeing the Layers panel in List view. Figure 1.17 shows the Layers panel in Hierarchy view. This is useful for more complex objects like characters or mechanical creations.
Figure 1.17 You can also choose to view your object layers as a List or Hierarchy.
There are many more panels in LightWave v9 Modeler, but it’s important to understand how to navigate before you get more involved. Working with the layers is essential to any model you create, which is why it’s covered first in this topic. Now, to the menus!
