Across the top of the Modeler screen, you’ll see nine tabs, each representing a different group of modeling tools. This section guides you through the different tabs and explains how they are organized. Figure 1.18 shows the tabs across the top of Modeler.
Figure 1.18 The LightWave v9 menus are tabbed across the top of the interface. Selecting any of these brings up various tools on the left side of the screen.
When you select different tabs, different toolsets become available. Think of a toolset simply as a group of tools. Years ago, tools were just floating around in LightWave Modeler,some of them hidden deep within menus. Now, version 9 has significantly streamlined the tools and grouped them quite well. The LightWave Modeler toolset works similarly throughout the program, with slight variations depending on which tool you are using. This next section guides you through the toolset categories within each of the Modeler tabs.
Note
On the top left of the Modeler interface, you’ll find a set of drop-down menus that will always appear, no matter what tab you’ve clicked.These include File, Edit,Window, Help, Surface Editor, and Image Editor.
When working in LightWave Modeler, really think about the process, and you’ll have a much easier time locating the proper tool. For example, say you’ve just started up Modeler and want to build a 3D television set. You want to create something and need basic geometry to get started. OK, head on over to the Create tab. Choose the box tool, and go. Then, let’s say you want to change it in some way, perhaps rotate it or move it. What are you doing? You’re modifying it, right? You’d go to the Modify tab to find the necessary tools. What if you need to add to this, perhaps by beveling it a bit? Think about a bevel, and you might realize that this operation will add to the geometry of your object, so look under the Multiply tab. Many tools in LightWave v9 have been rearranged in ways that make even more sense than in previous versions. If some tools are no longer where you’re used to finding them, keep the task at hand in mind and you’ll probably see that they’ve been moved to a location that makes more sense.
Create Tab
The Create tab calls up the basic tools you need to create geometric shapes such as boxes, balls, discs, and more. Additionally, you’ll find tools to create points and curves. Figure 1.19 shows the tools under the Create tab.
The first thing you’ll see when you click the Create tab is that the toolset starts at the top of the screen on the left side and pretty much runs down the entire left side of the interface! The first seven buttons at the top will always be there, no matter what menu you’ve chosen (unless you customize your interface and change their location, as described later in the topic).
Figure 1.19
The Create tab is home to many basic tools that you’ll need in the course of most modeling projects.
These key tools are the File menu, Edit menu, Windows menu, Help menu, Select menu, Surface Editor, and Image Editor. These are important areas that you will access often, which is why they’re always accessible from every tab in Modeler.
Primitives
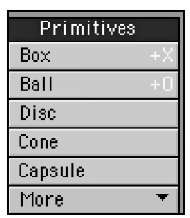
At the top of the toolset under the Create tab is the Primitives category, as shown in Figure 1.20. Here you’ll find the tools for creating geometric shapes such as a Box, Ball, Gemstone, and Capsule. These basic (and some not-so-basic) geometric shapes are key building blocks for just about anything you want to create. Think about it—the forms of nearly everything around you are based on geometric shapes: a television, a couch, a kitchen sink! A vast number of 3D models start out as primitives, which are multiplied, cut, shaped, and formed into final objects.
Text
LightWave is famous for generating spaceships and animated characters but, believe it or not, 3D text is one of its most popular and in-demand applications. "Text and Logo Creation," you can make some pretty outstanding broadcast-style animations and graphics with these tools. But what’s more, text objects can also be used as building blocks. For example, you can take the letter C, turn it on its side, extrude it, and you have a slide you can put into a 3D playground. Or how about using the letter E as a building block for creating a 3D maze?
In previous versions of LightWave, to use the text tools properly you needed to first select the Manage Fonts button, shown in Figure 1.21. This tool enables you to load fonts into Modeler. But LightWave v9 has made text creation even easier: It allows you to choose any font on your system by opening the numeric panel for the Text tool. The Text Layers tool in LightWave v9 is so easy to use, it’s just silly. Here, you can instantly create a string of text or a simple logo and have the program instantly add surfaces, while putting each word or letter on its own individual layer. This means you get to animating even faster!
Figure 1.20
The Primitives category within the Create tab offers a wide range of basic (and some not-so-basic) shapes you can use to create 3D models.
Figure 1.21
The Text tool category is where you’ll find the Manage Fonts command, Text Layers, Multi Text tool, as well as the Text creation tool.
Points
Often you’ll need to build an object from scratch, starting not with a box or a ball, but rather a point. Later in this topic, you’ll read about points, edges, and polygons, but essentially, points make up polygons, sort of like connect the dots. The Points category gives you the tools to create points one at a time, in clusters with the Spray Points tool, or with the Random Points generator. Figure 1.22 shows the category.
Figure 1.22
The Points category offers tools to create single points or clusters of points. Points, as you know, make up objects.
Polygons
Many 3D shapes you’ll create in Modeler begin as simple 2D polygonal shapes. And just because primitive shapes make basic objects and points create individual points doesn’t mean that you can’t create simpler polygonal objects. The Polygons category has a tool called Pen, for example, which is similar to the Points tool except that as you create with this tool, polygonal lines are automatically generated between each point; the dots are connected automatically. You can convert selected points to polygons, or use the Make Polygon command, which you can apply after you’ve used the Points tool from the previous category. Additionally, you can create some organic objects with the Metaedges and Metaballs tools. Figure 1.23 shows the category.
Figure 1.23
The Polygons category offers polygonal creation tools.
Curves
The last category in the Create tab is Curves. This category includes tools for generating curves from points you’ve created. Curves are used for many things, such as motion paths and extrusion paths as well as shaping models. The Sketch tool enables you to just click and draw, and when you release the mouse button, you have a 3D curve! You can use curves to build objects with splines. As you’ll learn later in this topic, splines are useful for building organic objects such as boats, curtains, or sometimes characters. Another key tool in this category is Spline Draw, with which you can precisely create curves, not only for models, but even text or custom shapes. Figure 1.24 shows the tools in this category.
Figure 1.24
You can use curves for text, characters, motion paths, and more.
Modify Tab
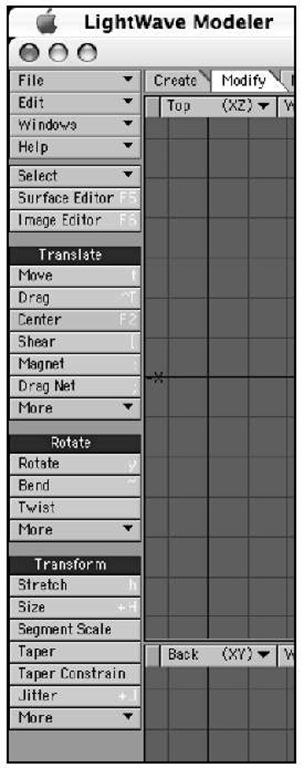
The Modify tab—sounds simple enough, right? Well, it is. Anytime you want to modify your object in some way that does not require adding or removing points or polygons, you need to use a modify function. Click this tab and at the top left you’ll see the seven tools available in every tab. Below them, you’ll see three toolset categories: Translate, Rotate, and Transform (Figure 1.25).
Translate
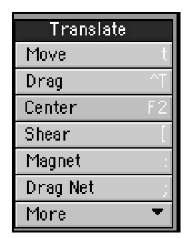
No, this category doesn’t contain tools to make objects fluent in foreign languages. Its tools are used to move objects in 3D space (Figure 1.26). Typically, the 3D industry calls a move function a translation. The Translate category contains tools like Move, Drag, Magnet, and a few others. Each tool repositions your object in some way.
Figure 1.25 The Modify tab is used when you need tools to move, rotate, or size your object.
Rotate
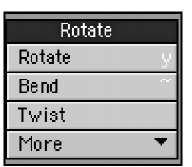
This category (Figure 1.27) is almost self-explanatory. Of course, you can rotate points or polygons with the Rotate tool, but there’s much more! You can also bend, twist, and even use the cool Vortex tool (in the category’s More drop-down). Other tools like Rotate to Ground or Rotate to Normal provide extra control for precise rotations.
Transform
Transform is a sizing function, so anytime you hear a seasoned animation veteran talk about "transforming the object," they’re not talking about a Saturday morning cartoon. The
Figure 1.26
Tools in the Translate category let you move your geometry around—both points and polygons.
Figure 1.27
The Rotate category contains your basic rotation tools, as well as some cool extras like Vortex.
Figure 1.28
The Transform toolset is the place to find Size/Scale tools.
Transform category includes modification tools such as Size, Stretch, Pole, and others (Figure 1.28). Every tool in this category controls object size in some way. For example, Size scales your object or selection equally on all sides. Stretch sizes your object or selection on a specific axis. Use the Transform tools when you want to scale or distort objects or selections.
Multiply Tab
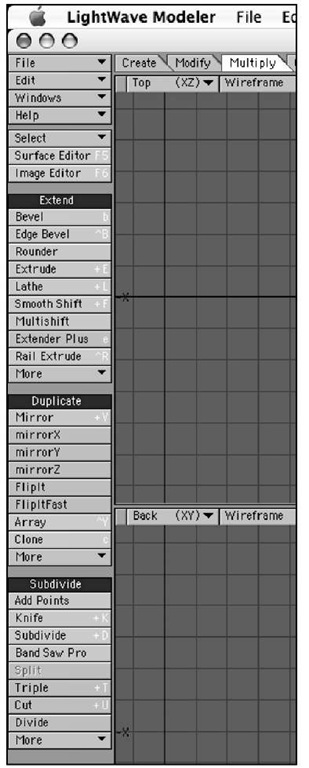
Tools in the Create and Modify tabs are generally easy to wrap your brain around. When you get into the Multiply tab (see Figure 1.29), things get more complex. Within LightWave, multiply means add onto a selection, and the tools within this tab do so in a variety of ways. You’ll use these tools often in later topics. For now, read on to find out what the categories in the Multiply tab can do for you.
Figure 1.29 The Multiply tab contains some complex tools that enable you to build up your object in a variety of ways.
Note
Some tools throughout LightWave v9, especially these within the Multiply tab, are not available until there is geometry in a specific layer.


