Add
The Add category in the Items tab was all about objects, but in the Setup tab, the Add tools concern all things bones. Tools in this category can be used to add a bone, add a child bone, draw bones in Layout, and draw child bones. But another important tool is labeled Cvt Skelegons. This is the Convert Skelegons command that you’ll use to change Skelegons (created in Modeler) into bones for use in Layout. Without this, Skelegons in Modeler are useless.
Modify
Once you’ve added bones to your scene, at some point, you’ll need to modify them. The Modify tool category provides all that’s necessary to adjust your bones. These powerful tools let you move bones’ joints and tips, twist bones, and scale them. They are handy for properly setting up a perfect character rig.
Detail
Modifications are great, but sometimes when working with bones, you need to control more specific details. The Detail tab offers tools to split bones, and not just once. You can take one bone, for example, and cut it into four without destroying the hierarchy of your setup. This is useful when you’ve put a bone into a foot, for example, and then realize you need another one so the foot can bend! You’ll also find Bone Fuse, which allows you to put two split bones back together, just in case you didn’t want to split them after all. And, you can use the UnParent Bone tool here to remove a bone from its hierarchy.
Edit
Again, all of the tools within the Setup tab relate to bones. Use tools in the Edit category to copy hierarchies, rename them, save them, and load them.
Motions
One small category within the Setup tab relates to bones but also, potentially, to every other item in your scene. You can use the Motion Options tool in the Motions category to access a variety of motion tools and plug-ins. This can be for bones, lights, cameras, objects, or any effect item in your scene. Additionally, you can record minimum and maximum joint angles with the Limits drop-down selection.
Utilities Tab
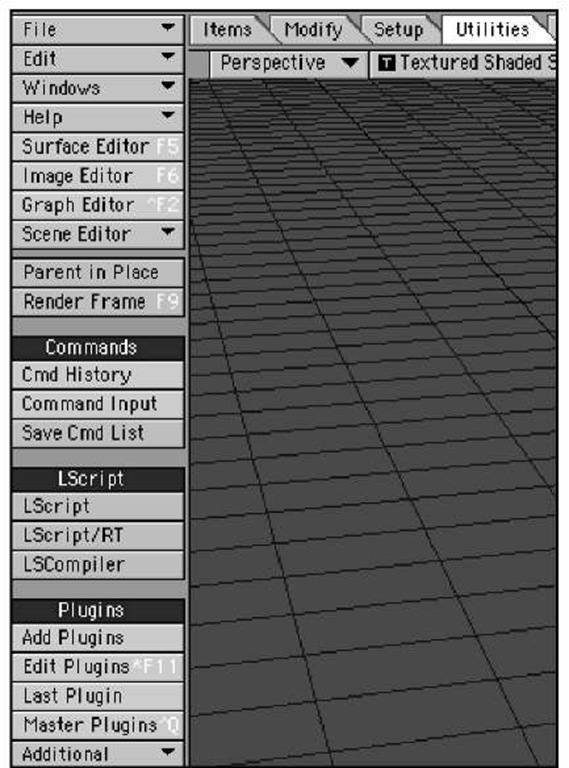
Whenever you need to add plug-ins, edit them, or work with LightWave’s LScript scripting language, you can click over to the Utilities tab. Figure 2.45 shows the menu tab and its tools.
Commands
The Commands category offers controls for looking up your command history or entering specific commands for LightWave to follow. Additionally, if you want to keep track of commands you’ve used, use the Save Cmd List option. Refer back to this for similar projects.
Figure 2.45 The Utilities tab is home to command tools, LScript programming tools, and plug-in tools.
LScript
The LScript category is home to LightWave’s custom programming language. Here, you can load preexisting LScripts, use the LScript compiler to build your own, and use LScript/RT to preview how they’ll run. (Note that the LightWave v9 documentation incorrectly describes a fourth tool in this category, LScript Commander. This powerful tool is found in the Additional drop-down of the Plugins category (described below), under the name "LS Commander". It lets you create your own plug-in that loads an object, saves it, and then saves the scene, all in one button!
Plugins
The Plugins category is where you find the tools to add individual plug-ins, load multiple plug-ins with the Edit Plugins tool, and quickly find the last used plug-in. Within this category is the Master Plugins panel, which is where you can load Master class plug-ins, such as the LScript Commander. You also see the Additional list, where you can find additional plug-ins and any third-party plug-ins you might have added.
Render Tab
Rendering is the process by which LightWave generates the final output of a scene, using all of the lighting, surfaces, textures, animations, and environmental effects (wind, gravity, and so on) that you create in Layout. If a scene is animated, of course, the process can yield anywhere from hundreds to millions of rendered frames.
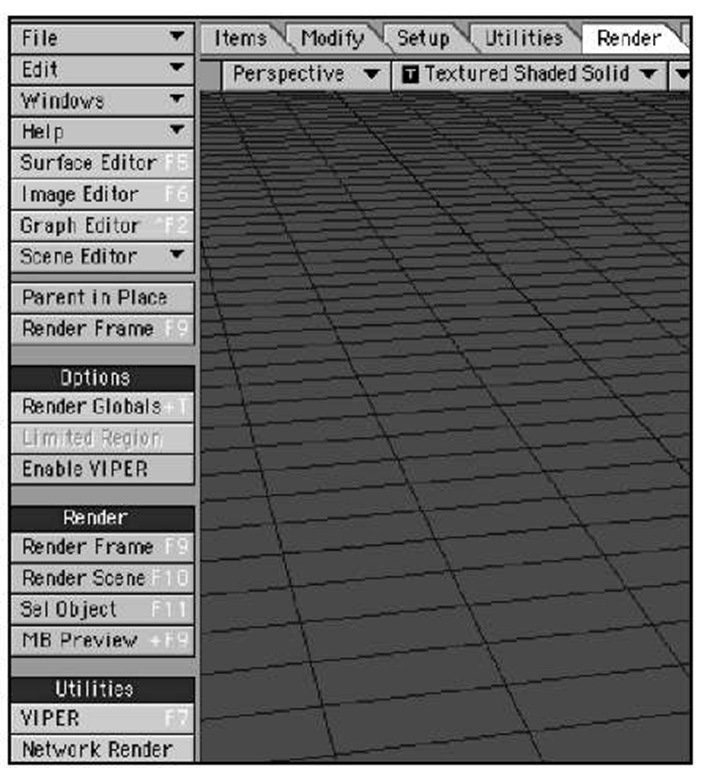
In earlier versions of LightWave, rendering tools were sort of hidden—kind of unusual for something so critical to the 3D animation process. If you are a veteran user of LightWave, you’ll love the new Render menu tab (Figure 2.46). When it’s time to render, LightWave v9 put the tools you need right in front of you.
Options
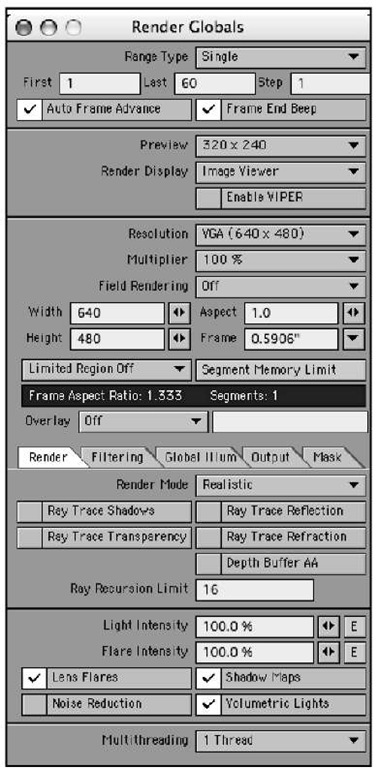
The Options tool category houses the Render Globals menu button, where you’ll find tools for setting up all of your animation characteristics. Use this panel to set camera resolution for single-frame renders, arbitrary renders,and full-frame animations. You can also set filtering methods, global illumination, and more, all from this one panel (Figure 2.47). This is sort of an on/off switch for VIPER, LightWave’s virtual preview render system, which we discuss shortly.
Figure 2.46 The Render tab encompasses all of your necessary render tools. Without these, you see nothing!
Render
The presence of a Render tool category within the Render tab might seem confusing—or at least redundant—but it all makes sense: The Render tools let you click a button to render a single frame, a scene, a selected object, or preview a motion blur right in Layout. Click MB Preview to see any motion blur your scene might be using. You can also see that there is a Render Frame button. This is why the tool was dimmed earlier in the topic when you edited menus.
Figure 2.47 The Render Globals panel, accessible from the Render tab’s Options tools.
Utilities
The Utilities category of the Render tab is where you find the tools for additional render options. First is VIPER, short for Virtual Interactive Preview Renderer. You can use VIPER to instantly see changes to surfaces, particles, and volumetrics, without performing a formal render. The other Utilities tool is Network Render, which enables you to tie other computers on your network into your rendering. This is especially valuable because it doesn’t require copies of LightWave to be installed on the other computers that help yours with rendering.
View Tab
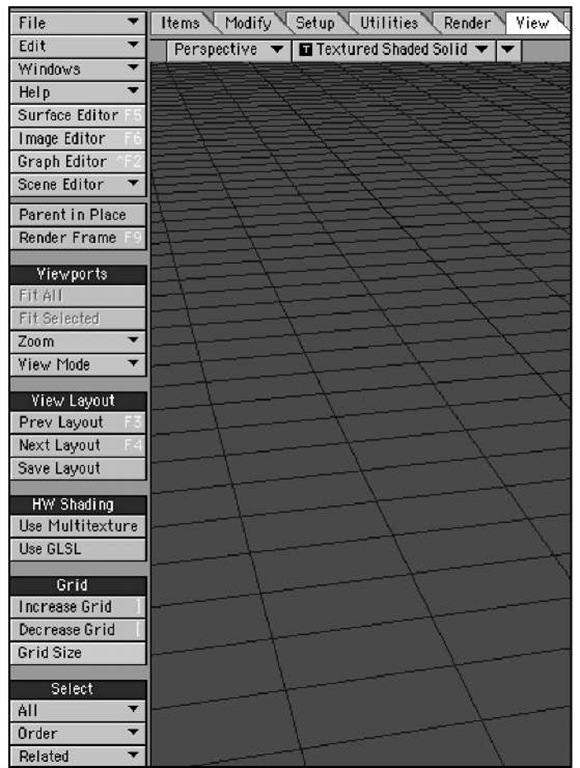
The next menu tab across the top of Layout is the View tab. Here, you can find necessary tools to control your Layout viewports (Figure 2.48).
Viewports
The sets of tools available in this menu give you additional control when working in Layout. Earlier in this topic, we discussed the viewports, and you saw how to set up multiple viewports. The Viewports category in the View tab gives access to buttons that control those views. You can also use the Fit All and Fit Selected commands to quickly bring your items to view. Note, however, that these tools only work in certain viewports, such as the Top or Side views.
Figure 2.48 The View tab and its associated tools manage Layout’s viewports.
View Layout
The View Layout tools let you jump between preset layout views, such as single, quad, and so on. If you set up your own view, and perhaps click and drag the center of the windows to adjust, you can save that particular layout with the Save Layout button.
HW Shading
The HW Shading, or hardware shading, option enables computers with certain video cards to display multiple textures within Layout. It also enables supported cards to use a high-level shading option known as GLSL. Not all video cards support these options, so check the specifications for your particular video card before applying these.
Grid
Also within the View menu, you can find the Grid Size control in the Grid category. If you recognize that LightWave is a big 3D universe that you work within, it should be easy to understand that the Grid Size is the default unit of measurement you work with. In Layout (and Modeler, too), Grid Size is always displayed in the lower left corner of the LightWave workspace. By default, this measurement is 1 meter in size, as you can see in Figure 2.49.
Figure 2.49
LightWave Layout’s default unit of measurement, Grid Size, is 1 meter. The Grid Size can be increased or decreased as needed.
This means that every grid square you see in Layout, from any view, is 1 meter in size. Count three squares, and that’s 3 meters, and so on. The reason you can increase and decrease the Grid Size in the View menu is because not all objects are scaled equally. For example, if you load in a Mars rover spacecraft, your unit of measurement automatically adjusts to the fit the size of the craft. You should be able to move and rotate the object just fine. If you load in the planet Mars, and it is built to scale, the Layout Grid Size might jump to 5 kilometers, and your rover will essentially disappear! This is because LightWave’s grid adjusts itself to fit this large object. If you find your rover and move it, it will shoot off the screen with the slightest mouse movement. If this happens, you need to decrease the grid size.
Note
Adjusting the grid appears to change the size of the camera and lights, but it really doesn’t. It only changes the relationship of those items to LightWave’s world.
Select
The last category in the View tab contains the Select tools. Here, you can choose from various ways to select objects, lights, and cameras. You can choose to select by name or search by name. You can also select related parent or child items here, in addition to selecting in order, from one item to the next. A quicker way to select, however, is to click directly on the item in Layout and then use the up or down arrow on your keyboard to select the next or previous item.
Modeler Tools Tab
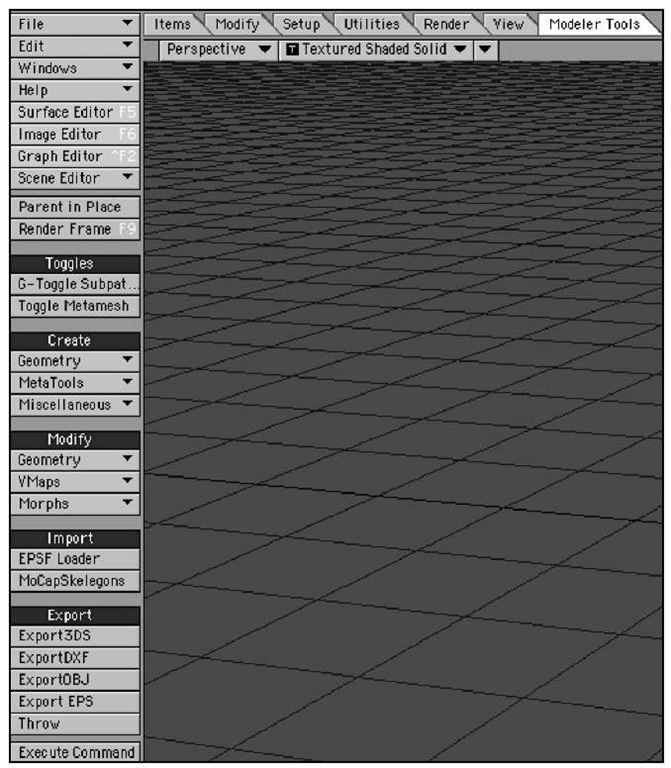
New to LightWave v9 is the Modeler Tools tab in Layout (Figure 2.50). This provides some basic modeling tools within Layout. While nowhere near as powerful as the tools in Modeler, these are mostly useful for setting up simple objects as placeholders.
Figure 2.50 The Modeler Tools tab makes basic modeling possible within Layout.
Toggles
Tools in the Toggles category are really switches that turn on and turn off useful functions that were available only in Modeler in previous versions of LightWave. G-Toggle Subpatch globally activates and deactivates subpatch objects you create in Modeler. You might turn subpatches on in Layout when fine-tuning surface attributes, then turn them off to speed up animation previews. The Metamesh toggle works the same way on objects built using Modeler’s metamesh tool; you can turn this feature on and off here as well, allowing you to work with simpler objects.
Create
In this category, you can create simple geometric shapes, including wedges, toroids (doughnuts), and other primitives. But in order to do so, you need to first create a null object. Do this from the Items tab, under the Add category.
Modify
In this area, you can modify the geometry you’ve created, with tools such as squash and stretch. You can also work with VMaps (vertex maps) that you might have setup in Modeler, or use the Apply, Rotate, and Scale Morph commands.
Import
In this section you have tools that allow you to import EPS and motion capture files.
Export
Animators often work with more than one program, and LightWave has set up tools that allow you to save 3DSs, OBJs, and other popular formats for use in other applications.
