One of the strengths of JavaFX is the ease with which you can create graphically rich user interfaces. Part of that richness is the ability to animate nodes that live in the Scene. At its core, animating a node involves changing the value of its properties over a period of time. Examples of animating a node include the following.
• Gradually increasing the size of a node when the mouse enters its bounds, and gradually decreasing the size when the mouse exits its bounds. Note that this requires scaling the node, which is referred to as a transform.
• Gradually increasing or decreasing the opacity of a node to provide a fade-in or fade-out effect, respectively.
• Gradually altering values of properties in a node that change its location, causing it to move from one location to another. This is useful, for example, when creating a game such as Pong. A related capability is detecting when a node has collided with another node.
Animating a node involves the use of the Timeline class, located in the javafx.animation package. Depending on the requirements of an animation and personal preference, use one of two general techniques:
• Create an instance of the Timeline class directly and supply key frames that specify values and actions at specific points in time.
• Use the javafx.animation.Transition subclasses to define and associate specific transitions with a node. Examples of transitions include causing a node to move along a defined path over a period of time, and rotating a node over a period of time. Each of these transition classes extends the Timeline class.
We now cover these techniques, showing examples of each, beginning with the first one listed.
Using a Timeline for Animation
Take a look at the javafx.animation package in the JavaFX API docs, and you see three of the classes that are used when directly creating a timeline: Timeline, KeyFrame, and Interpolator. Peruse the docs for these classes, and then come back so we can show you some examples of using them.
■ Tip Remember to consult the JavaFX API docs for any new packages, classes, properties, and methods that you encounter.
The Metronome1 Example
We use a simple metronome example to demonstrate how to create a timeline.
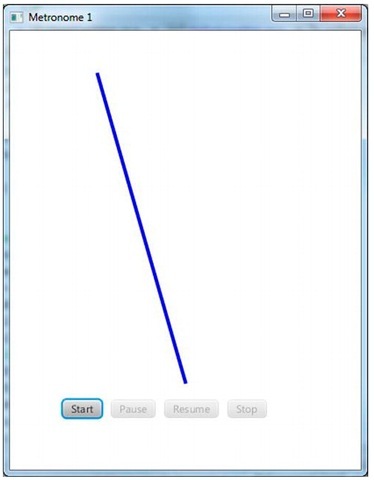
As the screenshot in Figure 2-8 shows, the Metronome1 program has a pendulum as well as four buttons that start, pause, resume, and stop the animation. The pendulum in this example is a Line node, and we’re going to animate that node by interpolating its startX property over the period of one second. Go ahead and take this example for a spin by doing the following exercise.
Figure 2-8. The Metronome1 program
EXAMINING THE BEHAVIOR OF THE METRONOME1 PROGRAM
When the Metronomel program starts, its appearance should be similar to the screenshot in Figure 2-8.
To fully examine its behavior, perform the following steps.
1. Observe that of the four buttons on the scene, only the Start button is enabled.
2. Click the Start button. Notice that the top of the line moves back and forth, taking one second to travel each direction. Also, observe that the Start and Resume buttons are disabled and that the Pause and Stop buttons are enabled.
3. Click the Pause button, noticing that the animation pauses. Also, observe that the Start and Pause buttons are disabled and that the Resume and Stop buttons are enabled.
4. Click the Resume button, noticing that the animation resumes from where it was paused.
5. Click the Stop button, noticing that the animation stops and that the button states are the same as they were when the program was first started (see Step 1).
6. Click the Start button again, noticing that the line jumps back to its starting point before beginning the animation (rather than simply resuming as it did in Step 4).
7. Click the Stop button.
Now that you’ve experienced the behavior of the Metronome1 program, we walk through the code behind it.
Understanding the Metronome1 program
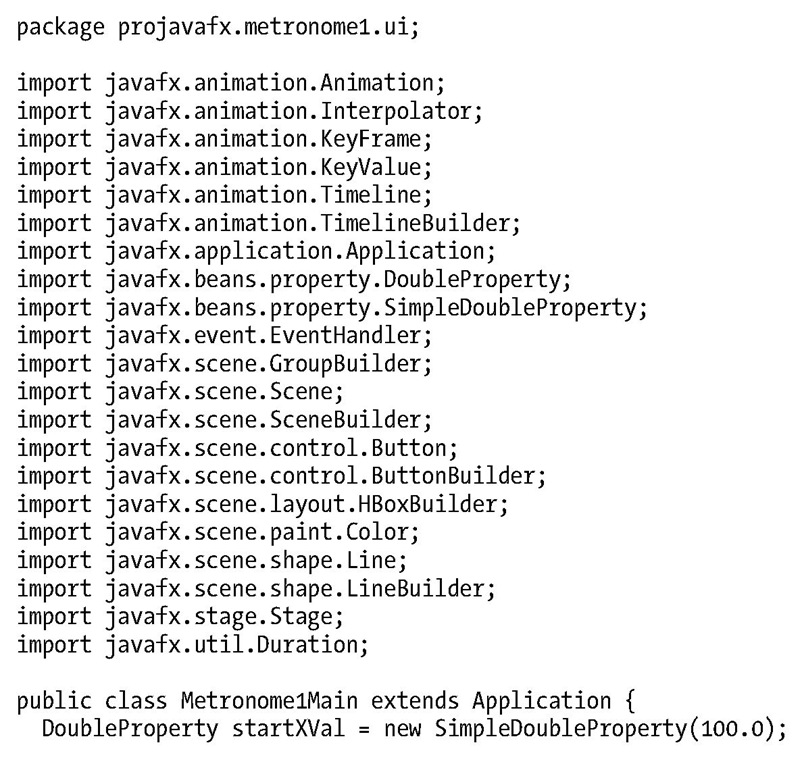
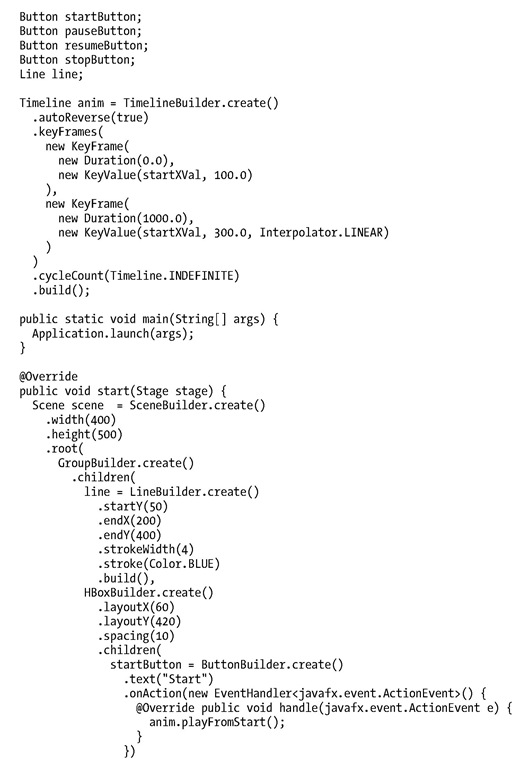
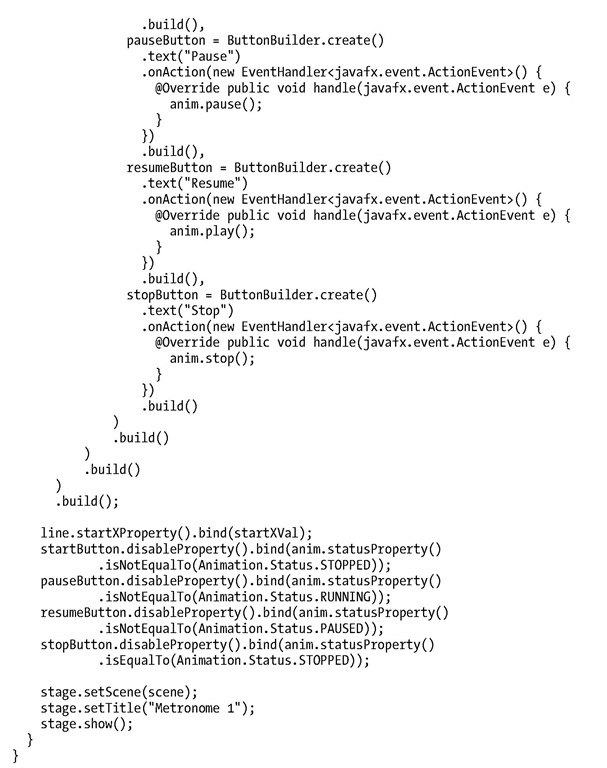
Take a look at the code for the Metronome1 program in Listing 2-5, and then we point out relevant concepts.
Listing 2-5. Metronome1Main.java
Understanding the Timeline Class
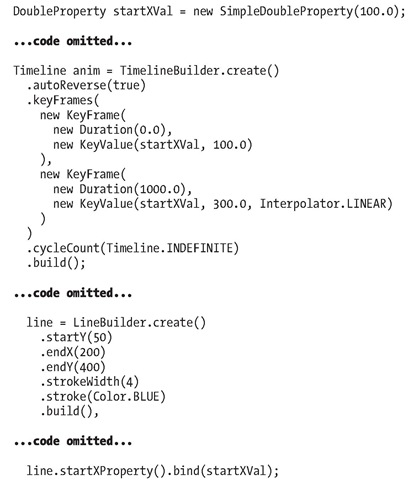
The main purpose for the Timeline class is to provide the ability to change the values of properties in a gradual fashion over given periods of time. Take a look at the following snippet from Listing 2-5 to see the timeline being created, along with some of its commonly used properties.
Inserting Key Frames into the Timeline
Our timeline contains a collection of two KeyFrame instances. Using the KeyValue constructor, one of these instances assigns 100 to the startXVal property at the beginning of the timeline, and the other assigns 300 to the startXVal property when the timeline has been running for one second. Because the startX property of the Line is bound to the value of the startXVal property, the net result is that the top of the line moves 200 pixels horizontally over the course of one second.
In the second KeyFrame of the timeline, the KeyValue constructor is passed a third argument that specifies that the interpolation from 100 to 300 will occur in a linear fashion over the one-second duration. Other Interpolation constants include EASEIN, EASEOUT, and EASEBOTH. These cause the interpolation in a KeyFrame to be slower in the beginning, ending, or both, respectively.
Following are the other Timeline properties, inherited from the Animation class, used in this example:
• autoReverse, which we’re initializing to true. This causes the timeline to automatically reverse when it reaches the last KeyFrame. When reversed, the interpolation goes from 300 to 100 over the course of one second.
• cycleCount, which we’re initializing to Timeline.INDEFINITE. This causes the timeline to repeat indefinitely until stopped by the stop() method of the Timeline class.
Speaking of the methods of the Timeline class, now is a good time to show you how to control the timeline and monitor its state.
Controlling and Monitoring the Timeline
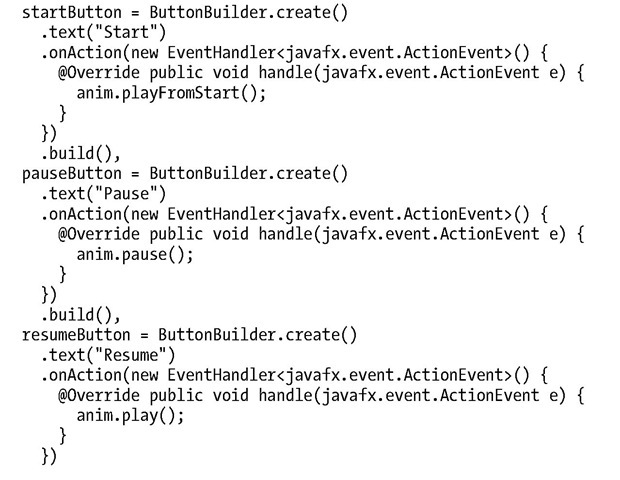
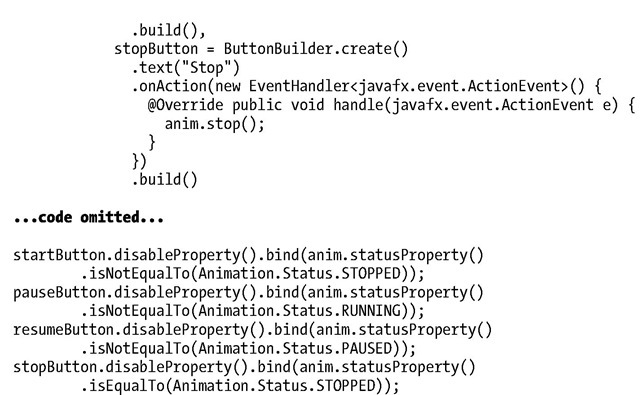
As you observed when using the Metronome1 program, clicking the buttons causes the animation to start, pause, resume, and stop. This in turn has an effect on the states of the animation (running, paused, or stopped). Those states are reflected in the buttons in the form of being enabled/disabled. The following snippet from Listing 2-5 shows how to start, pause, resume, and stop the timeline, as well as how to tell whether the timeline is running and/or paused.
As shown here in the action event handler of the Start button, the playFromStart() method of the Timeline instance is called, which begins playing the timeline from the beginning. In addition, the disable property of that Button is bound to an expression that evaluates whether the status property of the timeline is not equal to Animation.Status.STOPPED. This causes the button to be disabled when the timeline is not stopped (in which case it must be either running or paused).
When the user clicks the Pause button, the action event handler calls the timeline’s pause() method, which pauses the animation. The disable property of that Button is bound to an expression that evaluates whether the timeline is not running.
The Resume button is only disabled when the timeline is not paused. To resume the timeline from where it was paused, the action event handler calls the play() method of the timeline.
Finally, the Stop button is disabled when the timeline is stopped. To stop the timeline, the action event handler calls the stop() method of the timeline.
Now that you know how to animate nodes by creating a Timeline class and creating KeyFrame instances, it’s time to learn how to use the transition classes to animate nodes.
