In the previous examples, you’ve used every field shown in the ERD in figure 2.2, except for one: the field named imdb. This field contains the ID for the movie on imdb.com, which is the Internet Movie Database (IMDB).
Wouldn’t it be nice to link to this external site from your documents? And what kind of internal links could you add to a document? If you browse the resources that come with the topic, you’ll see that the imdb field is also used as part of the filename for the movie poster of each movie. The movie Superman Returns has the ID 0348150 at IMDB. This means that you’ll find a 0348150.jpg file in the posters directory, which is a subdirectory of the resources folder.
In this section, you’ll work with different types of links: internal and external. You’ll create a table of contents automatically and get bookmarks for free, using the topic and Section objects. Finally, you’ll learn how to add images.
The Anchor object: internal and external links
What would the internet be without hypertext? How would you browse the web without hyperlinks? It’s almost impossible to imagine a web page without <a> tags. But what about PDF documents?
There are different ways to add a link to a PDF file using iText. In this section, you’ll add references and destinations using the Anchor object, as well as by setting the reference and anchor attributes of a Chunk. You’ll discover more alternatives in topic 7.
ADDING ANCHOR OBJECTS
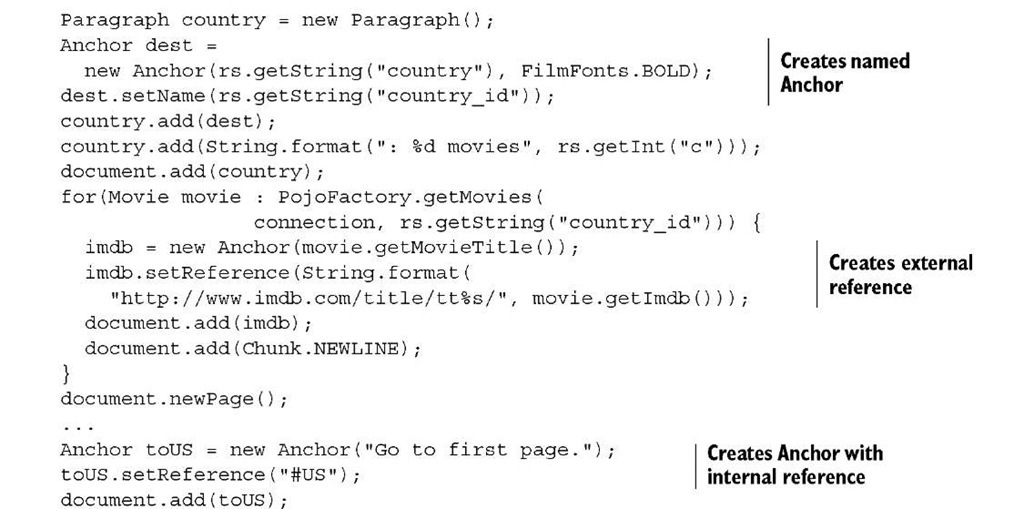
In listing 2.22, three Anchor objects are created. The first Anchor, with a country name as its text, will act as a destination. It’s the equivalent of <a name=”US”> in HTML, where US is the id of a country in the database. The third anchor, with the text “Go back to the first page.” will be an internal link acting as <a href=”#US”>. It will allow the reader to jump to the destination with name “US” (located on the first page). iText recognizes this reference as a local destination because you’re adding a number sign (#) to the name, just as you would do in HTML.
Listing 2.22 MovieLinks1.java
The second Anchor is a link to an external resource. In this case, to a specific page on the IMDB website. http://www.imdb.com/title/tt0348150/ refers to a page with information about the movie Superman Returns.
There’s also another way to achieve the same result.
REMOTE GOTO, LOCAL DESTINATION, AND LOCAL GOTO CHUNKS
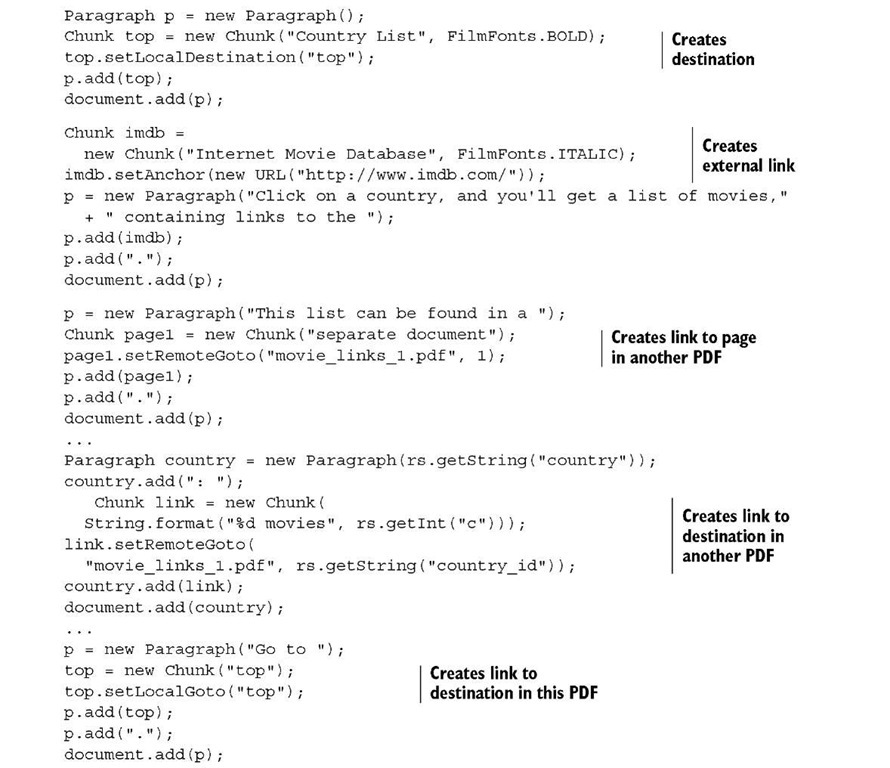
Listing 2.23 creates a PDF document with an opening paragraph, a list of countries, and a closing paragraph. The closing paragraph contains a link to jump to the top of the page. The other links are external.
Listing 2.23 MovieLinks2.java
In previous examples, you’ve set attributes of the Chunk object to underline text, to change the background color, and so on. You can also set attributes that provide even more functionality than the Anchor class:
■ Chunk.setLocalDestination()—Corresponds to Anchor.setName(). You can use it to create a destination that can be referenced from within the document, or from another document.
■ Chunk.setLocalGoto()—Corresponds to Anchor.setReference(), where the reference is a local destination. You don’t need to add a # sign when using this method.
■ Chunk.setRemoteGoto() —Can refer to any of the following:
- An external URL—Defined by a String or a java.net.URL object; this corresponds to Anchor.setReference().
- A page in another PDF document—The document created in the MovieLinks2 example refers to page 1 in the file movie_links_1.pdf, a file generated by MovieLinks1.
- A destination in another PDF document—Listing 2.23 refers to the country code in movie_links_1.pdf.
You can use the movie_links_2.pdf file, which lists 32 countries, as a clickable table of contents (TOC) for the movie_links_1.pdf file, which lists the movies that were produced in these countries.
The next example will explain how to create a different type of TOC: the bookmarks panel in Adobe Reader. Note that bookmarks are often referred to as outlines in the context of PDF.
Topic and Section: get bookmarks for free
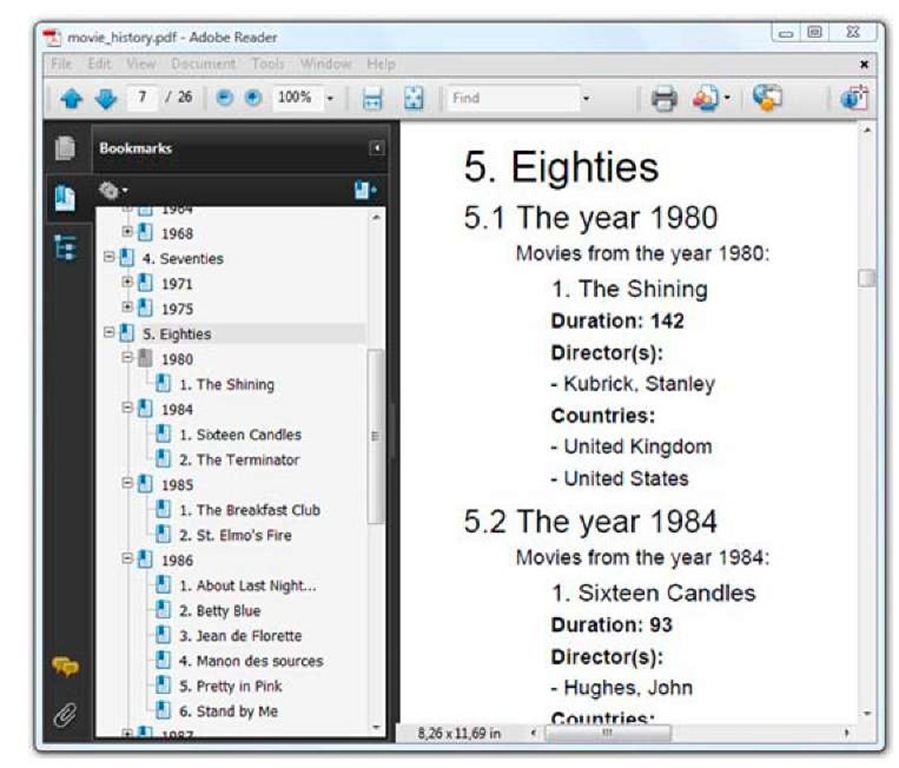
If you scroll in the bookmarks panel shown in figure 2.12, you’ll see entries numbered from 1 to 7: Forties, Fifties, Sixties, Seventies, Eighties, Nineties, and Twenty-first century. You can create these entries by organizing the content in topics. Every topic in this PDF document contains one or more Section objects. In this case, years that belong to the forties, fifties, and so on. In figure 2.12, there are also subsections with titles of movies.
Let’s compare listing 2.24 and figure 2.12. The topic number is passed as a parameter when constructing the topic object. By default, a dot is added to the number, but you can change this with the setNumberStyle() method. Sections are created using the addSection() method. The title passed as a parameter when constructing a topic or Section is shown on the page and is used as the title for the bookmark. If you want to use a different title in the outline tree, you can use setBookmarkTitle(). You can change the indentation of a topic or Section by using different methods: setInden-tation() changes the indentation of the content but doesn’t affect the title; setInden-tationLeft() and setIndentationRight() apply to the content and the title. Observe that the subsections aren’t numbered 5.4.1., 5.4.2, 5.4.3 … but 1., 2., 3. … because the number depth has been reduced to 1 with setNumberDepth().
Figure 2.12 A PDF with bookmarks
Listing 2.24 MovieHistory.java
As shown in the class diagram in figure 2.1, Section also implements an interface named LargeElement. In topic 1, you learned that iText tries to write PDF syntax to the OutputStream, freeing memory as soon as possible. But with objects such as topic, you’re creating content in memory that can only be rendered to PDF when you add them to the Document object. This means that the content of several pages can be kept in memory until iText gets the chance to generate the PDF syntax.
There are two ways to work around this:
■ Define the topic as incomplete, and add it to the Document in different pieces; you’ll see how to do this in topic 4, after we discuss another LargeElement, PdfPTable.
■ Create the outline tree using PdfOutline instead of putting content in topic or Section objects. This will be discussed in topic 7, where you’ll discover that PdfOutline offers much more flexibility.
We’ve covered almost all the objects in the class diagram. Only two objects remain: Rectangle and Image.
The image object: adding raster format illustrations
You created Rectangle objects in topic 1 to define the page size, but there’s very little chance you’ll ever need to add a Rectangle object with Document.add(). We’ll find better ways to draw shapes in topic 3, but let’s take a look at a simple example for the sake of completeness.
Listing 2.25 MoviePosters1.java
The code draws a small red square in the upper-left corner of the first page. ADDING AN IMAGE
To add an Image to a PDF document, do this:
iText comes with different classes for different image types: Jpeg, PngImage, GifImage, TiffImage, and so on. All these classes are discussed in detail in topic 10. They either extend the Image class, or they are able to create an instance of the Image class.
You could use these separate classes to create a new Image, but it’s easier to let the Image class inspect the binary image and decide which class should be used, based on the contents of the file. That’s one thing less to worry about.
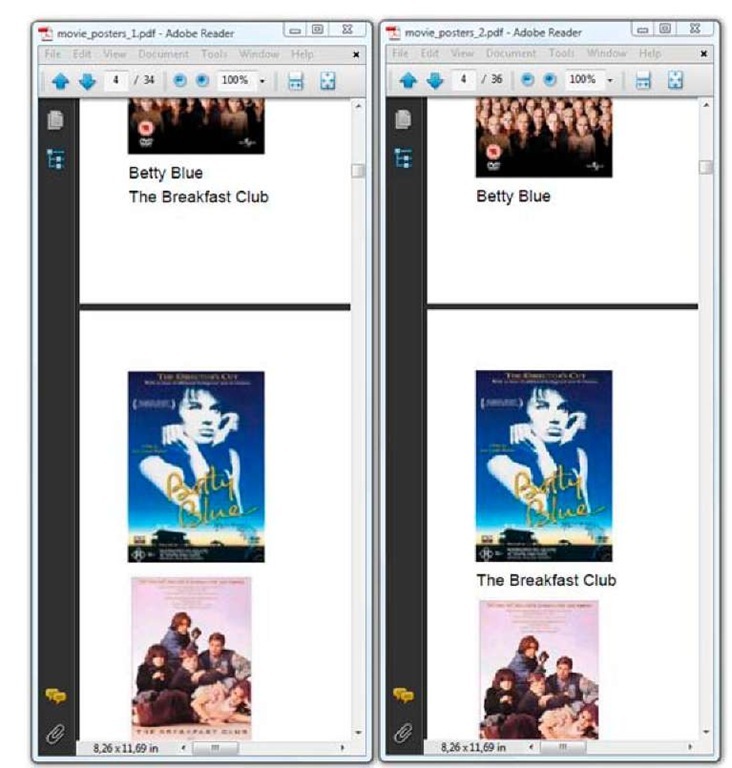
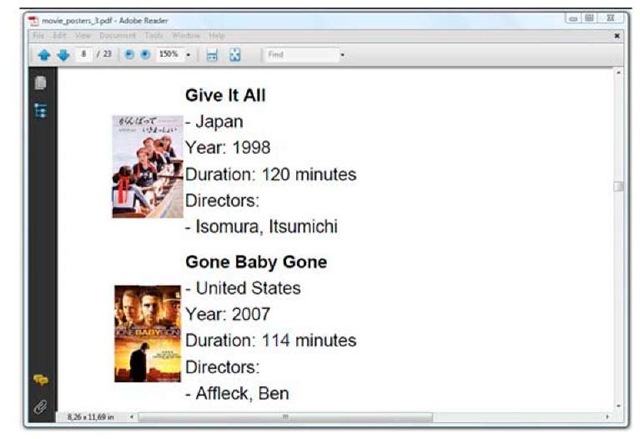
The result of the code in listing 2.26 is shown to the left in figure 2.13. Observe that the poster of the movie Betty Blue didn’t fit on page 3. As a result, the title of the next movie, The Breakfast Club, is added on page 3, and the poster is added on page 4. This is the default behavior: iText tries to add as much information as possible on each page.
This may be considered undesired behavior in some projects. If that’s the case, you can use this method:
Figure 2.13 Adding images to a PDF document
Listing 2.27 MoviePosters2.java
The resulting PDF is shown on the right in figure 2.13. The method setStrictImage-Sequence() allows you to force iText to respect the order in which content is added. CHANGING THE IMAGE POSITION
In figure 2.14, the alignment of the image is changed so that the film information is put next to the movie poster.
This is done with the setAlignment() method. Possible values for this method are:
■ Image.LEFT, Image.CENTER, or Image.RIGHT—These define the position on the page.
■ Image.TEXTWRAP or Image.UNDERLYING—By default, iText doesn’t wrap images. When you add an Image followed by text to a Document, the text will be added under the image, as shown in figure 2.13. With TEXTWRAP, you can add text next to the Image, except when you’re using Image.CENTER. With UNDERLYING, the text will be added on top of the Image (text and image will overlap).
All of this doesn’t apply if you use the method setAbsolutePosition(). With this method, you can define coordinates (X, Y) that will be used to position the lower-left corner of the image. The image will not follow the flow of the other objects.
Figure 2.14 Resized images
The PDF shown in figure 2.14 was generated using methods that are inherited from the Rectangle object. Listing 2.28 shows how to define a border, and how to change its width and color.
Listing 2.28 MoviePosters3.java
The Image.BOX value is shorthand for Rectangle.LEFT | Rectangle.RIGHT | Rectan-gle.TOP | Rectangle.BOTTOM, meaning that the image should have a border on all sides. You’ll learn more about drawing Rectangle objects in topics 3 and 14. RESIZING IMAGES
In listing 2.28, you’re also using scaleToFit(). You’re passing an unusually high width value (1000 pt) compared to the height value (72 pt). This ensures that all the images will have a height of one inch. The width will vary depending on the aspect ratio of the image.
FAQ What is the relationship between the size and the resolution of an image in iText ? Suppose you have a paper image that measures 5 in. x 5 in. You scan this image at 300 dpi. The resulting image is 1500 pixels x 1500 pixels, so if you get an iText Image instance, the width and the height will be 1500 user units. Taking into account that 1 in. equals 72 user units, the image will be about 20.83 in. x 20.83 in. when added to the PDF document. If you want to display the object as an image of 5 in. x 5 in., you’ll need to scale it. The best way to do this is with scalePercent(100 * 72 / 300).
There are different ways to change the dimensions of an image:
■ The width and height parameters of scaleToFit() define the maximum dimensions of the image. If the width/height ratio differs from the aspect ratio of the image, either the width, or the height, will be smaller than the corresponding parameter of this method.
The width and height parameters will be respected when using scaleAbso-lute(). The resulting image risks being stretched in the X or Ydirection if you don’t choose the parameters wisely. You can also use scaleAbsoluteWidth() and scaleAbsoluteHeight().
■ scalePercent() comes in two versions: one with two parameters, a percentage for the width and a percentage for the height; and another with only one parameter, a percentage that will be applied equally to the width and the height.
It’s a common misconception that resizing images in iText also changes the quality of the image. It’s important to understand that iText takes the image as is: iText doesn’t change the number of pixels in the image.
FAQ IText is adding the same image more than once to the same document. How can I avoid this?Suppose that you have an image.jpg file with a size of 100 KB. If you create ten different Image objects from this file, and add these objects to your Document, these different instances referring to imagejpg will consume at least 1000 KB, because the image bytes will be added 10 times to the PDF file. If you create only one Image instance referring to imagejpg, and you add this single object 10 times to your Document, the image bytes will be added to the PDF file only once. In short, you can save plenty of disk space if you reuse Image objects for images that need to be repeated multiple times in your document. For example, a logo that needs to be added to the header of each page.
When creating an Image instance from a file, you won’t always know its dimensions before or even after scaling it. You can get the width and height of the image with these methods:
■ getWidth() and getHeight() are inherited from the Rectangle object. They return the original height and width of the image.
■ getPlainWidth() and getPlainHeight() return the width and height after scaling. These are the dimensions of the image used to print it on a page.
■ getScaledWidth() and getScaledHeight() return the width and height needed to print the image. These dimensions are equal to the plain width and height, except in cases where the image is rotated.
The difference between scaled width/height and plain width/height is shown in the next example.
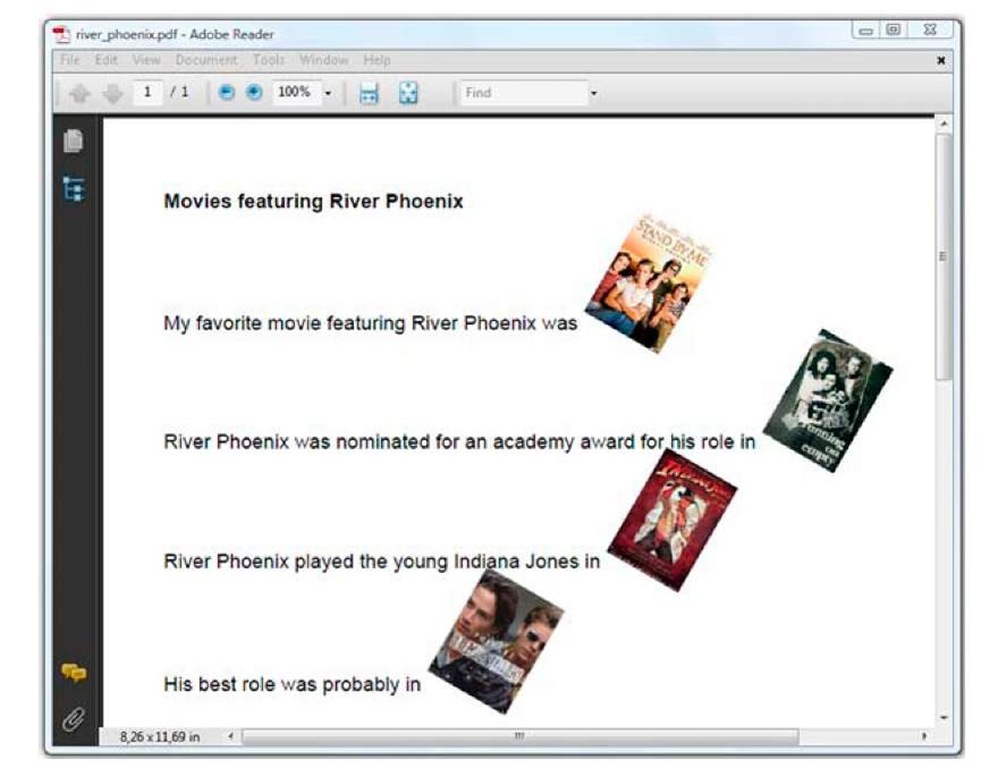
The rotation for images is defined counterclockwise. Listing 2.29 uses the setRota-tionDegrees() method to rotate an image -30 degrees; that’s 30 degrees to the right.
Using setRotation() with a rotation value of (float) -Math.PI / 6 would have had the same effect.
Listing 2.29 RiverPhoenix.java
If you look at the poster for the movie Stand by Me, you’ll find out that it’s made up of 100 pixels x 140 pixels. These values are returned by getWidth() and get-Height(). When scaled to fit a rectangle of 1000 pixels x 72 pixels, the dimensions are changed into 51.42857 x 72—those are the values returned by getPlainWidth() and getPlainHeight().
In figure 2.15, you can see that the image needs more space. Due to the rotation, the horizontal distance between the lower-right corner and the upper-left corner of the image is 80.53845. The vertical distance between the upper-right corner and the lower-left corner is 88.068115. These values are returned by getScaledWidth() and getScaledHeight().
Something else is different in figure 2.15: each Image has been added to a Paragraph object, wrapped in a Chunk.
Figure 2.15 Rotated images, wrapped in Chunk objects
This is yet another example of setting attributes for a Chunk. By creating a Chunk using an Image as the parameter, you can add the Image to other building blocks as if it were an ordinary chunk of text. The extra parameters in this Chunk constructor define an offset in the X and Y directions. The negative value in listing 2.29 causes the image to be added 15 pt below the baseline. You can also indicate whether the leading should be adapted to accommodate the image. If you don’t set the final parameter to true, the image risks overlapping with the other text (if the height of the image is greater than the leading).
This isn’t a definitive overview of what you can do with images. You’ve learned enough to change the properties of an image, but there’s more to learn about the bits and bytes of specific image types (TIFF, animated GIF, and so on), about using java.awt.Image, and about using image masks. All of this will be covered in topic 10; now it’s time to round up what we’ve covered in topic 2.
Summary
We’ve covered a lot of ground in this topic. You learned about Chunk objects and several—not all—of a Chunk’s attributes; you’ll discover more attributes as you read on in part 1 of this topic. You’ve worked with Phrases and Paragraphs, and you’ve been introduced to the Font and BaseFont classes. You’ve made Lists containing List-Items, and you’ve discovered different ways to use separator Chunks.
With the Anchor object and its alternatives, you’ve created internal and external links and destinations. The topic and Section classes were used to create bookmarks, but you’ll learn more about the outline tree and the LargeElement object in the topics that follow. That’s also true for the Image object: you’ve learned how to use the most common methods, but you’ll learn more about the bits and bytes of images in topic 10.
Up until now, you’ve worked with the building blocks of iText, which are often referred to as high-level objects. In the next topic, you’ll discover the world of low-level PDF creation.
